Introduction
In this guide you will be able to:
- Safely remove and put back together your device
- Accurately replace the screen of your device
Tools
-
-
With a J00 Philips head screwdriver, unscrew the two 4mm black screws located at the bottom of the device.
-
-
-
Using a plastic opening tool, begin softly prying open device by first inserting it in between the front and back panels.
-
Continue prying the edges while moving around the device's perimeter until the back can be easily removed.
-
-
-
Desolder positive and negative, red and black, wires from the mother board that are connected to the battery.
-
-
-
Using a metal spudger tool, wedge between battery and metal screen.
-
Follow the edge of the battery to loosen the glue.
-
-
-
Once the glue is loosened, you should be able to pry off the battery from the screen.
-
Using your hands, pull up on the battery to pull battery off.
-
The battery will be completely disconnected and you can set the battery aside in a safe place.
-
-
-
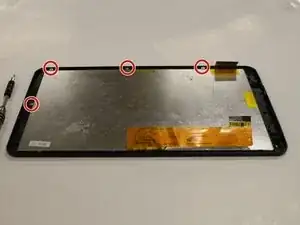
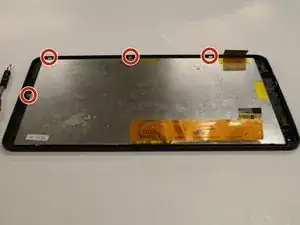
Begin by locating the four 3mm silver screws that are holding the screen down to the digitizer. Set screws to the side.
-
-
-
Once everything is removed, take one plastic opening tool and pry it between the screen and digitizer.
-
-
-
Once the screen is pried free from the digitizer, simply grab the thin orange circuit strip and carefully pull in an upwards motion to remove the screen from the digitizer. Set screen to the side.
-
To reassemble your device, follow these instructions in reverse order.
3 comments
I find it's not necessary to remove the batttery, but there are scews holding down the main circuit board that he left out.
នៅណាមានបង
ខ្ញុំទិញមួយ
ផ្ញើតាមឡានបានអត់
ខ្ញិំនៅតាកែវ ស្រុកកោះអណ្ដែត
@kevinosborn hi


