Introduction
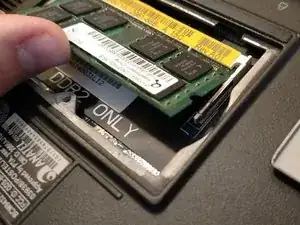
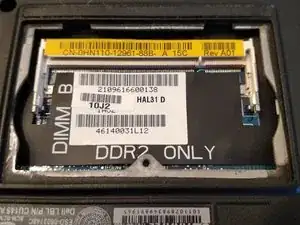
The laptop has two memory module slots ...one on the bottom-side of the computer, and one accessed from the top-side of the computer (behind the keyboard). Each slot supports up to 2 GB, and the type of memory required is SO-DIMM, DDR2. Supported memory sizes include 256 MB, 512 MB, 1GB, and 2 GB for each slot. With 2 GB on top and 2 GB on the bottom slot, you can get up to 4 GB if want to upgrade the lower amount of existing memory, to a higher amount.
Tools
-
-
Steps for Bottom-Side Memory Slot
-
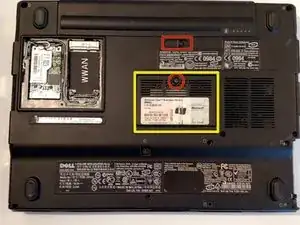
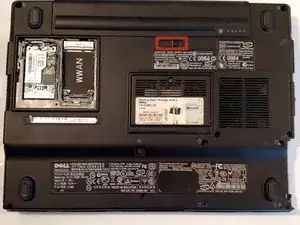
Turn off the computer, unplug the power adapter. Remove the battery, after sliding the battery latch, until you hear a click.
-
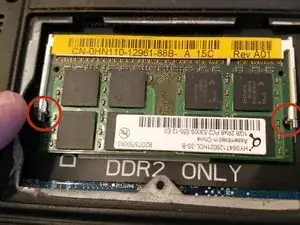
Remove 1 star screw, so you can remove memory cover. Using your fingertips, spread apart the clips, which secure the memory module in place.
-
-
-
Steps for Bottom-Side Memory Slot
-
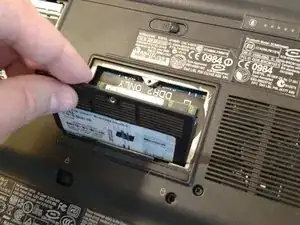
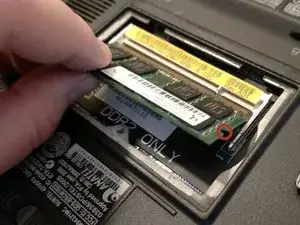
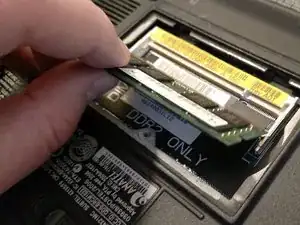
Once unsecured, the memory module will pop up, so you can remove it at a 45-degree angle.
-
When installing the new memory module, you will notice it can only be inserted in one direction, due to the memory module indents.
-
Secure the module with the clips, click it into place, and reinstall the memory module cover in reverse order of the above instructions.
-
-
-
Steps for Top-Side Memory Slot
-
Turn off the computer, unplug the power adapter.
-
Remove the battery, after sliding the battery latch, until you hear a click.
-
-
-
Steps for Top-Side Memory Slot
-
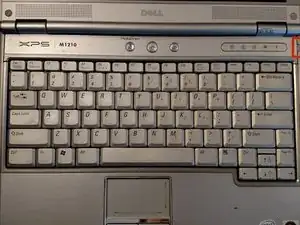
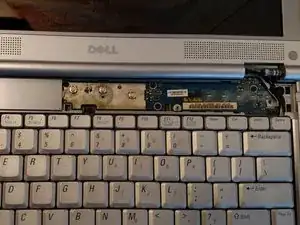
With the laptop screen tilted 180-degrees, you can begin removing the rear hinge panel. The cover is not attached to any wires and covers the screws which secure the keyboard in place.
-
With the flat-head screwdriver or a thin object, pry up the hinge panel.
-
-
-
Steps for Top-Side Memory Slot
-
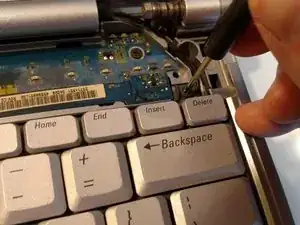
Remove the 3 Phillips-head screws at the top of the keyboard.
-
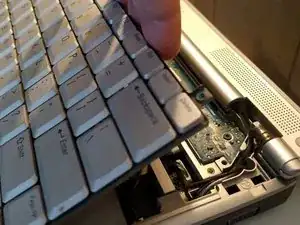
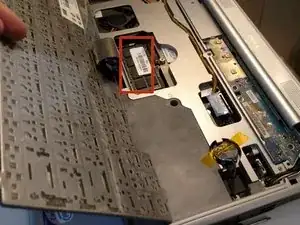
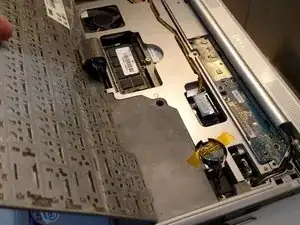
After the 3 screws are removed, you will be able to lift the keyboard, exposing the top-side memory module slot.
-
-
-
Steps for Top-Side Memory Slot
-
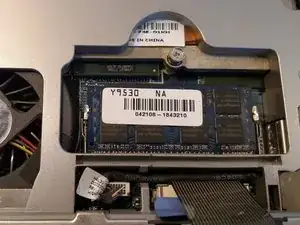
Using your fingertips, spread apart the clips, which secure the memory module in place.
-
Once unsecured, the memory module will pop up, so you can remove it at a 45-degree angle.
-
When installing the new memory module, you will notice it can only be inserted in one direction, due to the memory module indents.
-
Secure the module with the clips, click it into place, and re-install the keyboard and hinge panel in reverse order of the above instructions.
-
To reassemble your device, secure the module with the clips, click it into place, and reinstall the keyboard and hinge cover in reverse order of the above instructions.
