Introduction

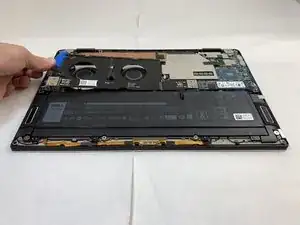
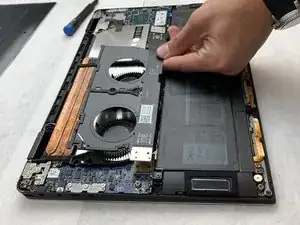
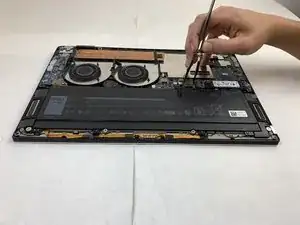
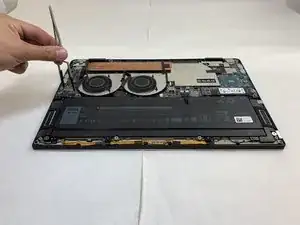
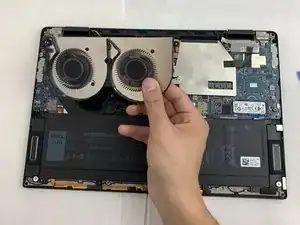
This guide shows the process of how to replace the fan of the Dell XPS 15 9575.

Both fans on this device have covers that are integrated into the interconnect cable, so its removal will be necessary for the fan replacement. However, Step 5 of the guide details removing the pin connectors for this cable, and their removal isn’t necessary for a quick fan swap.

The fans are responsible for offsetting the heat produced by processing units of the laptop. This means it should be relatively easy to diagnose problems with the fans, as the device will produce excessive heat as a result. If your device is producing noticeably excessive heat on a regular basis, you should replace the fan sooner rather than later, as heat in excess has the potential to damage the components that produce it. A faulty fan could also be responsible for excessive noise, and users may choose to replace such a fan to reduce noise even if heat is not experienced.


Check out the Dell XPS 9575 Troubleshooting page for more help narrowing down your issues to the fan.

  1. C6ohtjrisu5kDWfQ
    C6ohtjrisu5kDWfQ
    fdyFCmv3llbTAbbf
    JWki2gK2bEDiXPd2
    • For your safety, please make sure the device is powered off and the A/C adapter is unplugged.

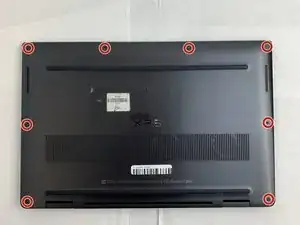
    • Use your T5 Torx driver to remove all eight 3.2mm hex screws holding down the back panel.

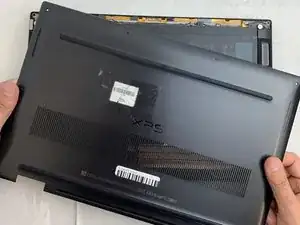
    • Wedge an opening pick between the back cover and the base of the board, then slightly lift the tool to pop the clips on the back cover off.

    I found it quite tough to make the initial pick insertion. The easiest point for me was on the rear edge of the laptop just to the outside of the hinge.

    The screws were all same size so no need to remember which came from where.

    Mr Mac -

  2. YDR2dEDJhlQmd3pd
    • Make sure all screws are removed before you lift the panel to prevent any damage from occurring.

    • Remove the bottom cover from the device when all sides are free.

  3. 1rOLSaYHCnSxhTN1
    1rOLSaYHCnSxhTN1
    rhAIQrIbmnKXO6sE
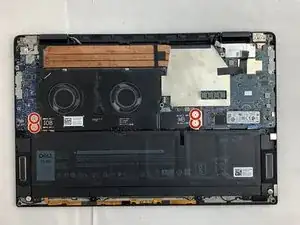
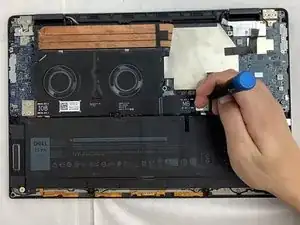
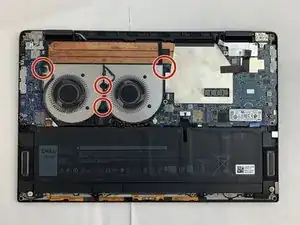
    • Use the Phillips #0 screwdriver to remove all four silver 3.2mm screws fastening the interconnect cable.

    There is an off/on switch for the battery to the right of the SSD. You can see a diagram of it on the battery picture above. It advises to turn it off before working with the battery.

    AtotheJ -

    Turn off the internal power as AtotheJ suggests. I did not have to remove or touch the fan as the interconnect cable came loose easily.

    bubba -

  4. IHbPMktnPGZZBLoj
    IHbPMktnPGZZBLoj
    vRXEcJpETAh4raTI
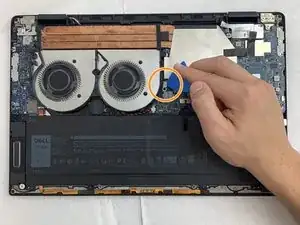
    • Carefully wedge the plastic opening pick between the fan and the interconnect cable.

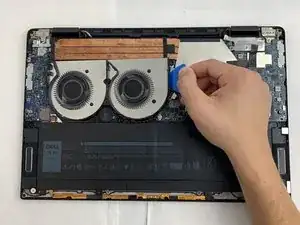
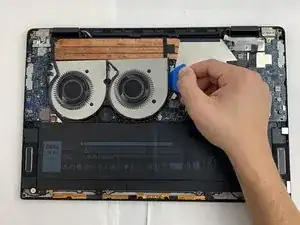
    • If this position does not release the interconnect cable, slide the opening pick along the edge until it is completely free.

    • Remove the interconnect cable.

    I have a different cable on my XPS 15 2 in 1. The fan covers were not attached to the cable and remained in place. So only the long thin strip was removed and it came of very easily

    Mr Mac -

    On my 9575, I couldn’t get the entire fan cover off but realized it wasn’t necessary as I was able to get access to the battery connector by just removing the four screws above and moving the bottom section out of the way.

    AtotheJ -

    In fact, per Dell user manual, thats the sure way to break the very tiny plastic parts of the fan cover. I did it, now I regret. I cannot unhear the small creak due to void space, and un-feel the light wobbling while typing on the top part of keyboard

    Aurel A -

  5. KwRhJvZOcrUtmTbq
    KwRhJvZOcrUtmTbq
    CdYjLEasBam2utOR
    • Use the nylon tweezers to remove the interconnect pins from each of the circuit boards.

  6. tl6m1sBqvCrv3bNX
    tl6m1sBqvCrv3bNX
    aIfEQmViVJrdVlTd
    • Use the Phillips 0 Screwdriver to carefully extract each of the four 3.2 mm screws.

    If you have red markup, you should also have red bullets. Also, make sure to use end punctuation—I would check every step for this.

    Alex Watkins -

  7. HdAEwH4e6TlnZ4Sv
    HdAEwH4e6TlnZ4Sv
    OshEKdEfCvnQiNui
    • Confirm all four screws have been extracted from the fan.

    • Find the wire connecting the fan into the motherboard and use the plastic opening tool to push the wire out from the motherboard's port.

    Follow ROYGBIV order for markup.

    Alex Watkins -

  8. OKeXHXPf6H2I2wQX
    OKeXHXPf6H2I2wQX
    FVUJXuaqehGSAbUX
    • The fan has been completely disconnected and is now safe to remove.

    Remember to begin all steps with action verbs, and remove reassembly directions, since the blue box below has the same information.

    Alex Watkins -

    The last bullet seems redundant when the conclusion says the same thing

    Markus Eldridge -

Conclusion

To reassemble your device, follow these instructions in reverse order.
Andre Williams

Member since: 20/09/19

445 Reputation

0 comments