Introduction

If the laptop will not connect to wireless internet, you may need a new wireless card.

  1. JhVaoLMhBEGlcqFG
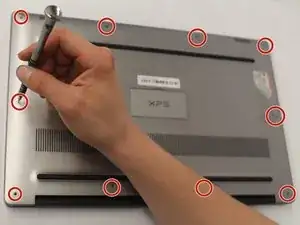
    • Turn the laptop upside down.

    • Make sure the laptop is turned off.

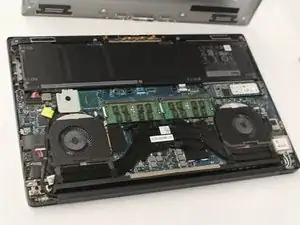
    • Use a T5 Torx Screwdriver to remove the ten 3 mm long screws from the perimeter of the back of the laptop.

  2. OgImtWUkApWrFIPl
    OgImtWUkApWrFIPl
    aHrQx4bGJZwh6IF4
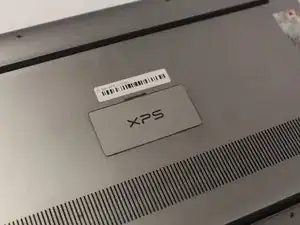
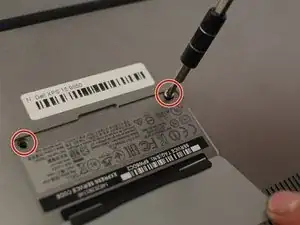
    • Open up the information panel door (on the middle of the back side).

    • While holding the door open, use a Phillips #00 Screwdriver to remove the two 10 mm long screws.

    use a J1, fits a lot better. no risk of rounding

    noah.mooresmith -

    Size is Philips #0 not #00

    Brandon McKee -

  3. KbpdJc6ueEstOgy3
    KbpdJc6ueEstOgy3
    F3ks3LQeHceJUAMf
    QDHjYStVkNUGOSLA
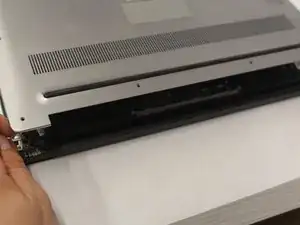
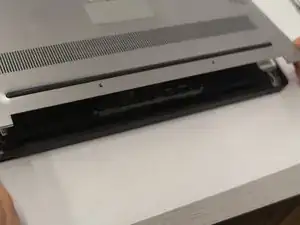
    • Carefully lift the 2 corners of the back panel close to the hinge upwards, to release the whole panel.

    • Do not force the panel off. If it does not come off easily, try to use a plastic spudger where it is stuck.

    Dégouté d'avoir suivi cette étape à la lettre ?

    N'ouvrez SURTOUT PAS le panneau par les deux coins arrières du côté de la charnière !!!

    Et N'utiliser SURTOUT PAS une spatule en plastique pour l'ouvrir si le panneau ne se détache pas facilement !!!

    Le panneau est fait pour s'ouvrir par les coins avant!!! A l'arrière des picots servent justement à l'empêcher de s'ouvrir !!!

    Le résultat si vous utiliser uns spatule à l'arrière… c'est que ces picots cassent… ?

    IL FAUT DONC OUVRIR LE PANNEAU PAR L'AVANT !! Et il est juste posé donc inutile d'utiliser une spatule…

    Voilà voilà je suis dégoûté d'avoir fait cette connerie alors qu'en cliquant sur un autre tuto (lien juste en dessous sur Google) ils le disent…

    J'espère qu'après mon commentaire l'auteur de ce tuto fera la modif…

    Sur ce… merci pour le tuto…

    Tanguy de Guenyveau -

    Bonjour Tanguy ! Désolée de votre mésaventure :( Et merci de ce retour fort précieux à qui voudra effectuer la réparation ! Votre commentaire est visible par tous, donc les utilisateurs seront avertis. iFixit est un wiki ; si vous le souhaitez, vous pouvez également adapter le tutoriel d’origine pour inclure votre retour d’expérience.

    Claire Miesch -

  4. DSI3aDruPcjinIYM
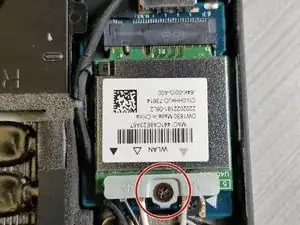
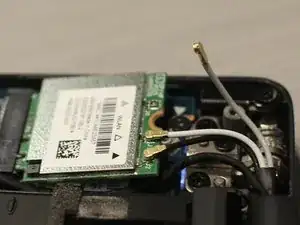
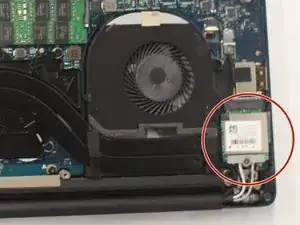
    • With a Philips #00 Screwdriver bit, remove one 4 mm long black screw located by the antenna connections on the wireless card.

    • Set the screw and metal holder aside.

  5. jsInUQShxNvUdv5A
    jsInUQShxNvUdv5A
    T4yEgCT5gEUiHxd4
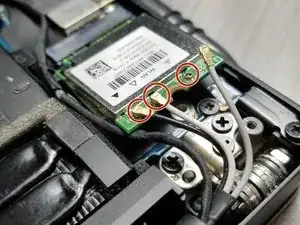
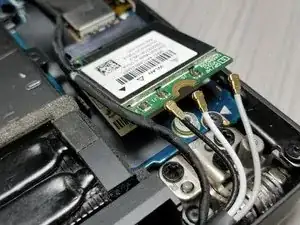
    • Gently lift up each of the antennas (3) to disconnect them from the wireless card.

    • These are similar to a coat button, the antennas snap on and snap off.

    This step requires an extremely delicate touch. Those "buttons" will take the "snaps" right off the WIFI card and the hair-thin wiring on the card will break at the slightest pressure. If possible, remove the card and leave it attached to the wires rather than trying to pop off the connectors.

    Peter Moeykens -

  6. itwBFCLHEtuNhJHr
    itwBFCLHEtuNhJHr
    o1HEkumsGUIqFJqN
    6JS3ZA6MA1XBpBAi
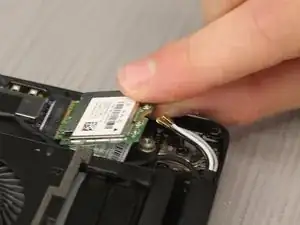
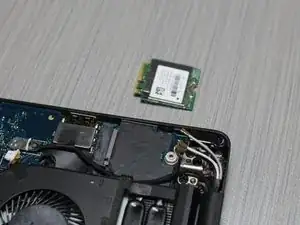
    • With the antennas disconnected, gently pull the wireless card out at the angle it sits at.

    • The wireless card has been successfully removed!

    How do you know what are compatible wifi cards?

    Moises Vasquez -

    Removing the WLAN card was easy. However, I have problems reconnecting the antenna cables to the card. Is a lot of force necessary?

    Do you recommend pliers, a pinch tool or something similar?

    I don't want to break anything (and that's why I've had a WLAN stick for a few weeks now :( ).

    Rudolf Glaser -

Conclusion

To reassemble your device, follow these instructions in reverse order.
Hunter J Laska

Member since: 04/10/18

157 Reputation

0 comments