Introduction

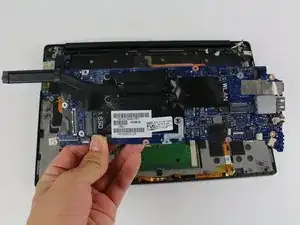
Use this guide to replace the motherboard in the Dell XPS 13.

  1. d4dlLhKy4BBopKMR
    d4dlLhKy4BBopKMR
    k2WqKJVEtDes4Ca2
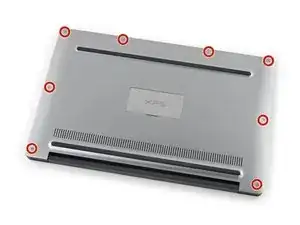
    • Remove the eight 4 mm T5 Torx screws from the bottom cover.

    Missing a step about removing the tiny Phillips head screw under the XPS flip up cover in the middle. Also, there are hooks all the way around the cover so it doesn’t simply lift off.

    curtis_p_brown -
    What about step 3???

    Peter Hecht -
    Please dont hurry , take your Time to follow this procedure. It takes 20 min (not 5) and step 4 requires half of this Time. Good luck.

    Peter Hecht -

    +1 Peter Hecht is right - getting the little clips the back is snapped on with is time consuming and a bit fiddly for people not used to “spudging” off covers. Starting from the back is the key those come loose much easier and help with the rest

    Doug Steinschneider -

  2. 2TNJ3aF1OiC3dQrY
    2TNJ3aF1OiC3dQrY
    RKMGHiGBGvwUs2b6
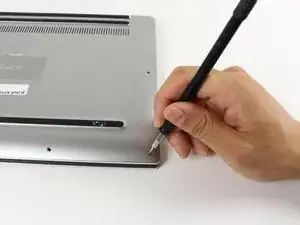
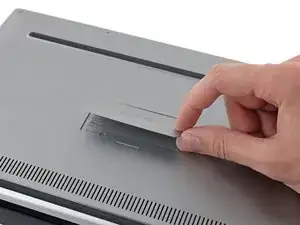
    • Use a plastic opening tool to pry open the 'XPS' flap in the middle.

    No flap or screw on the XPS 9370, just a press-fit latch at the centre of the cover. This can be gently prised off.

    Alan Thomas -

  3. TtZb5DNBruSpJQiH
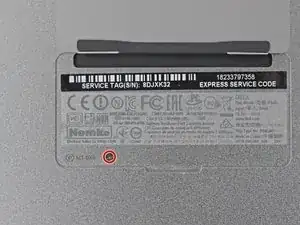
    • Remove the single Phillips screw hidden beneath the flap.

    XPS 13 9370 doesn't have it.

    Kes Bond -

  4. SV3vQLxNPuaLAJc2
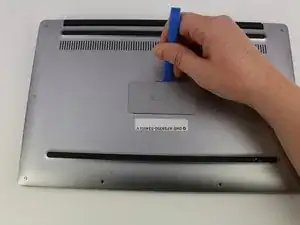
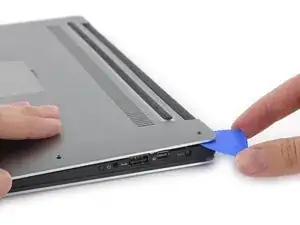
    • Use opening picks or a plastic pry tool to pry open the case clips, beginning from the back edge.

    It’s not that easy to lift actually, cause there are latches. Had t release them gently all around beforehand.

    Davit Barbakadze -

    Also there’s one additional screw under that plate on the bottom!

    Davit Barbakadze -

    Maybe the later models are different, since it should be from the front: https://www.youtube.com/watch?v=xFIE2SKs...

    shigmas -

    Very difficult step, Proceed very carefull

    Peter Hecht -

    If you are replacing the battery of a 9360 or latter (2016 onward) make sure to do the FRONT first. There are latches on the back that you may break if you try to force it open that way. After prying up the front and the sides, just lift up the front like you would open a hinged box. You shouldn’t feel that much resistance as the back hinges off towards you after you’ve lifted it around 30-40 degrees.

    Giacomo P -

    Very easy with XPS 13 9370 - just used my nails (rather short!)

    Kes Bond -

  5. SclHTlmfKvgauUBi
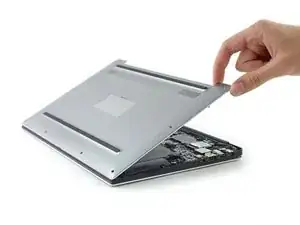
    • Remove the bottom cover.

    good evening, is there a site that sells the back part because it's broken

    marios cocka -

    good evening, is there a site that sells the

    back part because it's broken

    marios cocka -

  6. PyUToIwsQDJBe6OD
    PyUToIwsQDJBe6OD
    33oCi1YwifwxZYRh
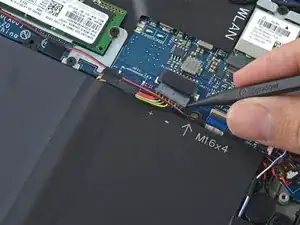
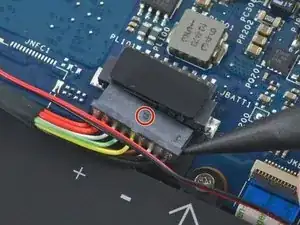
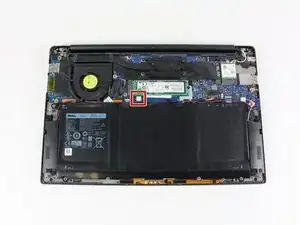
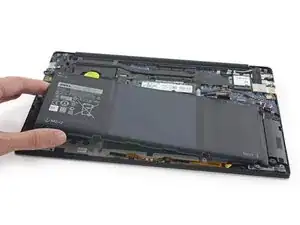
    • Pull the battery cable connector towards the battery to disconnect it from its socket.

    • If the connector is stubborn, push a little at one side, then the other, to "walk" it out of its socket.

    • If you have trouble walking the connector out of the socket, use the point of a spudger to gently push on the connector indent to slide the connector out.

    • Do not pull up.

    • Open the display and press the power button for five seconds to drain any remaining charge from the system.

  7. J3xV4inNJSrPEStr
    J3xV4inNJSrPEStr
    MapH5cB5HWktsBgh
    puTWLgM1bQgcOkaO
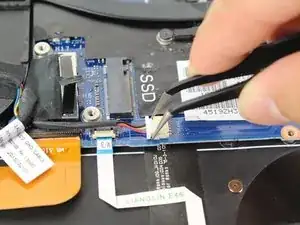
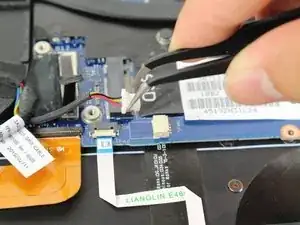
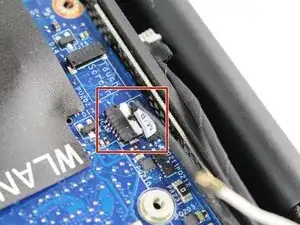
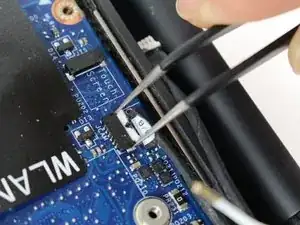
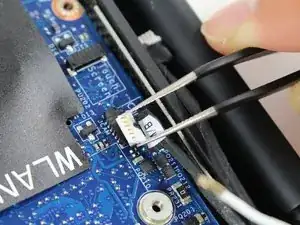
    • Use tweezers to remove the little white connector by pulling it out and away from its socket.

  8. 6RrOgRvvBRM6DDQA
    6RrOgRvvBRM6DDQA
    3ASoOPt2hQ3rEsDF
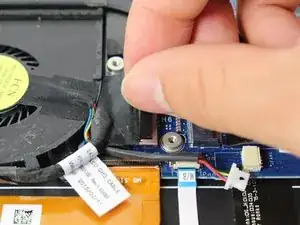
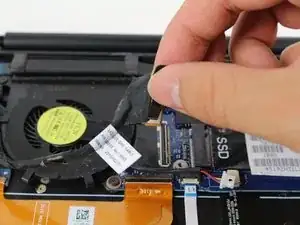
    • Remove the black standard flat connector by lifting the tab up with your hand.

    My XPS 13 had a little silver plate with two Philips head screws over the connector that had to be removed to get to the connector

    David Fradkin -

    Reassuring comment David, thank you. So did mine.

    Sue Evans -

  9. supNFncOcpRmdGKH
    supNFncOcpRmdGKH
    KrdlUQwpLpGiMTfs
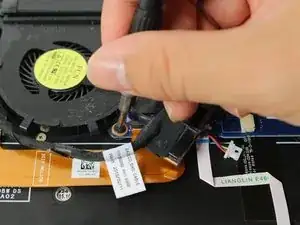
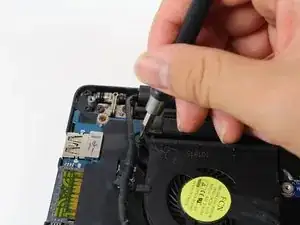
    • Remove the 4 mm Phillips #0 screw that connects the fan to the motherboard.

    • Remove the 4 mm Phillips #0 screw that connects the fan to the base of the computer.

  10. BwONokBXDhTGu5Ve
    BwONokBXDhTGu5Ve
    Y6RXUWNnYvKQUexW
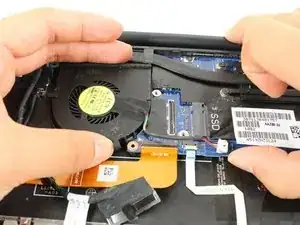
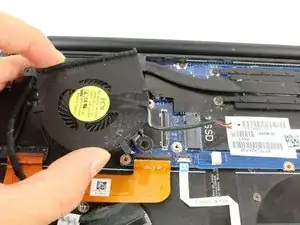
    • Use your right hand to lift up the larger section of the motherboard, closest to the fan.

    • Use your left hand to pull the fan at a 30-degree angle out from underneath the motherboard.

    I found it easier to gently lift up the very corner of the motherboard with a spudger. It's worth the effort to avoid having to take out the whole motherboard.

    Sue Evans -

  11. xOVtCEsgTbREfTYL
    xOVtCEsgTbREfTYL
    qFNPUbfQsBdlUaty
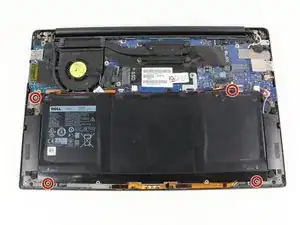
    • Remove the four 3 mm Phillips #0 screws located on each corner of the battery.

    There are two additional screws holding sound speakers.

    Davit Barbakadze -

    And there is a another small screw holding the battery right above the “M1 6x4” print.

    curtis_p_brown -

    You also do not need to remove any speaker screws or the speaker, you just have to remove the tape holding the speaker wire to the battery.

    curtis_p_brown -

  12. HhDh3XGhuQo3WcrU
    HhDh3XGhuQo3WcrU
    LgMA5uGJwVaBDh5g
    • Pull the battery cable connector towards the battery to disconnect it from its socket.

    • Do not pull up.

    This is a redundant step (disconnect the battery in step 6).

    William Cummings -

  13. XK14WEDKdKGuVOZe
    • Peel up any tape securing the speaker cables to the battery.

    • You do not need to remove the speakers, only the tape, allowing the battery to be removed out under the speaker cables.

  14. pbfpsDnER5fqy4uy
    • Remove the battery.

  15. cupaEfB1LUDL4PuG
    cupaEfB1LUDL4PuG
    me6Y6pSNKlulyVTb
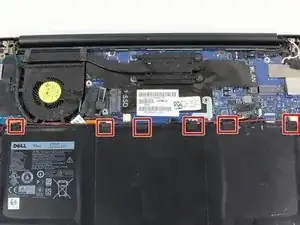
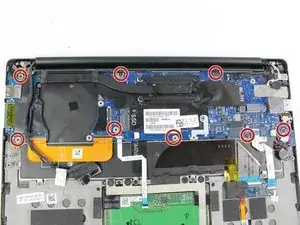
    • Remove the eight 4 mm Phillips #0 screws from the motherboard.

    There's one more screw in the upper right part of the motherboard just under the barrel jack connector It's hidden under its cable.

    Cryen -

  16. iZOuMJGotlXrDuLj
    iZOuMJGotlXrDuLj
    VecawI2cEE3Wf6dO
    2ZAfVy5IiNVGBDvR
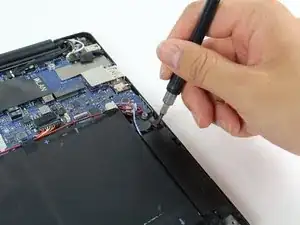
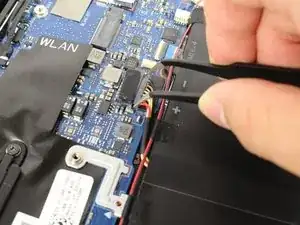
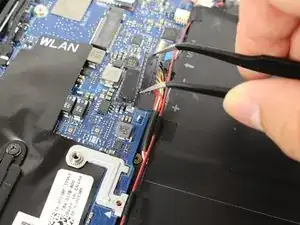
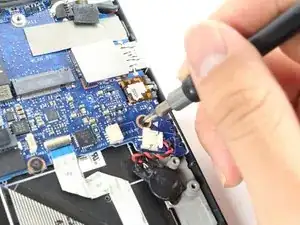
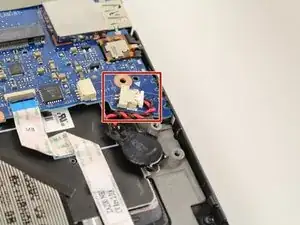
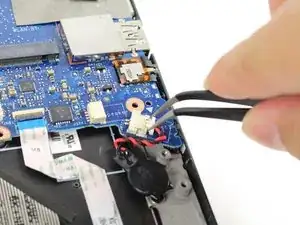
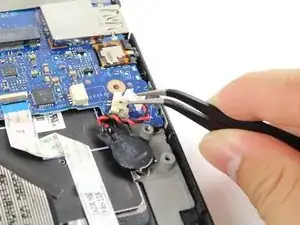
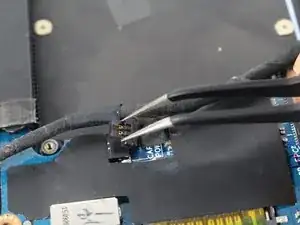
    • Locate the red and black cable connector at the bottom right of the motherboard.

    • Use tweezers to slowly detach the cable connector from its socket by pulling it to the right and up.

  17. QBxHXrVLMDMKATCX
    QBxHXrVLMDMKATCX
    wNTNSXZXtfA1hrgU
    ZcFgVJwHZLcpuNVV
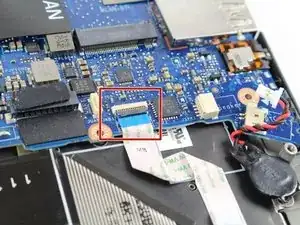
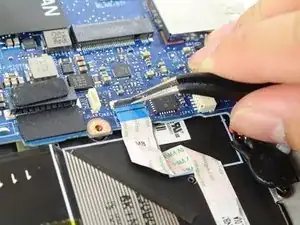
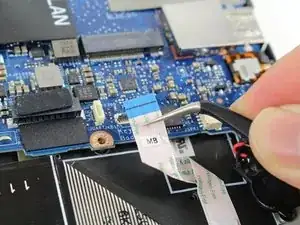
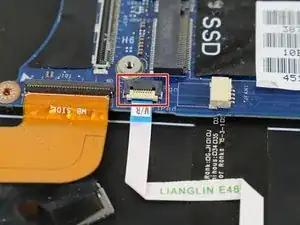
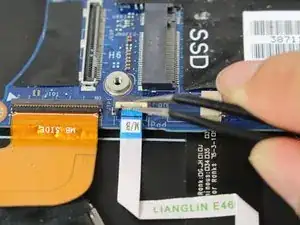
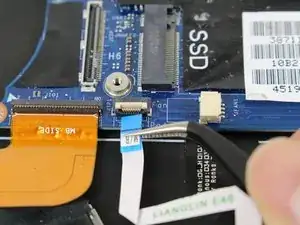
    • Use tweezers to flip open the Zero Insertion Force (ZIF) connector.

    • Use tweezers to detach the ribbon cable from the ZIF by pulling it towards yourself.

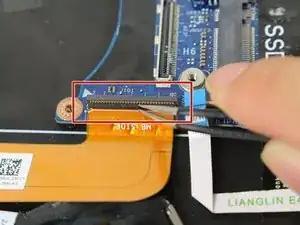
  18. pHL5h4LUHK2nSnKH
    pHL5h4LUHK2nSnKH
    4eMtPPpuW4fpTwq1
    lCnGrwnNqaMpV4yq
    • Use tweezers to flip open the white ZIF connector.

    • Use tweezers to detach the ribbon connector from the ZIF by pulling it towards yourself.

  19. hyCpOqBcNRSLGVFj
    hyCpOqBcNRSLGVFj
    ndgSBMHQYQZdSfc2
    pdKIllKmiHvIGEtk
    • Use tweezers to flip open the ZIF connector.

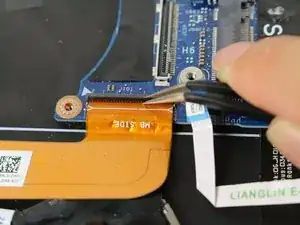
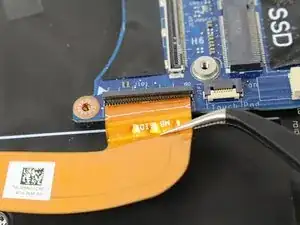
    • Use tweezers to detach the orange ribbon connector from the ZIF by pulling it towards yourself.

  20. D6tM5WPZbnZyUBii
    D6tM5WPZbnZyUBii
    P2DQYvNPXuTHCjWa
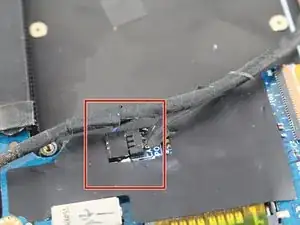
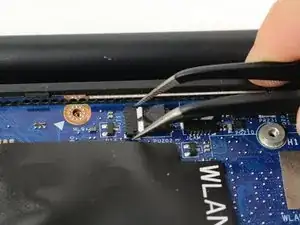
    • Use tweezers to detach the black cable connector out of its socket by pulling it to the right.

  21. pGBowAPNLnAuygtE
    pGBowAPNLnAuygtE
    loBN16KFyoywwmJg
    olXwKRxDL2egRdRh
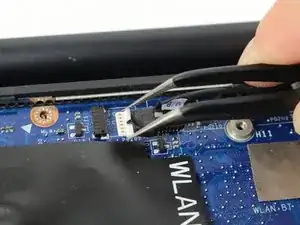
    • Use tweezers to gently detach the black and white cable connector out of its socket by pulling it to the right.

  22. sFuJ5RuLWH5jRgIx
    sFuJ5RuLWH5jRgIx
    J14524WN6BkXUnKo
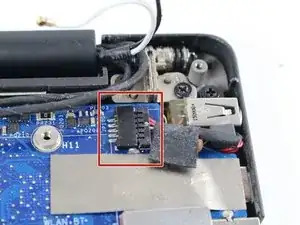
    • Locate the connector at the top right of the motherboard.

    • Use tweezers to detach the cable connector from its socket by pulling it to the right.

  23. FvMKAVCZQZpZ34N2
    FvMKAVCZQZpZ34N2
    QIO3GnQwIIIoMZqc
    SDUJV2MHTFdi1M5Y
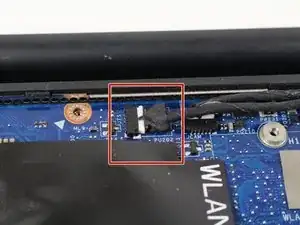
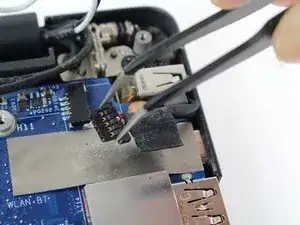
    • Locate the last black cable connector.

    • Use tweezers to detach the black cable connector from its socket by pulling it to the right.

  24. NtffU3PFA5b1QcJ6
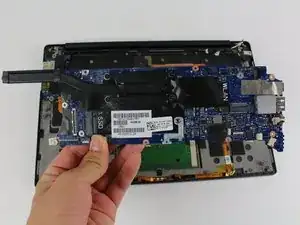
    • Use your hands to lift up the motherboard.

Conclusion

To reassemble your device, follow these instructions in reverse order.

Evan Shui

Member since: 26/04/17

320 Reputation

2 comments

where is camera cable

phong thanh -

Wow man that is awesome job. Where can you get a newer motheboard for the same laptop?

R E -