Introduction
In this guide, we will be showing you how to remove and replace the Battery.
Tools
Parts
-
-
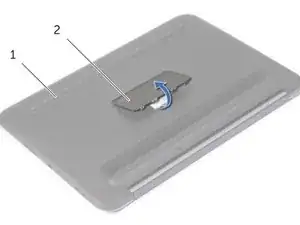
Beginning with the side opposite the power switch, use your fingers to pry up the base cover from the laptop.
-
Carefully lift the base cover around the power switch and remove the cover.
-
-
-
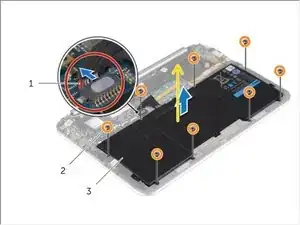
Slide the battery cable connector out of its system board socket.
-
Remove the screws that secure the battery to the palm-rest assembly.
-
Lift and remove the battery along with its cable.
-
Conclusion
To reassemble your device, follow these instructions in reverse order.
Take your e-waste to an R2 or e-Stewards certified recycler.
Repair didn’t go as planned? Try some basic troubleshooting, or ask our Answers community for help.


