Introduction

  1. YESLxj1KaR6waodx
    YESLxj1KaR6waodx
    ArdiGRfIASxxGZYa
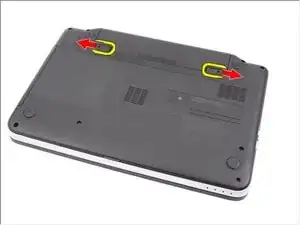
    • Slide the release latches to unlock the battery.

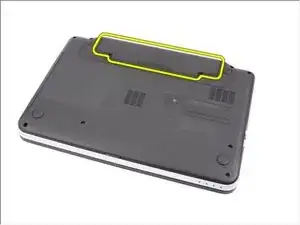
    • Slide the battery and remove it from the computer.

  2. 6VVSZWFhX5StlNTp
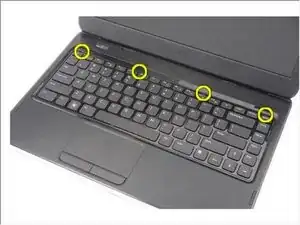
    • Pry up to release the top four snaps securing the keyboard to the computer.

  3. C4ftHRd4xywWGiG2
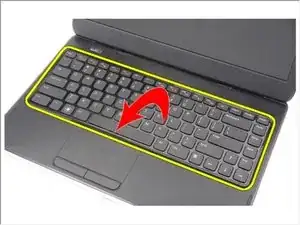
    • Flip the keyboard over and lay it on the palm rest.

  4. GOM1qWtscdgvWDGS
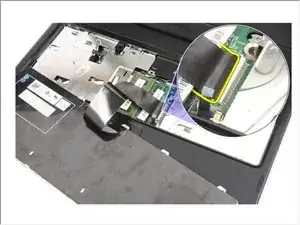
    • Disconnect the keyboard cable from the system board.

  5. bUu2xB4YR4kcLE3q
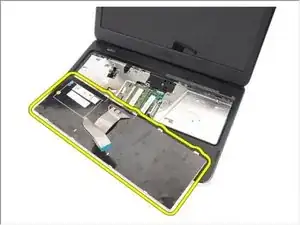
    • Remove the keyboard from the computer.

    ESC,1,2,4,5,8,10,11,12,s

    BIPAL HALDER -

  6. sAselsOuukPsIVQK
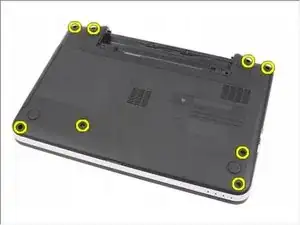
    • Remove the screws that secure the bottom base.

  7. UOkTfrQVZ5GL3yNP
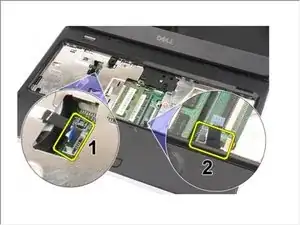
    • Flip the computer around and disconnect the power board cable (1) and the touchpad cable (2).

  8. EPnJrYtDWeKJIaWd
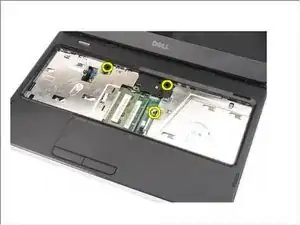
    • Remove the screws that secure the palm rest to the computer.

  9. LS4XfaifnFXDA42H
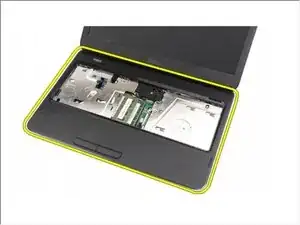
    • Pry up the palm rest using a plastic scribe to release all the snaps on the bottom, left, and right sides of the palm rest. Once all the snaps have been released, lift up the palm rest from the computer and remove.

  10. kZOyvlJsybAHShrw
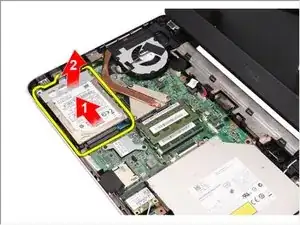
    • Slide the hard drive and lift it out of the computer.

  11. YeVdcINLYnQBJPCv
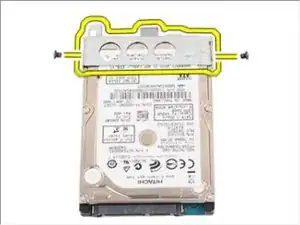
    • Remove the screws that secure the hard drive bracket and detach it from the hard drive.

Conclusion

To reassemble your device, follow these instructions in reverse order.
Johnathan Hammond

Member since: 28/02/18

44820 Reputation

0 comments