
Introduction
-
-
Get a replacement battery.
-
e.g. via DELL Support: Part No. "CPL-TXF9M" or Part No. "HK6DV". Costs approx. 40€
-
-
-
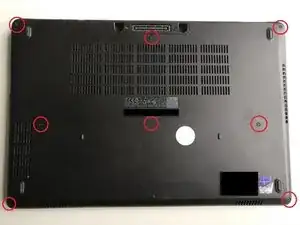
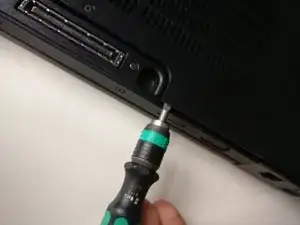
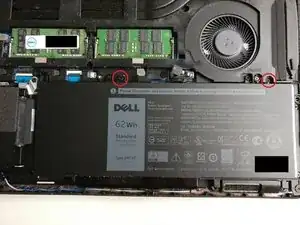
Use a small Phillips screwdriver to carefully unscrew the 8 marked screws.
-
'The screws cannot be removed from the base plate!'
-
-
-
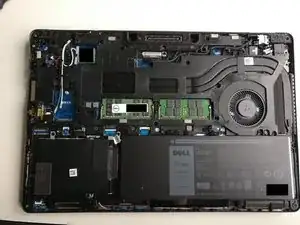
Carefully pry open the bottom cover and remove the cover plate.
-
The base plate is fastened all around with small plastic hooks. These should not get damaged.
-
-
-
After removing the bottom panel, the battery can be seen at the bottom right of the image.
-
Avoid touching or damaging any other components inside the laptop.
-
-
-
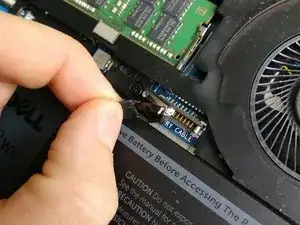
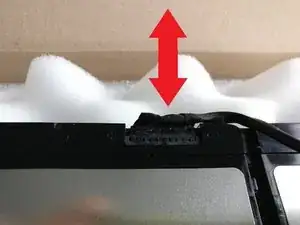
To disconnect the battery from the laptop, pull the plug by the tab, straight out of the slot.
-
-
-
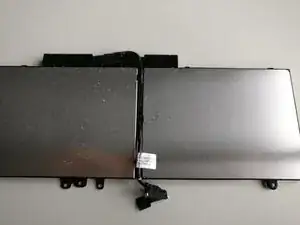
Place the battery on a flat surface and avoid bending the two battery cells!
-
Detach the cable from the clips between the two cells.
-
The connector on the battery itself can now be removed from the top of the battery by carefully pulling it out.
-
-
-
Connect the battery cable to the replacement battery and make sure that it is plugged in straight and without gaps (the contacts should no longer be visible).
-
Stow the cable between the two battery cells and reinsert the battery into the laptop.
-
Install the two retaining screws onto the battery and connect the battery to the laptop by gently pressing the connector into place from above.
-
Make sure that the battery is connected and inserted correctly. Verify that no parts are sticking out or are installed crooked.
-
Put the case cover back on the laptop and hook it into place by pressing lightly on the edge.
-
Now the 8 screws from step 2 can be tightened again.
-
-
-
In order for the new battery to be recognized by the device, it must first be connected to the power supply and switched on.
-
Follow theses steps in reverse order to reassemble your device