Introduction

  1. uQbpZsCfux2ORquJ
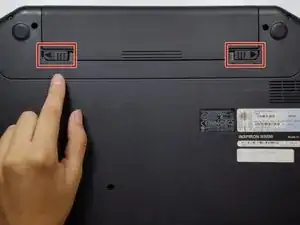
    • Flip your laptop over to view the bottom and locate the two locks.

  2. XbdU6yDTi2uQDWvF
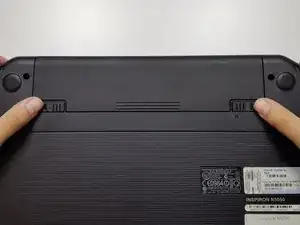
    • Slide the two locks away from each other.

    • Sliding these locks will loosen the battery to allow removal.

  3. cSX5c1IPS2O1WZqB
    cSX5c1IPS2O1WZqB
    hubMXhZEUipkL1qi
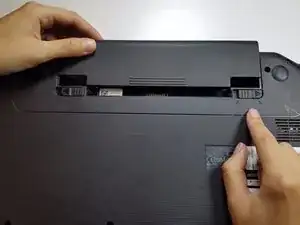
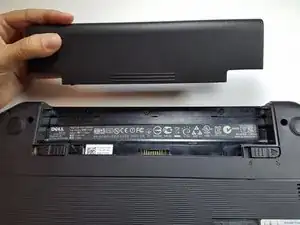
    • Pull battery out of the laptop.

    • Your laptop's battery should be completely removed.

  4. H3LMDXl4IJnHRgdO
    H3LMDXl4IJnHRgdO
    IHoQsRllmltiHLOy
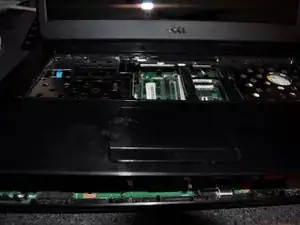
    • Flip the laptop right side up. Open the laptop.

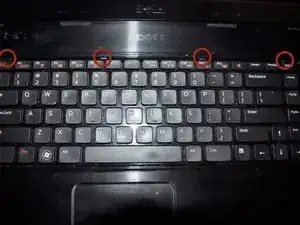
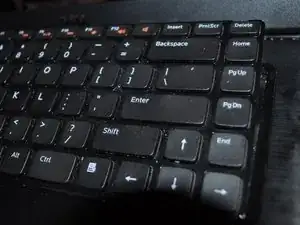
    • Gently press in the four retaining tabs along the top of the keyboard with a spudger, one at a time.

    • After the first tab is released, gently lift up on the keyboard so it doesn't lock again. Finish the other three tabs while gently lifting up on the keyboard. The keyboard will hinge up along the bottom.

  5. Vqv4MgXDdK4jtKCx
    Vqv4MgXDdK4jtKCx
    JZutJhjEdX5fvYCG
    IJRwQJSdgPsJMPWe
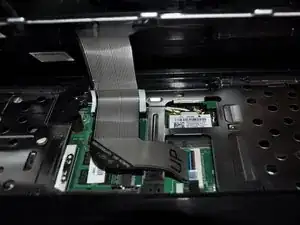
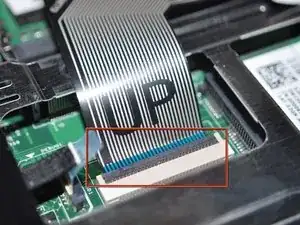
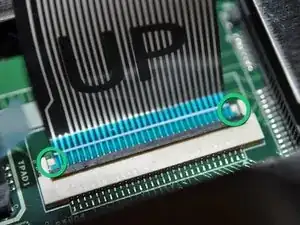
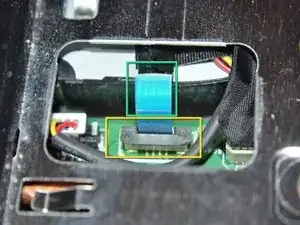
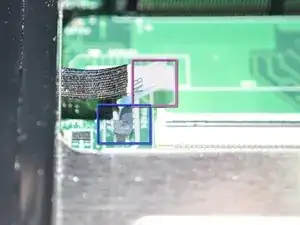
    • Gently flip the data cable latch away from the data cable with flat side of spudger.

    • Lift the cable up and out.

    • When reinstalling cable, there are two retainer wings on the sides of the cable that the cable that lock onto the bottom of the cable latch area. When these are in place the cable is properly inserted.

    • For removing the optical drive you don't need to disconnect the keyboard ribbon cable.

    What do I do is i broke the cable retainer wings and the black thing?

    Wezley Joao Ferreira -

    If the connector on the motherboard is still attached and only the clip is broken you can try and find a new clip, or perhaps tape the keyboard in place with electrical tape.

    Tyler -

    I didn’t need to disconnect and remove the cable. I simply set the keyboard gently to the side. This gave me full access to the two RAM module slots for replacement. Hopefully this will make the procedure easier.

    Clemmitt Sigler -

  6. mNyfIM3BUU6PEoAy
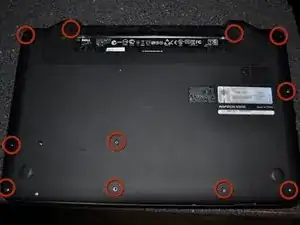
    • Close the lid, flip the laptop bottom side up with the battery at the top.

    • Remove the 11 screws holding the upper case to the lower case.

  7. RbJJbKkuBvKg6iCj
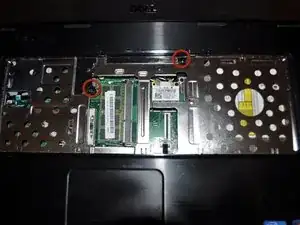
    • Flip the laptop over and open the lid.

    • Remove the two screws from the upper case.

  8. cVqujalYBNEiYlfk
    cVqujalYBNEiYlfk
    H6k3RphyjoGr5PjF
    COGaVZwIb4dgIF5n
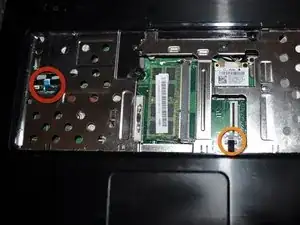
    • Gently unplug the power cable.

    • You lift up on the dark gray latch.

    • Pull the blue ribbon up.

    • Gently unplug the touchpad cable.

    • Lift up on the dark gray latch.

    • Pull the blue ribbon up

  9. 4qFmJ3AFCQLAaKNu
    • Grab the metal frame of the upper case and gently pull it away from the lower case. Disconnect the cable that says MB before removing the palmrest.

    • Work your way around the perimeter of the upper case.

    Thanks publishing this repair guide.

    Jay -

Conclusion

To reassemble your device, follow these instructions in reverse order.

Tyler

Member since: 20/06/12

4920 Reputation

10 comments

Awesome guide! Thank you so much for posting this.

Chris Baines -

My issue was that hard drive slipped out of it connector. Snapped it back in. Works! Thanks for great instructions.

Joe B -

Thanks for your help - now reformattting in a different laptop
rosen220462 -

I've replaced my drive as described above.

Can anyone tell me what comes next?

*I turned it on, got dialog on the drive recognized, but I couldn't get it started.

I did try the dell drivers & utilities that came with it with no luck.

I looked into the options under F2, F8 & F12.

No luck there.

I'm still digging through e-how links.

Sage -

A new hard drive normally doesn't have Windows installed on it. Hopefully you have created the dell recovery dvds when you first obtained the laptop. If you don't have that you can try and download the dvd image from Microsoft at http://www.microsoft.com/en-us/software-....

Tyler -

I have model N4050, so slightly different positions for screw and HDD but, success! New SSD, clone of system, in place and working fine! Thank you very much for the nice work!

Milton -

My Keyboard Didn't Come Off. Only This Little Frame That looks like a dust protector. HELP!!!

SPP3000 -

Can you post a picture somewhere and the link here?

Tyler -

The guide stopped right before accessing and removing the hard drive. I am trying to figure out how to get the hard drive out without breaking any thing. I really hope all the ribbon cables are still okay. I have removed/installed many a hard drive.memory, cards (etc.) but this is my first with a laptop. I thought the Ipod was tough.

Cliff Kononen -

Forgot to mention the screws holding the hd in place

hybrid_tor -