Introduction

Before disassembling this device further, have a screwdriver and a plastic opening tool nearby. This section of the guide involves removing the keyboard, so make sure you carefully pull the keyboard cable to prevent damaging it.

  1. SOEeAW1eGxSYFlXP
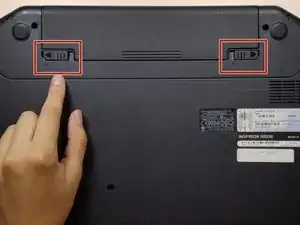
    • Flip your laptop over to view the bottom and the two locks.

    How many gb hard drive can I install on Inspiron n5050

    Anguiano pro -

  2. 1BZga3PXHPYewP6N
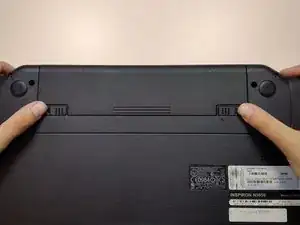
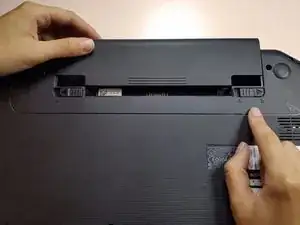
    • Slide the two locks away from each other.

    • Sliding these locks will loosen the battery to allow removal.

  3. fhGZh1edFVELE2qE
    fhGZh1edFVELE2qE
    nrFCsTeKtYDRqbTQ
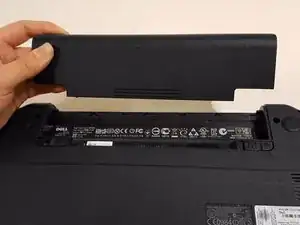
    • Pull the battery out of the laptop.

    • Your laptop's battery should be completely removed.

  4. BiFlNDYAnvRSnZnV
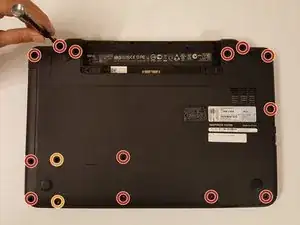
    • Remove the eleven 5mm palmrest screws from the bottom of the laptop with a Phillips #PH00 screw.

    • Remove the two 3mm hard drive screws from the bottom of the laptop with a Phillips #PH00 screw.

    You may also remove the 2 indicated hard drive screws during the last step.

    They are of different length than the other screws in this step, and it will provide better stability for the drive as you flip the computer over multiple times.

    Brian Y -

    Aren't there 13 screws in that picture, aside from the two hard drive screws, bringing the total to 15?

    D Smartvlasak -

    Just to be clear, the case screws are 2.5mm(diameter) x 5mm(length). The two hard drive screws are 3mm x 5mm.

    gworrel -

  5. 4S6HTIT6Hqvs2TiJ
    4S6HTIT6Hqvs2TiJ
    aRKCqiCFvOOnDkBE
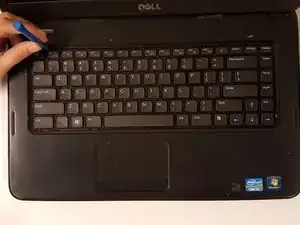
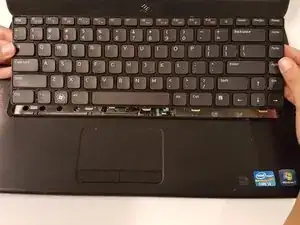
    • Flip over and open the laptop to view the keyboard.

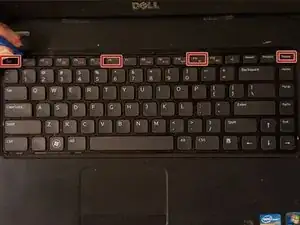
    • Use a plastic opening tool to press down on four clips, one by one.

    • Press down on the clips and pull the tool towards you to pry the keyboard loose.

    • The four clips are above the Esc, F6, F11, and Delete keys.

    The plastic opening tool is really ideal for this step. Especially use of one with a bit of a hook to it, so you may lift up the keyboard without pulling upon the individual keys. The keys can pop off, which is undesirable.

    Without the pry tool, I ended up using the edge of a clean plastic take-out container to both press down the tab while the lip provided the hook action needed to lift up the keyboard itself. Used a popsicle stick temporarily to brace it as the remaining clips were undone.

    Brian Y -

  6. ddJHQkd2ImMWpICx
    ddJHQkd2ImMWpICx
    1TPDt1q6DKrxhN1w
    l4YCUkqfXh4tTpdH
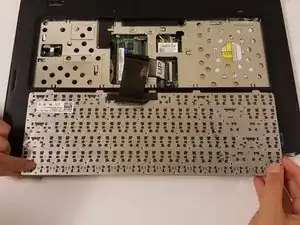
    • Remove the keyboard carefully.

    • Make sure to lift the keyboard gently, because a cable is connected to the back.

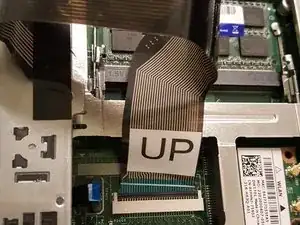
    • Flip the keyboard over to find the keyboard cable.

    • Pull the cable labeled "UP" out to disconnect it from the laptop.

    To remove the keyboard flexible flat cable, there is a dark grey strip securing the cable, (visible in the detailed photo). This grey plastic strip secures the cable, and is undone by lifting gently from the long edge adjacent to the UP label. It has 2 delicate pivot points left and right of the visible conductors in the white plastic connector.

    If you just grab and yank the flexible flat cable, this piece will likely just pop off, but can be re-seated provided it did not break.

    Brian Y -

  7. rKDeAGu3qUBuJBw1
    rKDeAGu3qUBuJBw1
    mLvlJ4DVbUiUXjVl
    1BSmMNxLOKEEpwgo
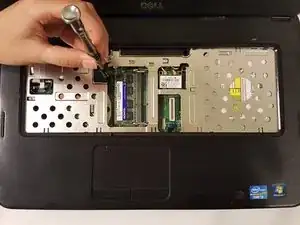
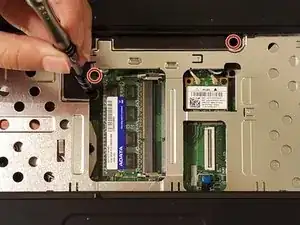
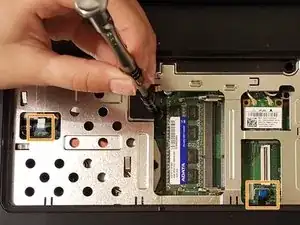
    • Unscrew the two palmrest screws.

    • Lift the two, blue palmrest cables up and out of their sockets.

    The two blue palmrest cables can be removed much easier if you lift the securing plastic gently. Found within the orange rectangles, each one can be lifted a millimeter or so, freeing the flexible flat cable.

    Brian Y -

  8. xBScSkeo14AgXoOa
    xBScSkeo14AgXoOa
    3rZPjptcTNgvkevu
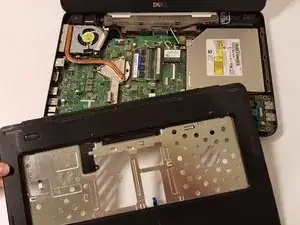
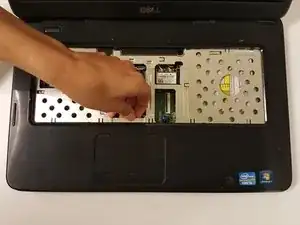
    • Lift the entire surface (palmrest casing) to expose the motherboard underneath.

    There are multiple minor tabs around the perimeter of the palm rest that you must gently pry free in order to remove the palm rest.

    Work around the perimeter with a suitable tool. The most difficult area was by the optical drive.

    Brian Y -

  9. ISLYlnZSQk1ULNQQ
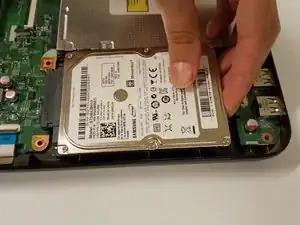
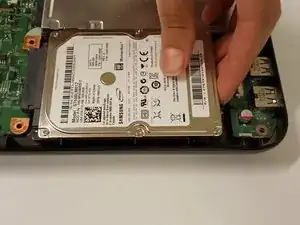
    • Slide the hard drive right and up to remove it from the laptop.

Conclusion

To reassemble your device, follow these instructions in reverse order.

Kristy Mayo

Member since: 16/09/16

1394 Reputation

4 comments

Thanks again. This guide was made straightforward and clear.

jason acn -

Thanks you - The clear instructions make this guide easy to follow.

Jay -

wouldnt turn on after i re-assembled it
Taemon Coolz -

Sehr gute Arbeit

pouchman -