Introduction

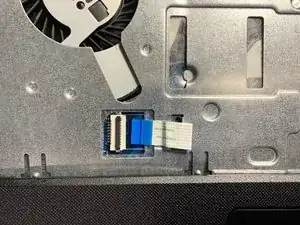
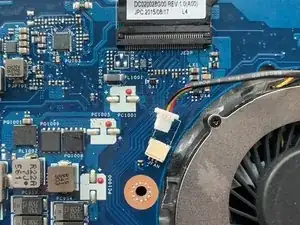
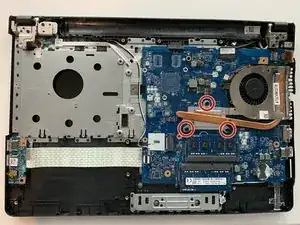
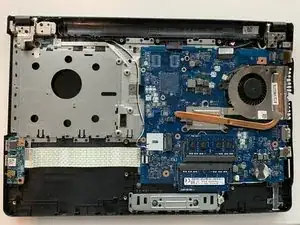
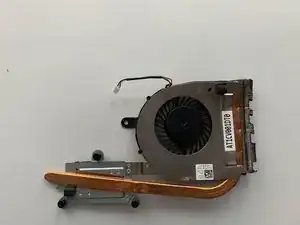
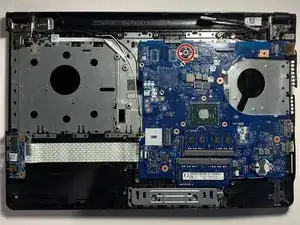
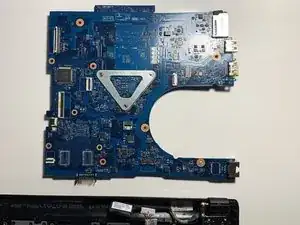
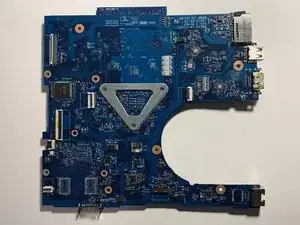
If your Dell Inspiron 5555 will not power on or charge, you may need to replace your motherboard. This guide will give you specific instructions on how to achieve this task.

With respect to the laptop turning on, the motherboard contains components that control power supply to the laptop.

Before attempting to replace the motherboard, you may want to consider that your laptop is not powering on due to a faulty power adapter or battery.

Do not forget to turn off your device completely and make sure it is not connected to any power adapters.

  1. XUNTlqnCpvHsNJiR
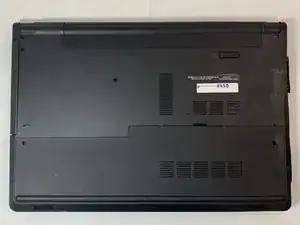
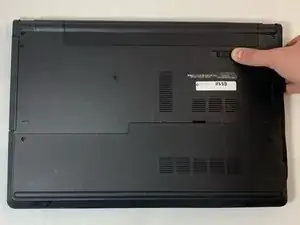
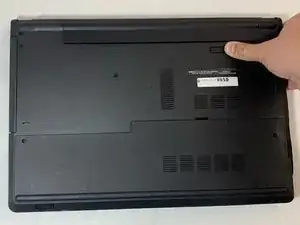
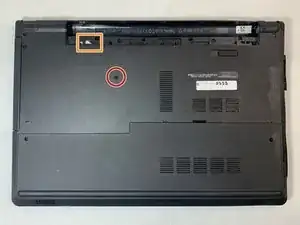
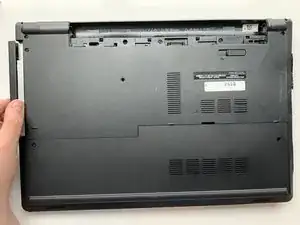
    • Close the laptop and lay it flat, logo side down.

    • Make sure that the battery is visible and at the top of the device.

  2. 2BE1Cb5lwP6TjTRt
    2BE1Cb5lwP6TjTRt
    mjKIkT1sPHtWs4LI
    TkrAbvuAnG32NqMO
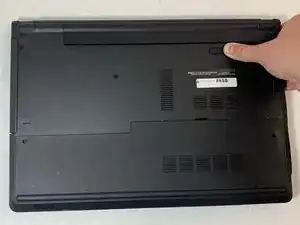
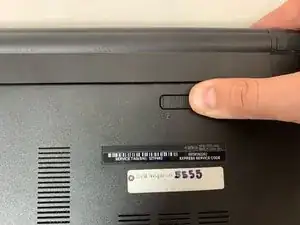
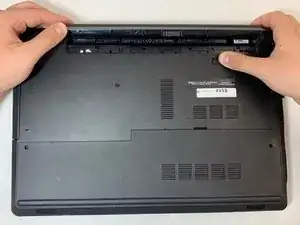
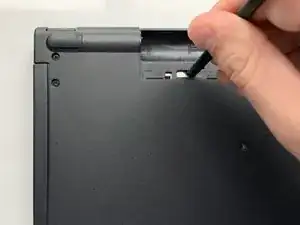
    • Push the lock switch to the left to pop out the battery.

  3. RjlnfMGFFpiNX1Xh
    RjlnfMGFFpiNX1Xh
    F5ODVIWJTRHSWjL4
    iGKuYLOoOgUqq5mu
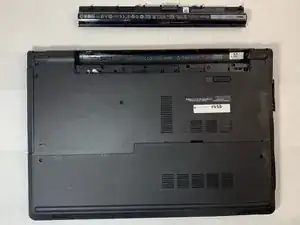
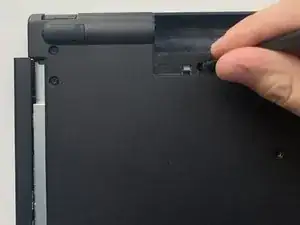
    • When the battery pops out, lift it so that it comes out completely.

  4. QNbs1evLaqUHcMMS
    QNbs1evLaqUHcMMS
    rhddOOfYtsEuegey
    RGMLD5kVLTWZWMmf
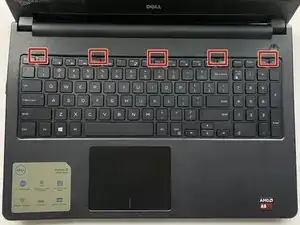
    • Turn the laptop over and open the device.

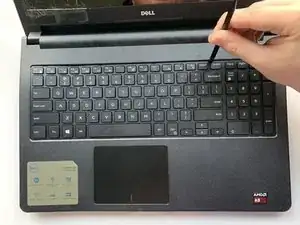
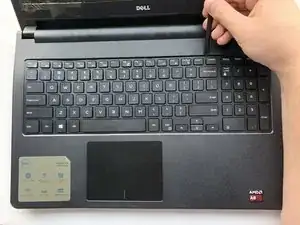
    • Insert the flat end of the spudger into the five notches located at the top of the keyboard and pry the keyboard up by pushing down and up.

    Make sure to use end punctuation on all steps.

    Alex Watkins -

    How should the user lift the keyboard? Why use a screwdriver to pry?

    Alex Watkins -

    Should there be a note here about how much to move the keyboard? Will yanking it up damage the device?

    Alex Watkins -

  5. 5OOudnuTNrVBItSv
    5OOudnuTNrVBItSv
    AooteaaKJ423m2Js
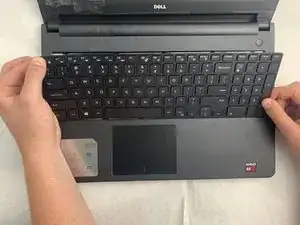
    • Lift up and slide back to release the six notches from the bottom of the keyboard.

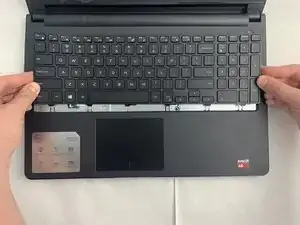
    • Be careful not to lift the keyboard up all the way because it is still connected to the laptop by a cable on the bottom.

  6. BiLOIWWYCT45WI3g
    BiLOIWWYCT45WI3g
    uKaro2PfNaDBOjX2
    KMohi5WxIgoPXBLv
    • Flip the keyboard upside down to access the keyboard cable.

    • Using the flat end of the spudger, flip the black tab securing the keyboard cable up to remove the keyboard cable.

    • Remove the keyboard by lifting it off of the laptop.

  7. CrLSGOYY4nkQT5XA
    CrLSGOYY4nkQT5XA
    pYcbwMrdcRF6aKeT
    TWMERHNGJcG1uVJD
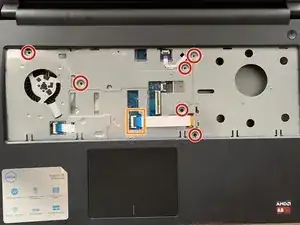
    • Remove the six 5 mm screws using the Phillips #0 screwdriver.

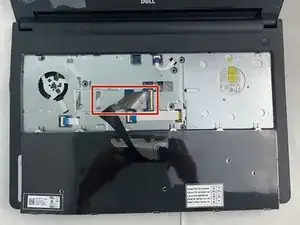
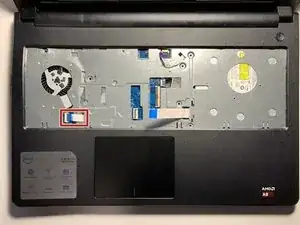
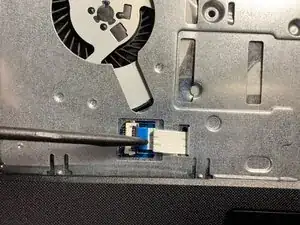
    • Use the spudger to lift the black tab of the ZIF connector, removing the optical drive cable.

  8. N3H4M6EIcu1A43HZ
    N3H4M6EIcu1A43HZ
    pplOyxXZf1YkL5H2
    tyexnc4k6v5aJIuH
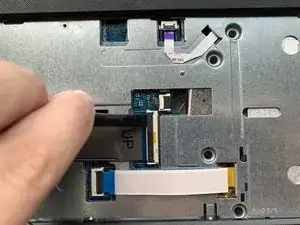
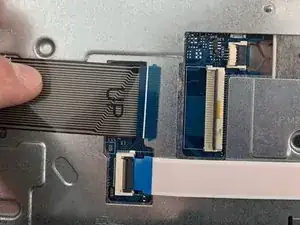
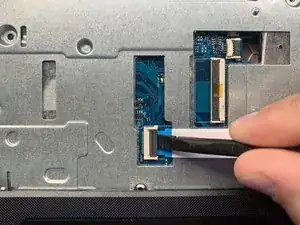
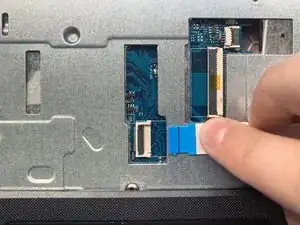
    • Using the hooked end of the Halberd Spudger, pull the black tab to the left to expose the touchpad cable.

    • Close the laptop and flip it over, so the bottom is facing up.

  9. FX4YIuFhk4geBUUD
    FX4YIuFhk4geBUUD
    ekYpyiAMDYZAkFI1
    Y1aOIMWO1GSZBQBX
    • Remove the 5 mm screw using the Phillips #0 Screwdriver.

    • Use the flat end of the spudger to slide the optical drive out to the left at the screwdriver push point.

  10. JSFRC44oqSulwa6t
    JSFRC44oqSulwa6t
    WXXNXyNEKnFeiusD
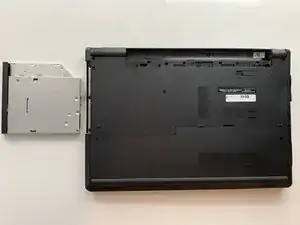
    • Pull the optical drive horizontally to the left to remove it from the laptop.

  11. qX1xsvuO3CEV5WJ5
    qX1xsvuO3CEV5WJ5
    yIsHBNfENIA3IGCG
    VVBVfaxlQslvZ6YE
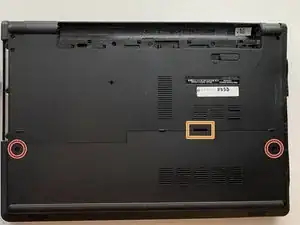
    • Remove the two 8 mm screws with the Phillips #0 Screwdriver.

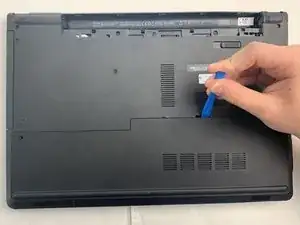
    • Use the iFixit opening tool to pry open the access door by pushing down and up at the notch on the top of the access door, running it along the edges.

    How can I pry open the access door?

    Alex Watkins -

  12. wGZWvpVHWlU6auEe
    wGZWvpVHWlU6auEe
    juoEtU54tA5CUpqu
    NCeXSijpY3yRBC1e
    • Use the flat end of the spudger to lift the white tab up that holds the hard drive cable in place.

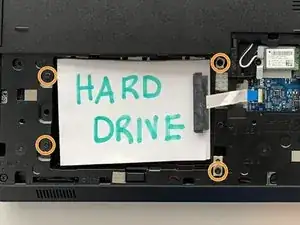
    • Remove the four 8 mm screws with the Phillips #0 screwdriver.

    • Lift the hard drive from the laptop.

    The halberd spudger or spudger? You use both in the tools. Make sure to check all tool lists.

    Alex Watkins -

  13. DdZSIt1ucXGOKhle
    DdZSIt1ucXGOKhle
    rF3UQP1rDGATrLRE
    FjMQPQJUVoLdIE2k
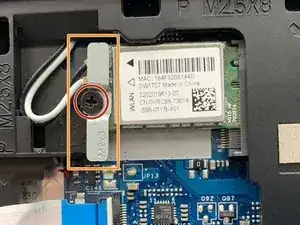
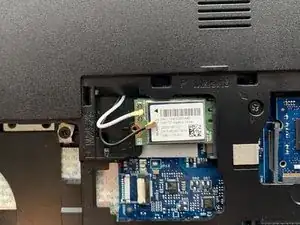
    • Remove the 3 mm screw on the wireless card with a Phillips #0 screwdriver.

    • Lift the metal bracket to remove.

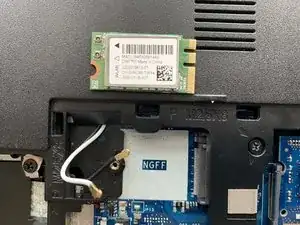
    • Detach the antenna cables at the gold metal end by carefully pulling them up from the Wireless WLAN Card.

    • Lift the Wireless WLAN Card from the device.

    For screws, use circles for markup. How should the user detach the antenna cables? How can the WLAN card be removed? “remove” is an appropriate verb when there’s one way to do it (e.g., screws), but not as helpful when the action isn’t as intuitive.

    Alex Watkins -

  14. TnL2364gVGDemUOk
    TnL2364gVGDemUOk
    QOOPH3fgsLGhOhTs
    woKVJO5mZB2MKII2
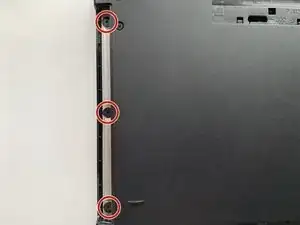
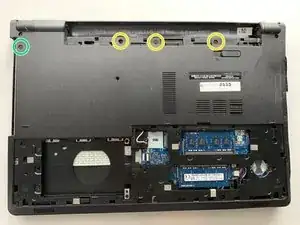
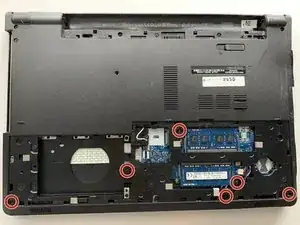
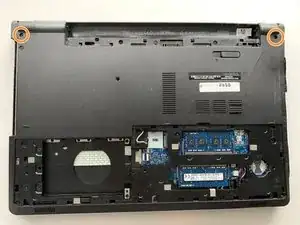
    • Remove the three 2 mm wafer screws in the optical drive port with the Phillips #0 screwdriver.

    • Remove the two 8 mm hinge screws with the Phillips #0 screwdriver.

    • Remove the three 5 mm screws from the battery opening with the Phillips #0 screwdriver.

    • Remove the 5 mm screw with the Phillips #0 screwdriver.

  15. wG2gDSQkomvOg3Ue
    wG2gDSQkomvOg3Ue
    gg2rZRHpy6RShRVT
    WdClGTCfL4aiAvSu
    • Remove the six 8 mm screws under the access door using the Phillips #0 Screwdriver.

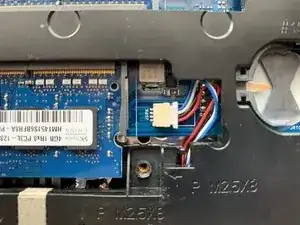
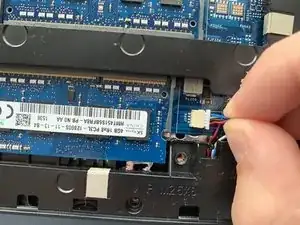
    • Disconnect the speaker connection by using your fingers and carefully pulling it to the right.

    • It may be snug in the connector, so gradually use more force until the speaker connection disconnects.

    Do you have the last shot zoomed out more to give perspective? As is, the tool is blurry, which makes the action difficult to see. Also, can you make the last step clearer?

    Alex Watkins -

  16. dDNPK6qLqFkQsbBY
    dDNPK6qLqFkQsbBY
    x2ZF6WQeoeWciKL4
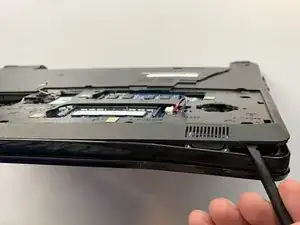
    • Using the flat end of the spudger, pry the bottom base off of the laptop by the crack around the perimeter of the laptop and running the spudger around the edges.

    Can you clarify how to pry the bottom base off? Are there latches involved? Do you have to run the spudger around the edges?

    Alex Watkins -

  17. ivdmEKHFMjYsdgqC
    ivdmEKHFMjYsdgqC
    JLVdaaKKqibvPgjB
    aU2lN6M24dkWvBrm
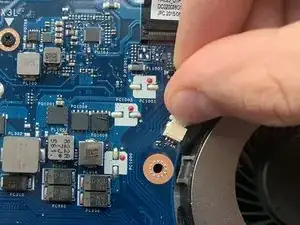
    • Using your fingers gently pull the fan cable out if its port.

    • Avoid pulling the fan cable out by the actual wire. Instead pull on the plastic white piece that is attached to the wire.

    Do you have a top down view of the laptop? I think since you zoom in significantly, marking up where the fan cable is before getting into it would be helpful. What direction should the fan cable be pushed? Do you have a flipbook style shot? I think you could use a whole step for that action, then have loosen the screws and remove in the next step.

    Alex Watkins -

  18. AOgSANoHCFmZBC4p
    AOgSANoHCFmZBC4p
    AWFiHNDs6qrhtLHv
    arF44Hu2XEMGUyGh
    • Loosen the three captive screws attached to the metal bracket of the fan using the Phillips #0 Screwdriver.

    • The screws should remain attached to the metal bracket by springs.

    • Carefully lift the fan out of the laptop.

  19. ycie4gUVG31MeiwH
    ycie4gUVG31MeiwH
    BMWTFSwungD6gPCT
    QyIewZFnBxqWgEWy
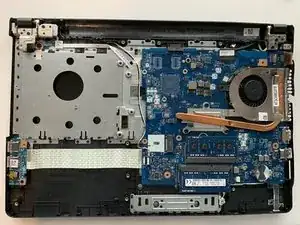
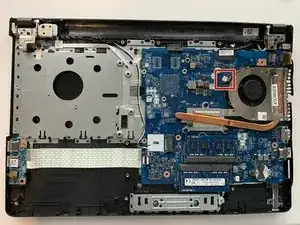
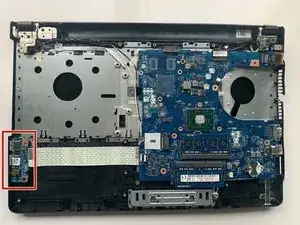
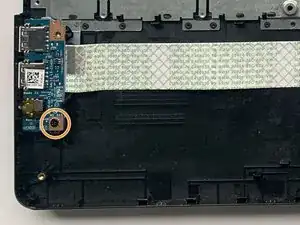
    • Remove the 5 mm screw from the circuit board using the Phillips #0 screwdriver.

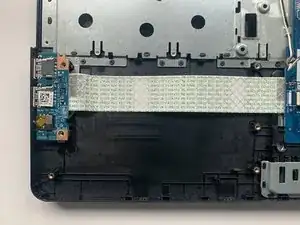
    • Loosen the circuit by lifting it up from the device.

    • The white and green cable will remain attached to the circuit board on the left end and attached to the motherboard on the right end.

    How should I loosen the circuit? Do you have more images?

    Alex Watkins -

    Also, consider a wideview with this element marked up.

    Alex Watkins -

  20. wiRv6NSCDeFNwXSC
    wiRv6NSCDeFNwXSC
    YG1geYJsehZGD4Dc
    n15QJIIWXcRuFXLi
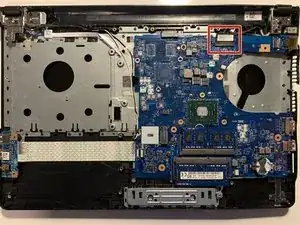
    • Using the halberd spudger, pull back and up to lift the black tab that holds the LCD cable in place.

    • Pull the LCD cable out with your fingers.

    I think the marked up shot should be zoomed out more to give a stronger sense of where the LCD cable is.

    Alex Watkins -

  21. eubvw15FSQDD1MRY
    eubvw15FSQDD1MRY
    iAlUpTfBlGAP4owm
    rmqfLSHNdiVBQSvW
    • Remove the 3 mm screw using the Phillips #0 screwdriver.

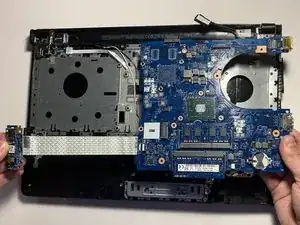
    • Carefully lift the motherboard and circuit board and turn it over.

    • The motherboard is still connected to the device so be careful to not yank up on it.

  22. ASKYYKeckLF3iClK
    ASKYYKeckLF3iClK
    xgEHrJ1OQJbyxFEQ
    bBCteOFjDJQ3RICT
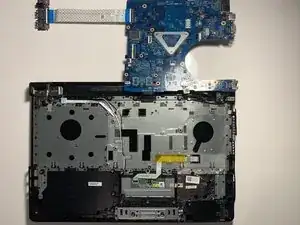
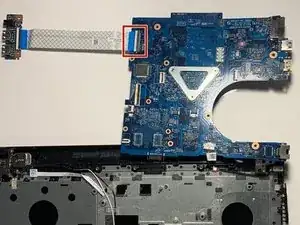
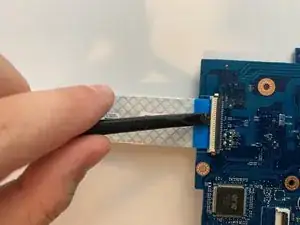
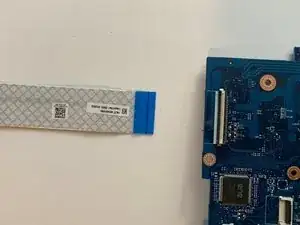
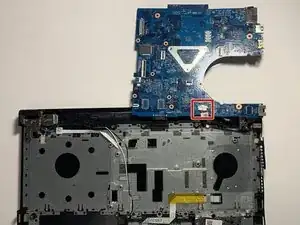
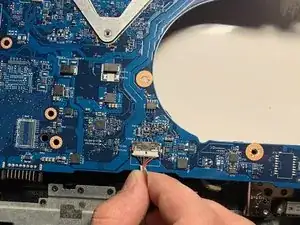
    • Using the flat end of the spudger, lift the white tab holding the USB circuit board cable attached to the motherboard to detach it from the motherboard.

    I would suggest putting the middle shot first.

    Alex Watkins -

  23. ryDMJputUZQeePMf
    ryDMJputUZQeePMf
    PMdwkojlc2KLCXjQ
    X5fqOEKie3HGQBnx
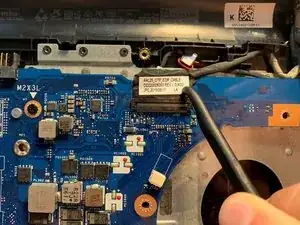
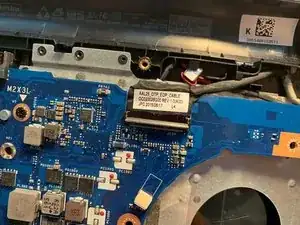
    • Use your fingers to pull the DC jack cable out of its port, separating the motherboard from the rest of the device.

    How should I detach the jack cable? I would also use a second bullet and indicate how to separate the motherboard.

    Alex Watkins -

Conclusion

To reassemble your device, follow these instructions in reverse order.
Marek Czyzycki Jr.
Member since: 20/09/19

242 Reputation

0 comments