
Introduction
Not all versions of the Dell Inspiron 7415 2-in-1 came with a fingerprint reader (FPR)/power button combo unit. The modularity of the laptop internals allow for easy retrofitting of such unit as an upgrade. This guide can also simply serve as a way of replacing the power button.
-
-
7 total phillips head screws
-
4 loose screws
-
3 captured screws
-
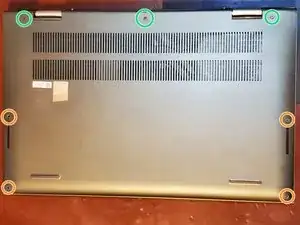
Carefully pry the bottom cover up from the rear of chassis first (by captured-screws), then follow perimeter to unlatch all plastic clips.
-
-
-
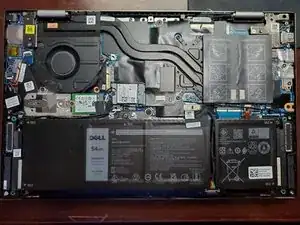
Remove the two screen hinge screws and turn the hinge upright slowly while holding the screen-side of hinge as shown.
-
-
-
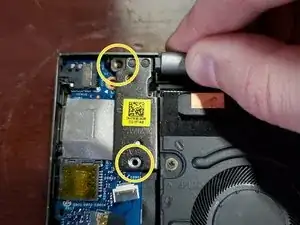
Remove the two daughterboard screws
-
Pry up from fan-side of daughterboard and slide slightly toward the fan to free the 3.5mm jack from the chassis.
-
-
-
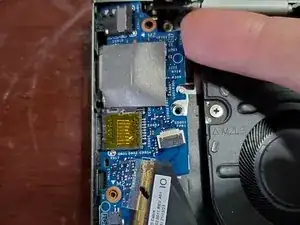
The daughterboard cable should be able to bend out of the way to allow access to rear of power button.
-
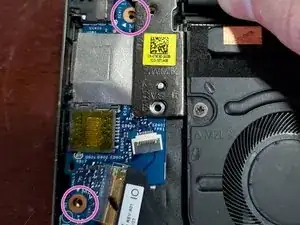
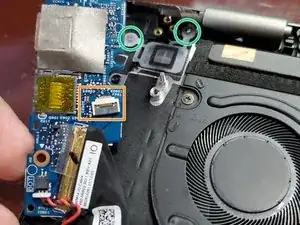
Remove two more screws holding in the power button.
-
*Note the unused connecter on the daughterboard marked "FPR1". This is where the new FPR cable will connect.
-
-
-
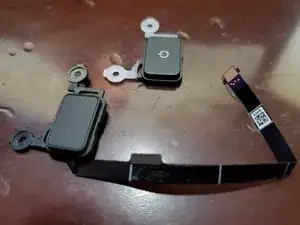
Install and screw in new power button/FPR.
-
Route FPR cable and re-install the daughterboard.
-
Upend the FPR jack latch, slide in FPR connector, and lower latch to secure the cable.
-
Re-install hinge screws, CMOS battery, and bottom cover and screws.
-


Windows Update installed drivers for the "GOODIX USB2.0" device soon after initial boot. Part was drop-in, but fitment is a B-. You may need to do some trial and error for centering the plastic button in the keyboard shell cutout to prevent contact or rubbing when pressing. Fingerprint recognition is great!

One comment
Where did you get the reader itself?