Introduction

In this guide, we will show you how to remove and replace the Hard Drive.

  1. WGjuPeTHCIsljDWr
    • Follow the instructions in Before You Begin.

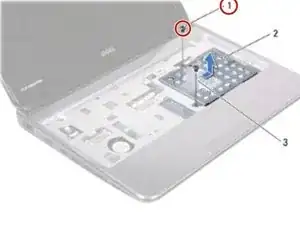
    • Remove the two screws that secure the hard-drive assembly to the computer base.

  2. ht1fnCfNyycq1Gwe
    • Using the pull-tab, slide the hard-drive assembly to the side to disconnect it from the connector on the system board.

  3. VwNGCfvwZSpFiO5K
    • Lift the hard-drive assembly out of the computer base.

  4. SjTdUpuusu6gldYb
    • Remove the four screws that secure the hard-drive bracket to the hard drive.

  5. dTtTHjPLLrgjqXEK
    • Lift the hard-drive bracket off the hard drive.

  6. V4BUPALum3UXhjRO
    • Place the NEW hard drive in the hard-drive bracket.

  7. HUkaIH2OSPQpVoVD
    • Replace the four screws that secure the hard-drive bracket to the hard drive.

  8. ZMMMUk2aUilnCqFc
    • Place the hard-drive assembly in the computer base.

  9. ndgAQFCdQXvQ1yOP
    • Using the pull-tab, slide the hard-drive assembly into the connector on the system board.

  10. vBlyyPYVWWK3lcNo
    • Replace the two screws that secure the hard-drive assembly to the computer base.

Conclusion

To reassemble your device, follow these instructions in reverse order.
Terrence15

Member since: 18/12/17

79034 Reputation

0 comments