Introduction

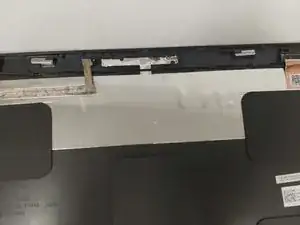
This guide will tell you step-by-step how to replace the webcam in the Dell Chromebook 3100 2-in-1.

Before beginning, make sure to power off your phone completely and disconnect from any external power source.

  1. V4ryyIuyLvIZgjNp
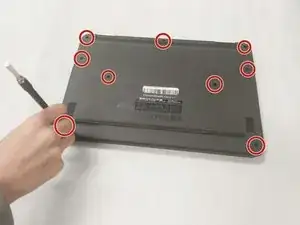
    • Using a Phillips screw driver (PH1) remove the 9 (M2.5x4) screws holding the back cover

  2. 2ACgOKvgiwALERog
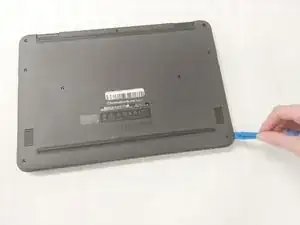
    • Using a jimmy and remove the plastic covering to reveal internal hardware.

  3. dJZwFxJRjYOiUDPj
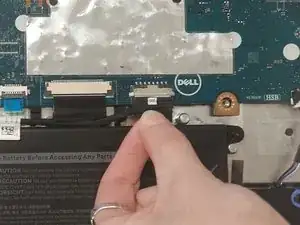
    • Unplug the battery from the motherboard by pulling gently.

  4. gMxrnSvVWKYG1Bie
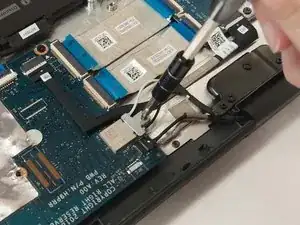
    • Remove the single screw (M2x3).

    • Remove the bracket over the Wi-Fi and camera plugs.

  5. HDErviy6k3CP5UWO
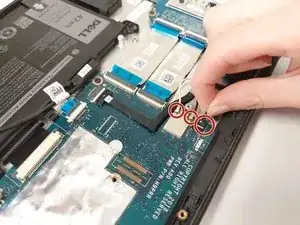
    • Unplug the now revealed camera and Wi-Fi antennas by gently pulling.

  6. NZTnnppBdXRACrum
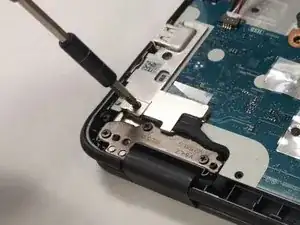
    • Remove the single screw (M2x4).

    • Remove the bracket over the display cable.

  7. QU4oEWSOZVQDA1vG
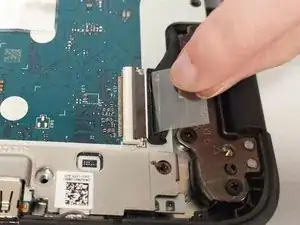
    • Lift the black tab and gently pull on the display cable to disconnect it.

  8. BCV5SHARcj3c6CSS
    BCV5SHARcj3c6CSS
    3GmkEgRdA3n455RB
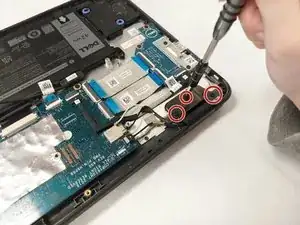
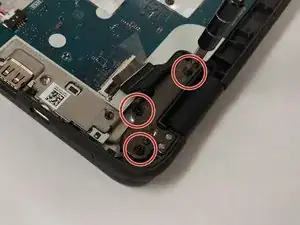
    • Remove the 6 screws (M2.5x5) holding the hinges on both ends.

    • When both brackets are free, separte the screen from the computer screen from the bottom section.

  9. 2GvrniYNWYq6h1LP
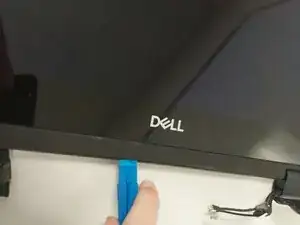
    • Use a jimmy to pry between the 2 layers of the now disconnected display.

  10. EMoB5iMVvjigSWo4
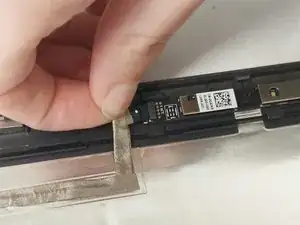
    • Unplug the webcam by gently pulling on the cable shown.

  11. VLKXuYpPq4BOr1tB
    VLKXuYpPq4BOr1tB
    nELfjSMNqbdT5IWD
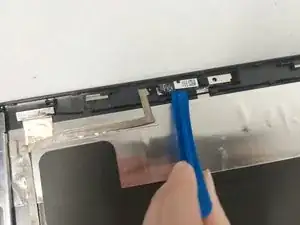
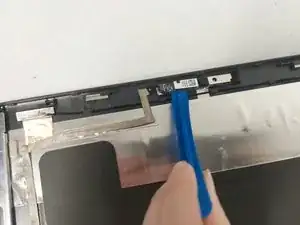
    • Use a jimmy to pry up the webcam, which is to then be removed.

Conclusion

To reassemble your device, follow these instructions in reverse order.
ot moya

Member since: 09/11/23

481 Reputation

0 comments