Introduction

  1. HDk4SYkjI2gUxXVH
    HDk4SYkjI2gUxXVH
    qmUhD6LDuPqBBTYQ
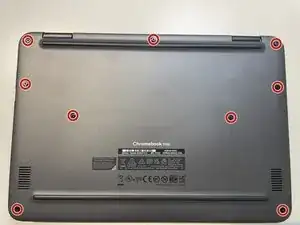
    • Unscrew the nine PH#0 captive screws on the bottom of the device.

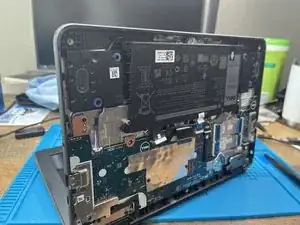
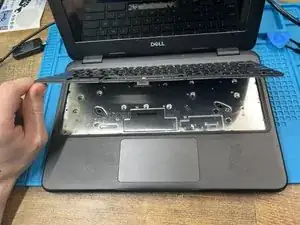
    • Use a pick to run along the outside of the device popping all the clips. Prying should not be necessary.

  2. eTFLbWO6Vpi4HSUR
    eTFLbWO6Vpi4HSUR
    RKZLqKXbl1UpKkKv
    x6adNXKsCYxA1sDg
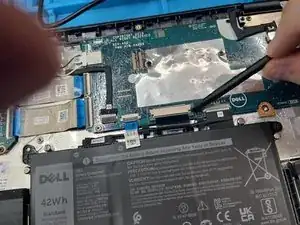
    • Disconnect the keyboard ribbon cable and pull it free. Make sure to undo the latch all the way; you shouldn't have to put hardly any force into pulling the cable out.

    • When re-inserting the cable, make sure the white line is parallel about 1mm away from the edge of the connector as shown in the first image.

  3. X5oHYnxsmblAKAYS
    • Open the computer to a 90º angle for the next step.

  4. GBPm2FgYxJTleLPR
    GBPm2FgYxJTleLPR
    lOcaDSSauG3nwrVw
    MU1lQNNdCMkGXSNU
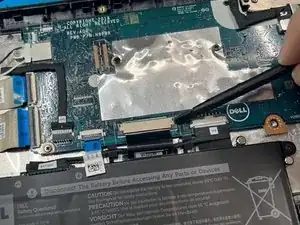
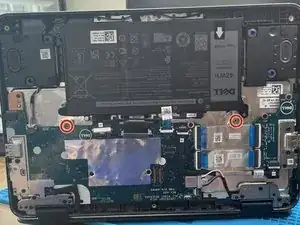
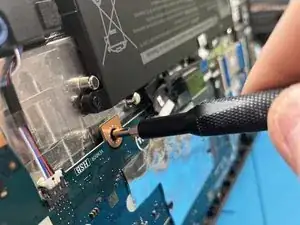
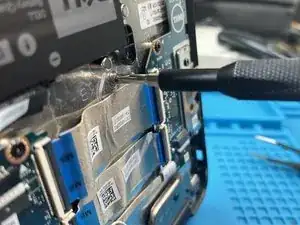
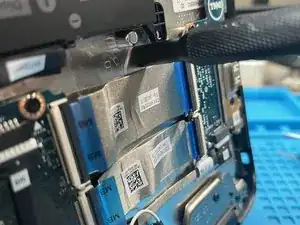
    • Locate the two screw posts connected to the keyboard, and give them a hard "push" with your blunt tweezers, spudger, screwdriver, or anything else vaguely stick-shaped.

    • Don't be afraid to put some muscle behind it. There are clips around the entire perimeter of the keyboard holding it in place, which require a decent amount of force to remove.

    • This step has a high chance to permanently damage the keyboard, if it's not already broken. DO NOT try this if you don't have another keyboard at hand, as you will likely be unable to put the old keyboard back in.

    I use this method all the time for work. For good keyboards I use a pick to run along the raised up edges and use a spudger to depress the other center oriented clips. Almost all of the good keyboards I've taken out work good as replacements. Great guide by the way! Helped a lot for my procedures at work.

    Mike The IT Guy -

  5. WGyysCTDdZraMnPc
    WGyysCTDdZraMnPc
    eCRQJBiWEAdWOIkl
    • Now the other side.

  6. TreTPPJwXlUl2Mxl
    • Remove the keyboard, freeing any clips that didn't come detached in the last step.

    • When installing the new keyboard, it is necessary to push down all around the keyboard about every inch, including in the middle. You'll notice that the backplate comes up to meet the keys in certain spots, and that is where you press down to set the clips.

Conclusion

To reassemble your device, follow these instructions in reverse order.

Isaac

1095 Reputation

0 comments