Introduction

In this guide we will show you how to properly, and safely, remove and replace your laptops track pad.

  1. 6utaA1NGCadsqx3H
    6utaA1NGCadsqx3H
    ZuduPXqPs4kvEKH1
    • Use the #J0 screwdriver to unscrew the seven 4mm screws located around the back panel.

  2. HWtQKSLbCrZ1NMys
    HWtQKSLbCrZ1NMys
    wti6JJIFndYD2PTS
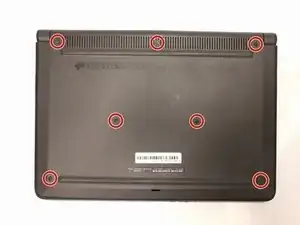
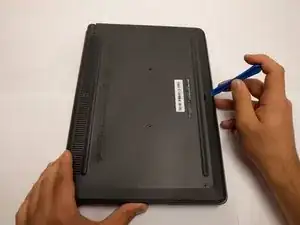
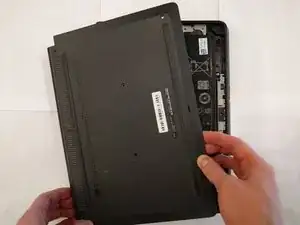
    • Use the plastic opening tool to gently pry around the four sides of the back panel until the panel is fully released.

    • Taking the back cover off of the computer may require more force than expected. When using the opening tool, be careful not to use too much force on it, and make sure all the screws are removed.

  3. ANj23Acsyvya11FA
    ANj23Acsyvya11FA
    6aYnubOE5KQNDtme
    Jq4NgnuRjvHR2Mym
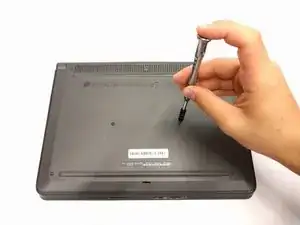
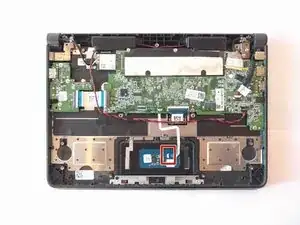
    • Using a pointed metal spudger, pull the tiny switch on top of the ribbon cable port away from the wire insertion to unlock it. Then gently remove the ribbon cable that connects the trackpad to the motherboard.

    • Use caution when removing ribbon cables as they may tear if too much force is applied.

    • Make sure the switch is lifted before pulling out the ribbon cable. Failure to do so can damage the locking mechanism.

  4. ihrmgSQJosRObIir
    ihrmgSQJosRObIir
    ZkMwAox3LjXaTmVc
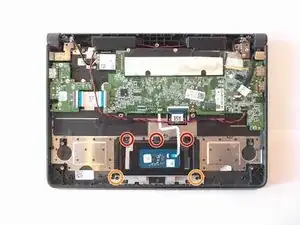
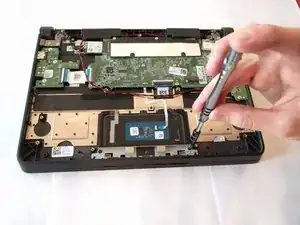
    • Using a JIS #0 screwdriver, unscrew the three 4 mm screws securing the trackpad in place.

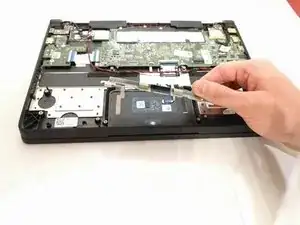
    • Using the JIS #0 screwdriver, unscrew the two 4mm screws that hold the metal clicking mechanism in place.

  5. GWtbAUDRVMXki6gC
    GWtbAUDRVMXki6gC
    DBREvmRLsDlR4OQD
    • Gently lift the metal click bar off of the trackpad.

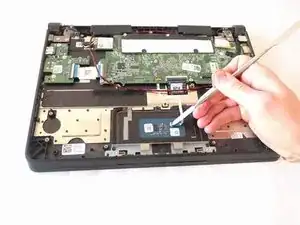
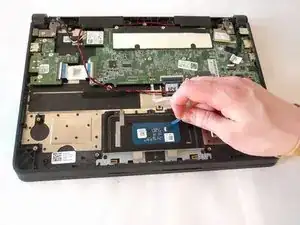
    • Lift the trackpad with the pointed metal spudger from any side to free the trackpad from its position.

Conclusion

To reassemble your device, follow these instructions in reverse order.

Joseph Silveira

Member since: 19/10/17

401 Reputation

0 comments