Introduction

This guide demonstrates how to replace the touch pad of your device. The touch pad may become damaged or malfunction after extended use, and replacing it is very straightforward and should not take long.

  1. kK2ZURg2UJNDnSxP
    • Set your laptop upside down on your work space.

    I usually skip most all of this and start with the bezel, disconnecting the screen wire AT THE SCREEN, and not at the motherboard. 4 screws around the bezel, and 4 screws in the screen. Leave everything connected and skip to step 12.

    Denton Holland -

  2. SroJvXMZOGPYBNm3
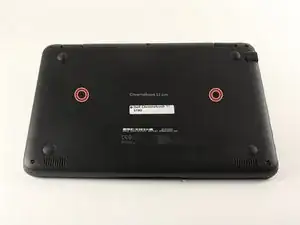
    • Using tweezers, remove the circular stickers that are covering the two screws near the middle of the back cover. Stick them to the laptop next to the screws.

    -coordinate color of bullet points with markup

    -perhaps say "...in the middle of the back cover" instead of "at"

    Daniel Leon-Gijon -

  3. F5gT6g6IIH5hyGTA
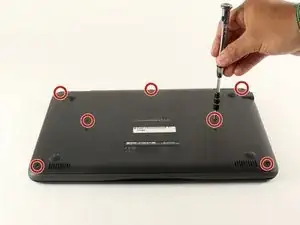
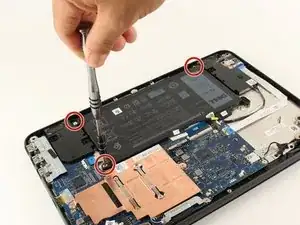
    • Using a Phillips #0 screwdriver, loosen all seven 2.5mm screws on the back cover of the device.

    • These screws will stay attached to the back cover, so just loosen them until they rattle around.

    -coordinate color of bullets with markup

    Daniel Leon-Gijon -

  4. SFwKeE14cNHYLkYE
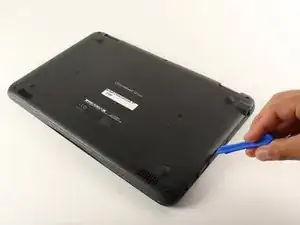
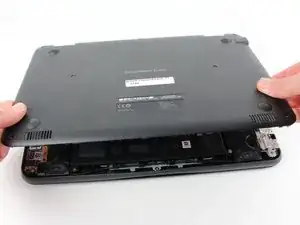
    • Using a plastic opening tool, begin to separate the back cover from the body of the computer.

    • If you have trouble prying a particular part of the back cover off, make sure that the nearest screws are fully loosened.

  5. GytiuSLFBHZClcbZ
    • Using your hands, pull the back cover fully off of the body of the computer.

  6. Y6crYUCLDf1kvSH3
    Y6crYUCLDf1kvSH3
    TjX6MBym5ka1KRtC
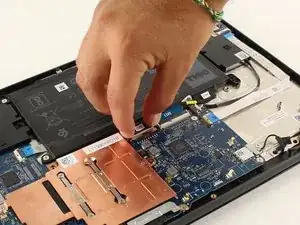
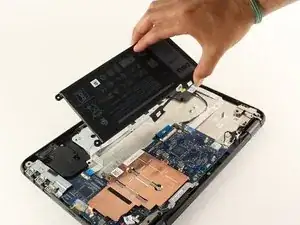
    • Unplug the battery from the motherboard by gently pulling the black cable header from the motherboard towards the battery.

    • You can locate this cable by checking that its other end connects to the battery. It has black protective wrap.

    -coordinate color of bullet with markup

    Daniel Leon-Gijon -

  7. RYuccZKNNcehUGji
    • Using a Phillips #0 screwdriver, remove each of the three 3mm screws from the battery.

    -coordinate color of markup with bullet

    Daniel Leon-Gijon -

  8. FlhMUgvKM1DZjgfJ
    • Lift the battery away from the computer to remove it.

    • If there is any resistance to the battery being removed, make sure that all of the screws have been properly removed and that nothing is blocking the battery.

  9. QZituegCME4RwN2v
    QZituegCME4RwN2v
    iYiVDVcHV5SjVsKo
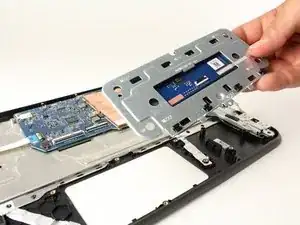
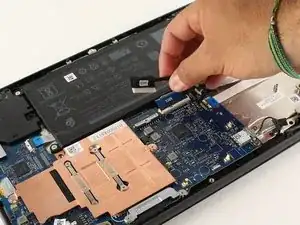
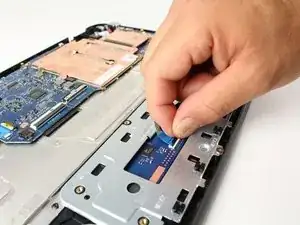
    • Unplug the touch pad from itself by lifting up on the connector and pull out the ribbon cable.

  10. UVeETRWFALdsSt3k
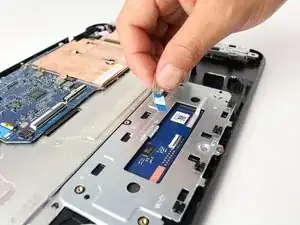
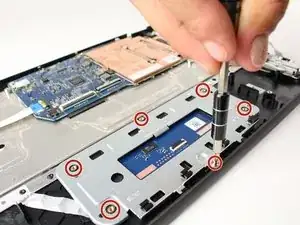
    • Using a Phillips #0 screwdriver, remove the five 2mm and single 3mm screws. Set the screws aside and note that they are for the touch pad.

    • One screw will be slightly smaller in size than the other five.

  11. ZtgFJWOrSU5whOv6
    • Lift the touch pad, with it's bracket, away from the computer to remove it.

Conclusion

To reassemble your device, follow these instructions in reverse order.

Devon Paul

Member since: 26/04/17

1206 Reputation

0 comments