Introduction
The keyboard is a part that is commonly in need of replacement, whether from liquid spills, debris, or damaged keys. This replacement shouldn't take too much time, but can fix a major pain in the neck.
In the guide images, some other components have been removed for clarity and simplicity, but the keyboard is still replaceable if you just follow the steps listed here.
-
-
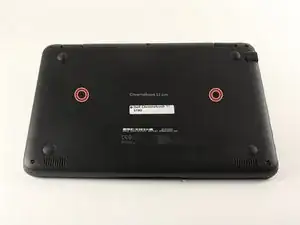
Using tweezers, remove the circular stickers that are covering the two screws near the middle of the back cover. Stick them to the laptop next to the screws.
-
-
-
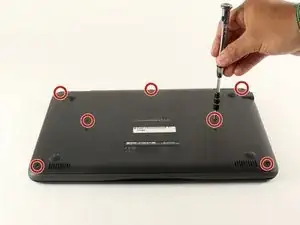
Using a Phillips #0 screwdriver, loosen all seven 2.5mm screws on the back cover of the device.
-
-
-
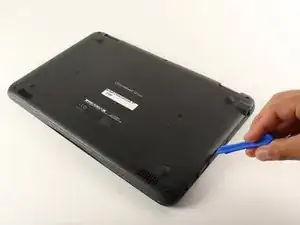
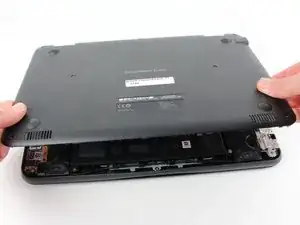
Using a plastic opening tool, begin to separate the back cover from the body of the computer.
-
-
-
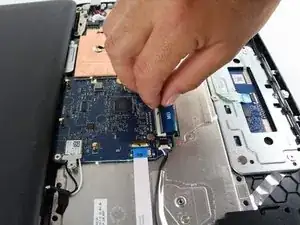
Disconnect the ribbon cable from the motherboard. To do this, lift up the black tab hinge securing the ribbon cable and pull the cable up and then out of the port.
-
-
-
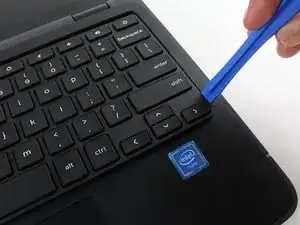
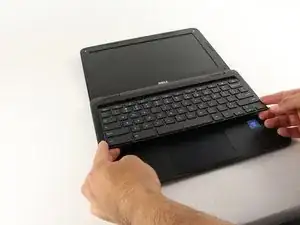
Release the keyboard from the body. To do this, push on the two keyboard release holes with something thin and cylindrical like a spudger or a pencil.
-
-
-
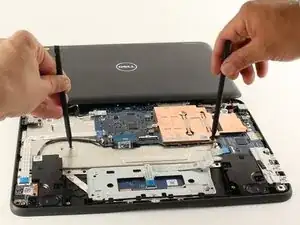
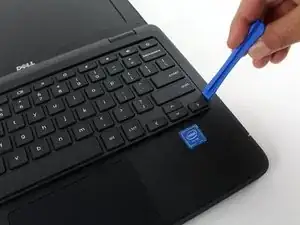
Remove the keyboard from the body. To do this, use a plastic prying tool to get under the keyboard and pry it up from the computer body.
-
-
-
Once you have separated the keyboard and the body using a spudger or plastic opening tool, use your hands to pull it away from and off of the computer.
-
To reassemble your device, follow these instructions in reverse order.
One comment
How I will fix the chromebook 11 now?
I usually skip most all of this and start with the bezel, disconnecting the screen wire AT THE SCREEN, and not at the motherboard. 4 screws around the bezel, and 4 screws in the screen. Leave everything connected and skip to step 12.
Denton Holland -