Introduction

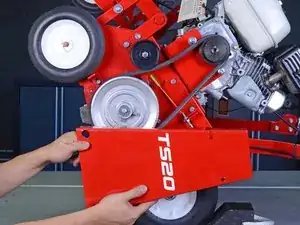
Follow this guide to remove the belt guide in order to replace it, or to access the belt and pulley.

  1. g5vFOM5NkuWfaZOH
    g5vFOM5NkuWfaZOH
    GPEPEXG2E4UjQyny
    • Before you begin, ensure that the machine is powered down and cool to the touch.

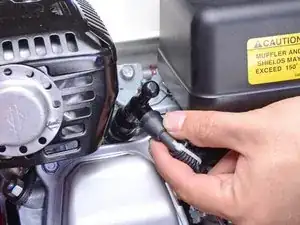
    • Disconnect the spark plug to prevent the engine from accidentally starting up during service:

    • Grab the plastic housing at the end of the spark plug wire.

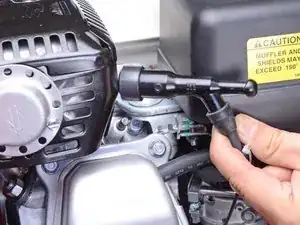
    • Pull firmly to disconnect the wire from the spark plug.

  2. uLxYVtuDSmeAY4Dj
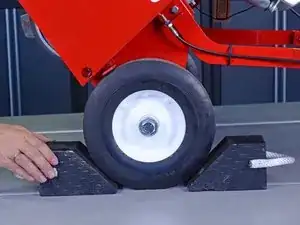
    • To prevent the over seeder from rolling during service, place wheel chocks behind a rear wheel.

  3. eQaTMYJIS4puU6Oc
    eQaTMYJIS4puU6Oc
    rfodWBojiJGoiqqy
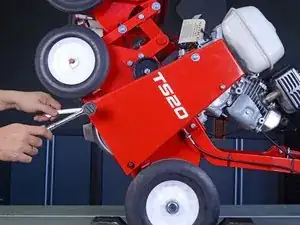
    • Push down on the main handle to tilt the over seeder back on its rear wheels.

    • Place some weights on the handle, or tie the handle down, to prevent the machine from falling forward.

  4. aOgR6qtZWTjvxSKh
    • Place a wheel chock in front of a rear tire to keep the machine in place.

  5. GlLc1P4dxXmXTwmL
    GlLc1P4dxXmXTwmL
    xTov3IVI3YyHojQU
    Y1SRIE1SUHIrhMRV
    • Remove the four lock nuts securing the belt guard:

    • Two 1/2" lock nuts

    • Two 7/16" lock nuts

    • These lock nuts are recessed and require a socket extension to access.

    • Use box wrenches to hold the corresponding bolts in place as you loosen and remove the nuts.

  6. t2ArJIrlRMfc4JCB
    t2ArJIrlRMfc4JCB
    DEgKwWHtppSdeYbi
    xQdQLcxss2mv4HMp
    • Remove the belt guard.

Conclusion

To reassemble your device, follow these instructions in reverse order.

Arthur Shi

Member since: 03/01/18

248651 Reputation

0 comments