Introduction

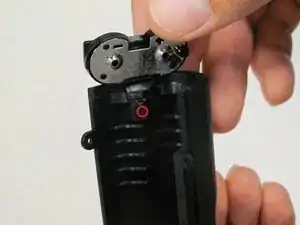
This fix is safe and only requires a screwdriver.

  1. TGVWrjnYLtjkMFA2
    • Remove the two 4.8 mm black screws above the lens on the front of the camera.

  2. IPLNHYPpHmCOHSJf
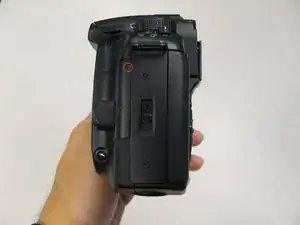
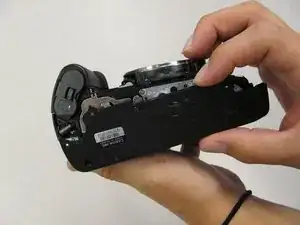
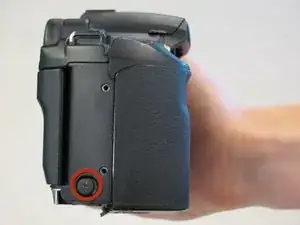
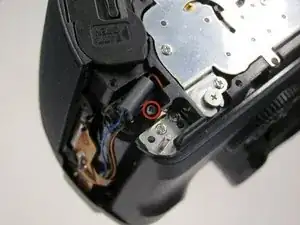
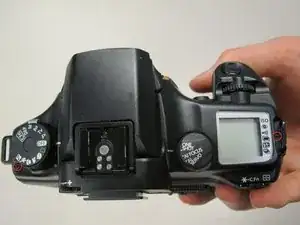
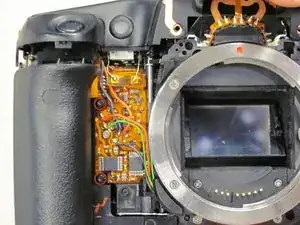
    • Remove the 4.3 mm black screw under the lens ring, and the 4.8 mm black screw under the camera.

  3. SBZy1TStnuPPdPea
    • Remove the 4.8 mm black screw on the left side of the camera.

  4. DUJQI5mCdYhWNZHR
    • Remove the front panel by lifting it away from the camera's body.

    I need a video tutorial

    Abdullah dicky S -

  5. DpORiUgiQ21PZJPL
    • Remove seven 4.25 mm black screws on the bottom panel.

  6. aP5bpgQgLZ1EBByL
    • Remove the bottom panel.

  7. rHyyEu3oIHwOny22
    • Remove two 6.5 mm black screws from the panel.

  8. K2vWseLlnxl2rlrf
    • Remove the plastic remote control socket cap by pulling it straight out.

  9. XFBquRyNGIhOJyHt
    XFBquRyNGIhOJyHt
    eUUSqZTdNYZJLwxB
    • Slide the panel toward the bottom of the camera to remove.

  10. dIZpUQcqWNy3H5Il
    • Remove the single 4.8 silver screw from the control socket.

  11. yp4rknNv6wKta1Pr
    yp4rknNv6wKta1Pr
    jEeqoIxhBamJnJpN
    • The control socket is now secure by three wires.

    • Desolder connections to replace the remote control socket.

  12. mE64gtuBpWdshJaa
    • Slide the outer eyepiece upward to remove it.

  13. NFZJAjvj4maqofiX
    • Remove the two 4.75 mm black screws located on the top of the camera.

  14. YP5DkaZKpZZpM22p
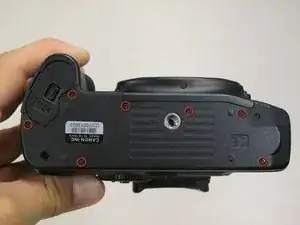
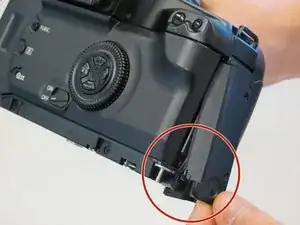
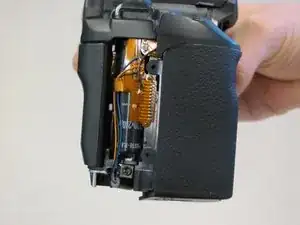
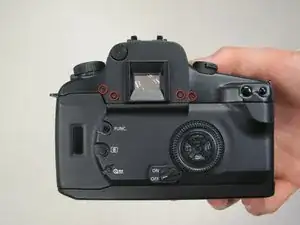
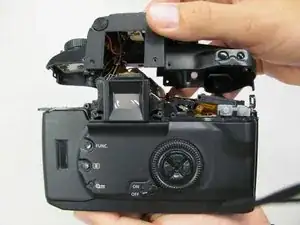
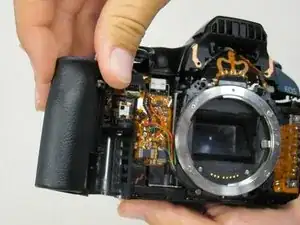
    • Remove the four 4.3 mm black screws near the bottom corners of the eyepiece at the back of the camera.

  15. UhnbNqYUoPMxWQGJ
    UhnbNqYUoPMxWQGJ
    fIIYRJmwdZZSkHVc
    • Slowly separate the top panel from the camera by pushing it upward.

    • Separating the top panel too far or quickly can damage the ribbon cable and connecting wires that are still attached to the top panel of the camera.

  16. vRfcXyfaYTgHIZJJ
    • Remove the two 5.5 mm screws from front of camera.

  17. LrWbwWCCbcR2eJGs
    • Remove grip panel.

  18. toKeJwgUHoQueBWO
    • Remove one black screw from battery door on underside of grip.

  19. fqJUoSJbrykiCBUw
    • Remove battery door.

Conclusion

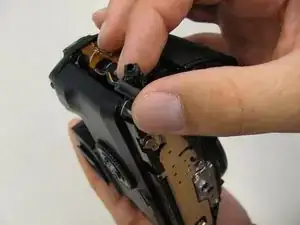
To reassemble your device, follow these instructions in reverse order.

Jackie

Member since: 17/04/11

236 Reputation

One comment

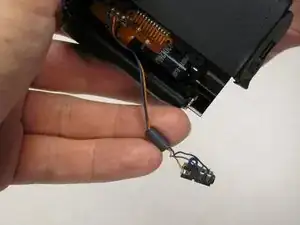
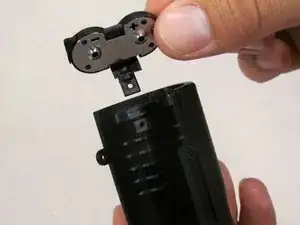
I was able to complete this by going from step 9 to 15. Oddly, I only had one screw to remove in step 15 but the grip piece easily slid out without needing to remove the top of the camera.

Alan -