Introduction

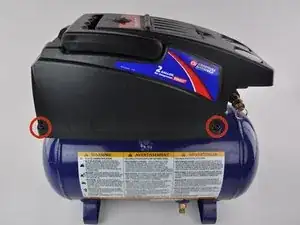
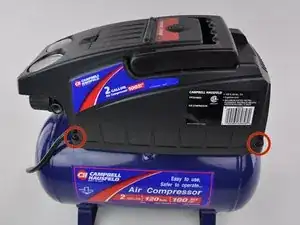
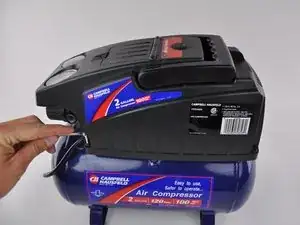
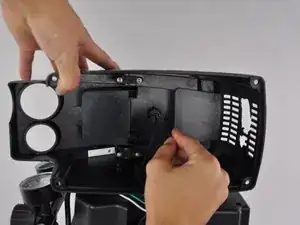
Removing the shroud of the compressor can be tricky because of wiring that is difficult to see during disassembly. Make sure you carefully read each step of this guide so you do not damage the compressor when removing the shroud.

  1. Qy2BNuucldpypTgD
    Qy2BNuucldpypTgD
    BXiBrIMG6C3QDE21
    BsPjSf3WXUOBxYXO
    • Unscrew the four 1cm long shroud screws using a 6mm Allen Wrench.

  2. QMveUWXroKKOqVD1
    QMveUWXroKKOqVD1
    IIOYC1a6vtIpECCL
    • Remove the plastic shroud from the compressor.

    • Do not pull the shroud too far from the compressor. You could damage the on/off switch wiring.

  3. 1NSrXa3DYSZHDiDp
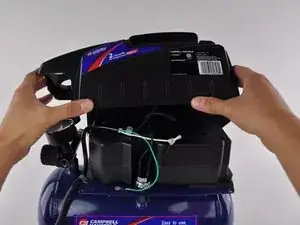
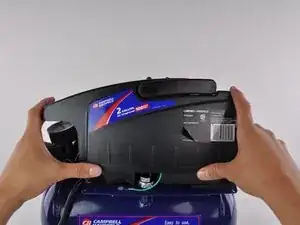
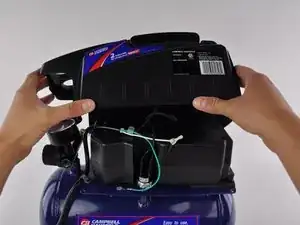
    • Gently pull the wire attached from the pressure switch to the on/off switch.

    • It should come off the pressure switch with ease.

    • Make sure you are pulling the correct wire. The pressure switch could be in a different configuration on your compressor than in the picture.

  4. hLwthEANdYbaBZkC
    • Gently pull the wire connected from the on/off switch to the motor of the compressor.

    • It should be the only wire keeping the shroud from being lifted from the compressor.

Conclusion

To reassemble your device, follow these instructions in reverse order.

Caleb Davies

Member since: 07/10/14

528 Reputation

0 comments