
Introduction
We will show you how to replace the heat controls for the oven and toaster settings. You will have to pop off the control knobs, take off the top cover, and remove screws in order to get to the controls. If your timer is not working, then unfortunately you will need to buy a new toaster over. Make sure you to place the screws back in the correct places and not to rip the heat shielding.
-
-
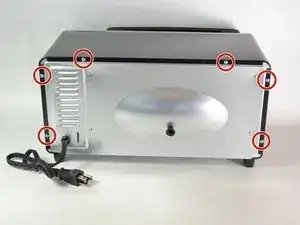
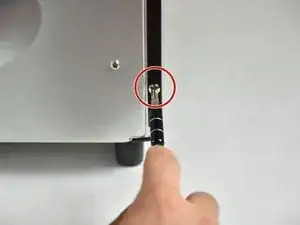
Remove the two 13mm screws, located between the feet on the bottom of the cover, using a Torx T15 screw driver.
-
On the TO1313SB, a Security Torx T15 driver is required — the screws have a center pin that prevents use of a regular T15 driver.
-
-
-
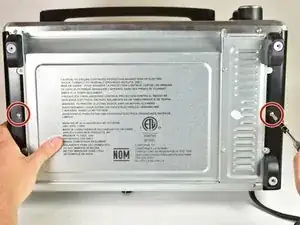
Using the metal spudger, carefully pry out the rubber base on each foot to access the screws.
-
-
-
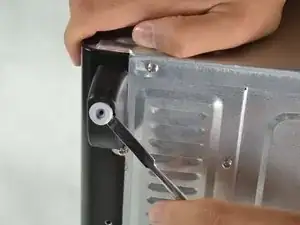
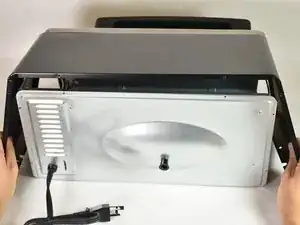
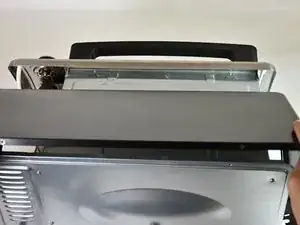
Remove the back cover by gently pulling the sides of the cover apart from the rest of the oven. Then, tilt the cover towards the face and pull back at an upward angle. The cover should slide right off.
-
-
-
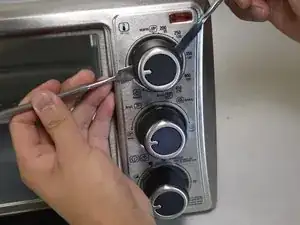
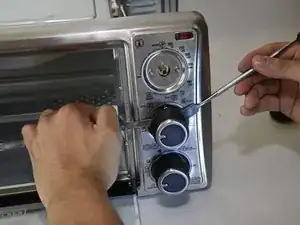
Remove the two 5.5mm screws, that are holding the oven controls to the face, using a #2 Phillips head screwdriver.
-
-
-
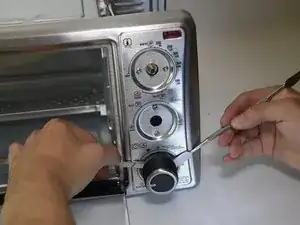
Remove the two 7.5mm screws, that hold the toaster controls to the face, using a #2 Phillips head screwdriver.
-
-
-
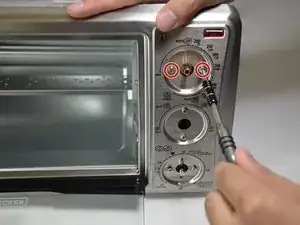
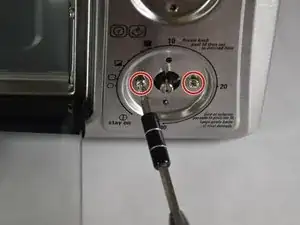
Remove the two 5.5 mm screws, that hold the timer to the face, using a #2 Phillips head screwdriver.
-
-
-
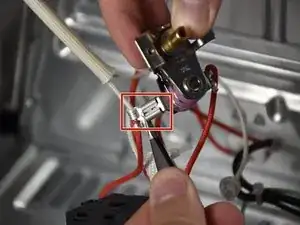
Press down the metal tab on the oven heat control connector using needle nose pliers and pull outwards to remove the connector.
-
-
-
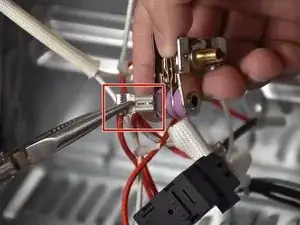
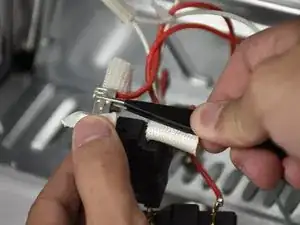
Using your thumb, carefully peel back the heat shielding from the connector on the toast heat control.
-
Press down the metal tab on the connector using needle nose pliers or tweezers.
-

To reassemble your device, follow these instructions in reverse order.
3 comments
I got to removing the “back” cover. Black cover perhaps? There seem to be silver tabs from the front silver facing that are defeating my attempts to remove the cover.
Joe -
Hi Alejandro, could you tell me how to replace the heating elements. Or maybe just how to access them for better cleaning? Or maybe just suggestions on how to clean them while in place since they do rotate? Vinegar-water isn’t working. Thanks!!!
Where can I get a new toast/ heater control unit?