Introduction

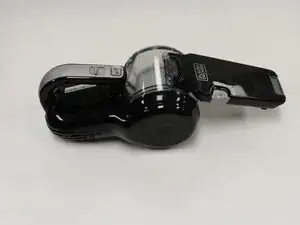
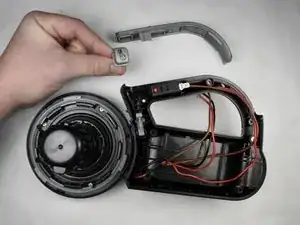
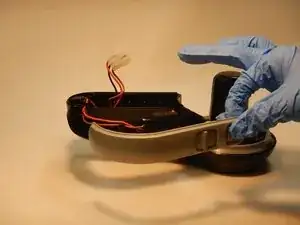
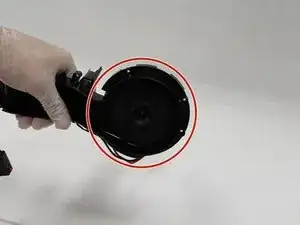
Use this guide to replace a faulty Black and Decker Pivot MAX (Model BDH2000PL) Motor.

The motor is responsible for rotating a fan which creates suction. The motor is the only component that causes motion while running and thus it is the only source of producing any potential noise issues. If the motor is making unusual noise, then it probably has a bad bearing or a damaged impeller. If your device is fully charged and turns on but does not run at all, check for any potential clogs. If nothing is clogged, the motor is likely the issue.

It is recommended that before replacing the motor, ensure the battery and internal wiring is not the damaged. If needed, follow this link to find instruction for replacing the battery. If everything looks fine and the device still does not run, follow this guide to replace the motor.

Make sure to power off your device and disconnect from any external power source prior to beginning this guide.

  1. KJfkEpjEDehKuM15
    KJfkEpjEDehKuM15
    jwcWtQdAgPCF2SOR
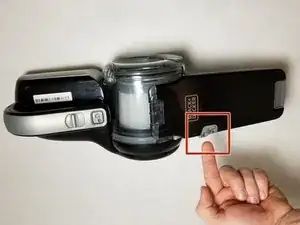
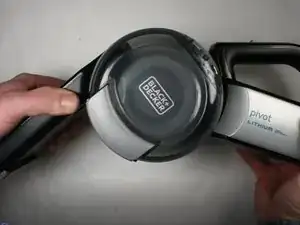
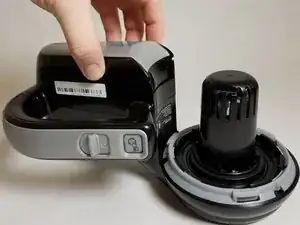
    • Press in and hold the release button.

    • Rotate the dust filter chamber counter-clockwise.

    • Remove the dust filter chamber.

    Don’t waste your time trying to fix, the battery pack was never made to be replaced. NO REPLACEMENT PARTS!!

    buchner.tarie -

    Too just troubleshoot the motor, after removing this section you can go straight to step 11. The pivot linkage referenced in a previous step is spring loaded and can simply be pressed down to rotate the gray ring and expose the screw heads in step 11. Disassembling the handle to remove it is not necessary. With the motor cover removed, the electrical connections are exposed. This is as far as I needed to go as I discovered the positive connector had become detached and simply needed to squeeze the connector for a tighter fit and placed back on the spade…reassembled and back in business.

    As far as the battery comment above…this is not the case either. I also accessed that to check it out. The battery pack’s cover comes right off and exposes the board and 5 standard cells. Didn’t disassemble further then that to see exactly what batteries they are as mine were in good health on the meter, but looked to be a fairly simple replacement if your comfortable soldering tabs on batteries.

    Dan C. -

    Replacing batteries in this battery pack is impractical. Even if you're adept at repairing such assemblies, it takes 5, LGEAHB71865 cells, which can't be found, at all. There are cells that can replace those. But, as the cells go for around $40 to $50 for a four pack, by the time you acquire the 5th cell, you may as well just by a new vac for around $75.00 on Amazon! Plus, if you do replace them, count on an hour, or 2, of your time disassembling & reassembling them. While I find this to be a really powerful & serviceable vacuum in all other respects, the simple fact that you can't replace the battery pack for a reasonable price, makes it a rip off! Still, Black and Decker did make up for this oversight a couple of years ago, when I called them to ask about new batteries for my vac. The woman politely explained that they don't sell the batteries, but then sent me a free replacement vac for my trouble. So, they're a good company, but I wouldn't count on getting that same deal when your batteries fail!

    Stan -

  2. erJ6nNK4OyicE4WQ
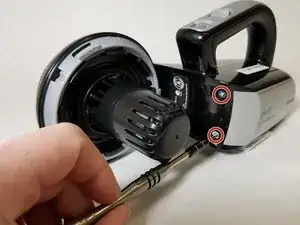
    • Remove the two 10 mm screws from the motor casing with a Phillips #1 screwdriver.

  3. piQq5AD6C6lWAMHA
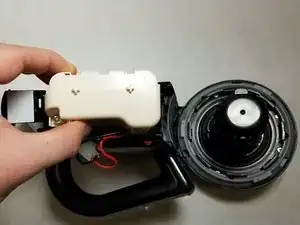
    • Pull the battery cover up and then slide it away from the motor to remove.

    Slide TOWARD the motor while lifting up the end of the cover that you just unscrewed. A gentile wiggle helps if it feels stuck

    Andrew Stanton -

    Uh, the above comment is incorrect, the first one is right. You HAVE to slide it AWAY from the motor, there are two tiny plastic teeth on the cover next to where the charger contacts are, those teeth are what make the cover feel stuck, you must GENTLY slide while lifting the unscrewed end so these teeth pull out, otherwise if you force it they’ll break and you’ll need duct tape to hold your BDH2000 together.

    Alan Molox -

    I had to lift and pull toward the motor like Andrew wrote….

    Ralph Rivera -

    You need to lift and slide away from the motor. As Alan stated, there are two plastic teeth on the cover near the charger contacts. You need to apply a fair amount of force to slide the teeth out.

    Robert -

    There doesn't seem to be a way to 'gently' slide it away from the motor.

    JxT -

  4. jpWoNvGiuOVMb5WL
    • Remove the battery unit by pulling it out of the main body.

    What does one do with the %#*@ motherboard? How does it come away from the battery?

    Hannah Dean -

  5. dllKvlCLHsgNaWL2
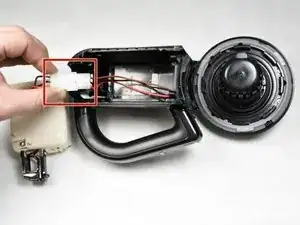
    • Disconnect the quick connect wire harness that connects the motor and battery located in the battery storage compartment.

    My vacuum has no disconnect. I am dead in the water, please help.

    knoel34 -

    Instruction were wonderful. Where can I get new batteries?

    bob_fulwider -

    +1, any link to where to buy the batteries?

    my vacuum is about 3 yo and now it stops working in a minute from full charge

    I disassembled it and checked the battery module, it is soldered and combine in a hard way to replace battery units one by one

    B&D doesn’t suggest any parts to replace entire battery module

    any advice other than to buy a new cleaner?

    Sergey Troshin -

    Same here: it would be really hard to replace individual batteries (I bet it was done on purpose). Any advice?

    fagnelli1 -

    Batteries are unavailable anywhere……,useless

    Matt Berthelot -

    Mine has no disconnect either. Wires are soldered to a circuit board.

    Ralph Rivera -

    Desolder it.

    Jeff -

    Agree mine is wired directly. Spent a lot of money on this. Sad design

    Diann Gilbert -

    Very disappointed that this model has no replacement battery packs. Spent time trying to fix only to find part never made for it.

    Lasts just over 2 year warranty - disposable product!

    buchner.tarie -

    After much research on troubleshooting how to fix the problem of the vacuum shutting off shortly after sitting on the charging station for hours, disassembling the vacuum exactly as shown in this ifixit site, most previous comments are spot on. There is no way to replace the Lithium battery because it can’t be disconnected since wires are soldered onto the circuit board. A huge negative to ever buying a Black & Decker Pivot or similar ever again. They had a good thing going while it lasted. Too bad their design is flawed, probably intentionally.

    Susan Adams Brown -

    there are no replacement batteries anywhere!!!!!

    Bruce Bethune -

    Your link to replacement batteries returns no results. The battery is it designed to be replaced. JUNK!

    Rio roo -

    https://secondlifestorage.com/index.php?... for a detailed solution: I am now in the process of replacing the cells. I will inform my progress here.

    Wim Smits -

    Welp, the inside of mine looks nothing like that.

    And they don't really sell already made 5s1p packs in the arrangement they need to be in to fit in this thing. So you've gotta spot weld your own.

    Buy a vacuum that takes regular tool batteries next time

    Jeff -

  6. yIxfUFJBFJq5VZfU
    • Remove the handle cover by removing the three PH1 20mm screws

    On my vacuum I also had three screws on the other side of the handle.

    Dominik Feiler -

  7. d6YVmk2DPlnTVsso
    • Pull out the pivot lock button.

  8. ASb1oL1lYjpbYUjK
    ASb1oL1lYjpbYUjK
    GASyB1d3Q6SPaRP2
    • Gently lift the battery tray from the chassis.

  9. EMROI5wiRpc5DOOR
    EMROI5wiRpc5DOOR
    UeBfRkaN44UTCfId
    • Pull the pivot linkage from the handle.

  10. JDJajyrSVjQRHudF
    • Remove the grey handle and set it aside.

  11. FcN4Kigp6xVsPAmr
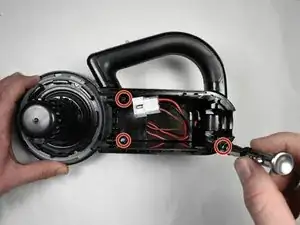
    • Remove four Phillips #1 screws from the motor housing.

  12. gWxQJEkeUbSjbFdU
    • Lift the motor housing straight up to remove it from the rest of the vacuum.

  13. UIqwLWXrGZXQQMRh
    UIqwLWXrGZXQQMRh
    yjHeHMQHXwmgncIN
    • Gently pull the red and black wires from the top of the motor.

  14. VheMGo1P4PgjnJQD
    • Lift the motor casing from the outer shell of the vacuum by pulling up on the motor casing away from the outer shell.

  15. OKyOrlJr3DPikYDQ
    OKyOrlJr3DPikYDQ
    IumnGtGfWWTNODVw
    • Turn over the motor casing and locate the fan disc underneath where the motor was.

  16. VuvApnIcMUmL4oKg
    • Insert one metal spudger underneath the fan disc located on the opposite side of the motor.

  17. BPJWNIMg2dwWGWqJ
    • Use a second metal spudger to pry up the fan disc.

  18. E6JeXrMMUrwtxSTC
    • Pull up on the fan disc to reveal the motor screws.

  19. iqwLHH1bKpIH4vGI
    • Remove the two 20mm Phillips #1 screws from the bottom of the motor under the fan disc.

  20. GZN22B5urDVSe5pC
    • Flip over the motor casing and remove the motor to be replaced.

    Where can I buy a 90553498 motor? I was only able to find 90553498-02. Do you know if it is compatible? Black & Decker refuses to provide any info.

    Albert Einstein -

    I’m looking for the 90582024

    Visually speaking they are quite similar, I wonder if they are interchangeable

    Paulo Ortega -

Conclusion

To reassemble your device, follow these instructions in reverse order.

Avery Hanulcik

Member since: 15/09/20

316 Reputation

2 comments

Unbelievable! They sell a replacement motor but not replacement batteries! Wow!

Robert Birmingham -

I needed to access the ultimate exit of the unit to clean and clear the filtration media, but was unsuccessful. Can the issue be clarified? My email address is 8tolive@gmail.com

R. J. W. -