
Introduction
Black and Decker only replaces the switch with a complete motor, so this guide will replace the switch with a commonly available switch.
Tools
-
-
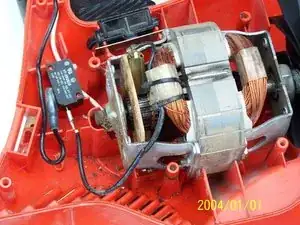
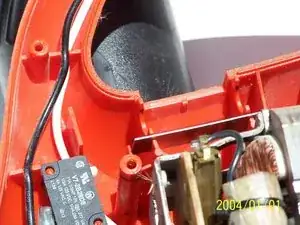
Remove rear cover. It helps to hold the plug tight to the front housing so the wires stay in place.
-
-
-
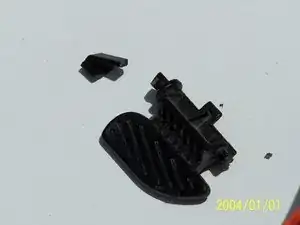
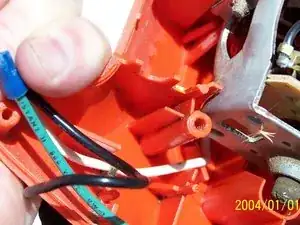
Notice the switch is fine, it's simply the plastic armature that is broken.
-
The broken piece is only included with the motor and switch.
-
-
-
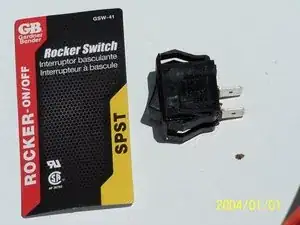
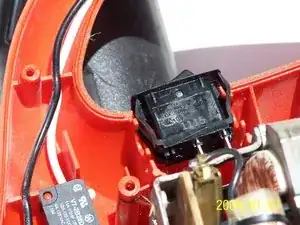
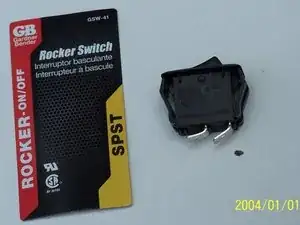
This switch is easy to find. It's just a single position single throw switch.
-
I was able to buy it at a home improvement store for $4.00.
-
It even fits nicely in the cutout for the original switch/armature.
-
-
-
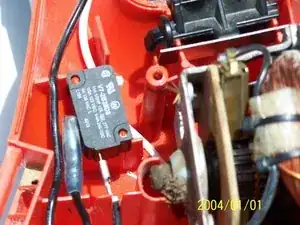
Remove the switch/armature.
-
Remove the tension plate (the metal piece).
-
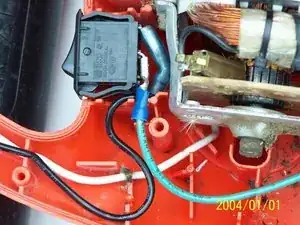
Put in the switch. The terminals are at a bad angle, so we will bend them to fit.
-
-
-
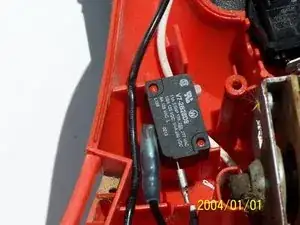
Now remove the actual electrical switch. No need to worry about the wiring, its just open and closed.
-
-
-
The black wire gets a new wider terminal and just plugs on.
-
The other wire needs to be a bit longer, so it gets an extension and a new terminal.
-
I used simple crimp on terminals and splice.
-
-
-
There was not enough room for the terminal to pass by the plastic housing. I just removed a little and then routed the black wire under the switch.
-


To reassemble your device, follow these instructions in reverse order.
3 comments
This works great. Thank you.
Scot,
Thanks so much for your excellent information!!! The exact same part broke on mine today. I looked at your outstanding detail on what to do. I looked through my stash of stuff and found a toggle switch just like the one you showed but from a different manufacturer. I just got done putting it in as you described and it is better than new now. Works like a champ!
Thanks so much,
John Brodrecht
Casper, WY
This was an excellent post with the perfect amount of detail and clear pictures!
I only wish you had the wiring part in the same detail because I think my wiring is faulty. I will look for your posts again for guidance. Thanks
Julie -