Introduction

This is a prerequisite-only guide! This guide is part of another procedure and is not meant to be used alone.

  1. ux2ZbNqTPJE53NSn
    • Be sure to power off your phone before you begin.

    • Apply a heated iOpener to the rear glass for two minutes to loosen the adhesive beneath.

    • A hair dryer, heat gun, or hot plate may also be used, but be careful not to overheat the phone—the AMOLED display and internal battery are both susceptible to heat damage.

  2. U4JRKisVYhFnKhNW
    U4JRKisVYhFnKhNW
    gTwNEbnkFIHnQk5N
    ZjJeMXTEDWBSQPhg
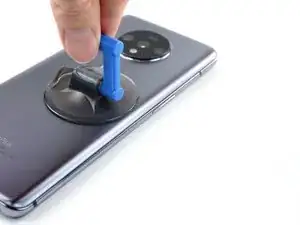
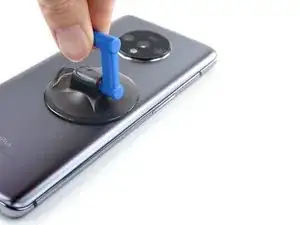
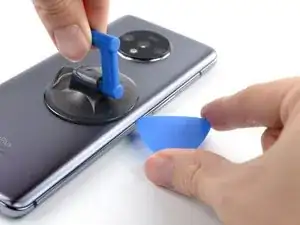
    • Apply a suction handle to the right edge of the rear glass.

    • If the back cover is cracked, the suction handle may not stick. Try lifting it with strong tape, or superglue the suction handle in place and allow it to cure so you can proceed.

    • Pull on the suction handle to create a gap between the rear glass and the frame.

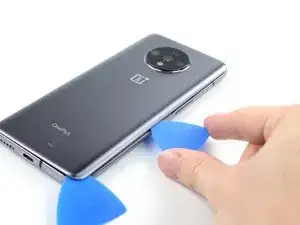
    • Insert an opening pick into the gap.

  3. SeHJ4CjMT6OLuvnF
    SeHJ4CjMT6OLuvnF
    GTEPtE2nDc2dDfCk
    qq6PQYu2ORWSKItV
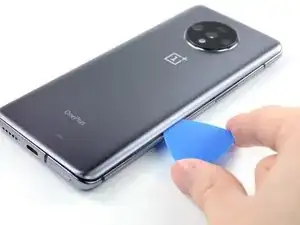
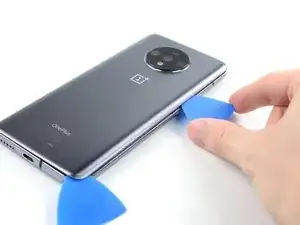
    • Slide the opening pick along the edge to the bottom right corner.

    • Leave the opening pick in the bottom right corner to prevent the adhesive from resealing.

    • Once you have inserted an opening pick, feel free to remove the suction handle or continue to use it for a better grip during this process.

  4. yUdsSgOPGcQCMdVf
    yUdsSgOPGcQCMdVf
    yXA6OUiZ6ZIxGV2V
    qik6oMyAQfXrXCgX
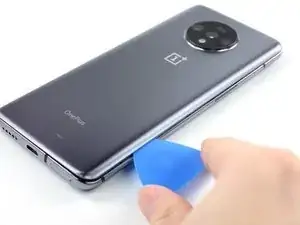
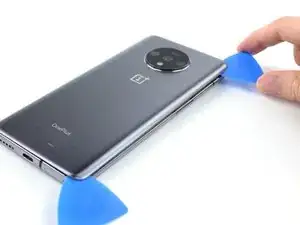
    • Insert a second opening pick in the gap you just created.

    • Slide the opening pick along the edge to the top right corner.

    • If you have trouble with slicing, you can use the iOpener again to soften the adhesive.

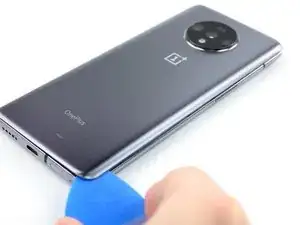
    • Leave the opening pick in the top right corner to prevent the adhesive from resealing.

  5. xMs6LJHdKakMYwTw
    xMs6LJHdKakMYwTw
    VwpRGYBOCHOupOtL
    GV52pVKb6QiDunh3
    • When you slice near the camera assembly, insert only the tip of the opening pick (~4-5 mm) to avoid damaging or smearing the camera.

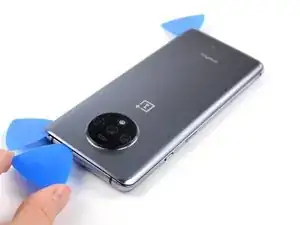
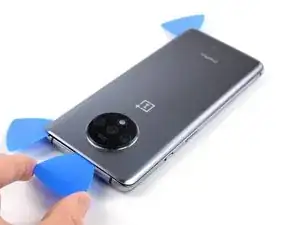
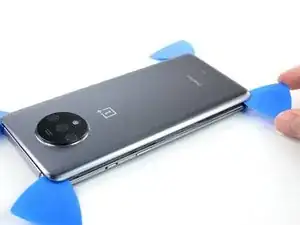
    • Insert a third opening pick under the top right corner of the rear glass.

    • Slide the opening pick along the edge of the phone to the top left corner to cut the adhesive.

    • Leave the opening pick in the top left corner to prevent the adhesive from resealing.

  6. mhdVgbDriw3rNH52
    mhdVgbDriw3rNH52
    CjDLpYW3vxwGbU2G
    WySCDhoKJB4FnCN4
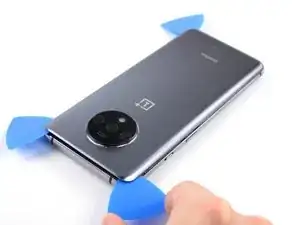
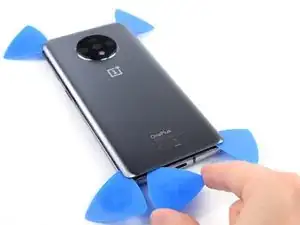
    • Insert a fourth opening pick under the top left corner.

    • Slide the opening pick along the edge to the bottom left corner to cut the adhesive.

    • Leave the opening pick in the bottom left corner to prevent the adhesive from resealing.

  7. 5Sui4XAfFxZc1LXB
    5Sui4XAfFxZc1LXB
    BD52InwikgCTE64Y
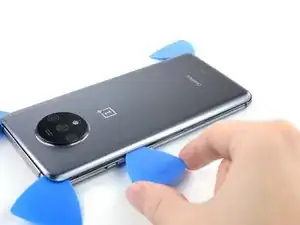
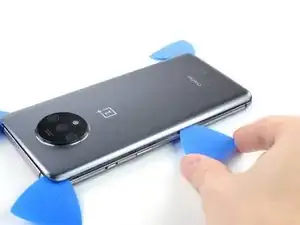
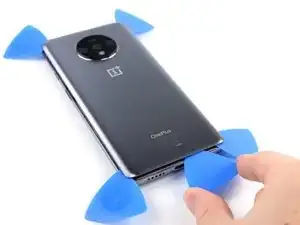
    • Insert a fifth opening pick under the bottom left corner.

    • Slide it along the the edge to the bottom right corner to cut the remaining adhesive.

  8. UFWvVReBy4h6XwCm
    • Remove the rear glass.

    • Apply new adhesive where necessary after cleaning the relevant areas with isopropyl alcohol (>90%).

    • Secure the new back cover with pre-cut adhesive or double-sided adhesive tape. After installing the back cover, apply strong, steady pressure to your phone for several minutes to help the adhesive form a good bond—a stack of heavy books works well.

  9. G5xJUjYEA1FwmGjT
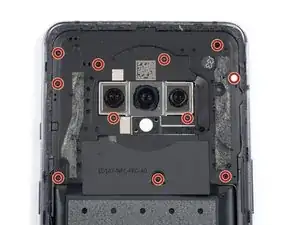
    • Use a Phillips screwdriver to remove the eleven 3.6 mm-long screws securing motherboard cover.

    • One of the screws is hidden beneath a white water damage sticker.

  10. gaqj6FbkbGYBOaBm
    gaqj6FbkbGYBOaBm
    TOsieFe5l6WGg5ss
    wq5TxPSGZP4gNZHg
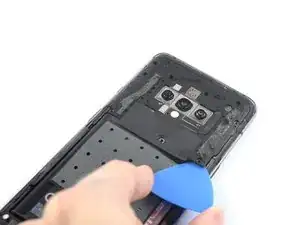
    • Insert the tip of an opening pick under the right bottom of the motherboard cover.

    • Slide the opening pick along the motherboard cover to release the plastic clips that hold it in its place.

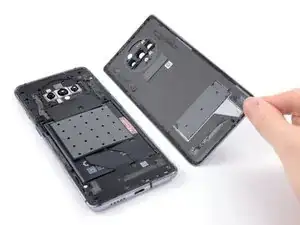
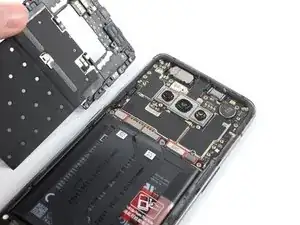
    • Remove the motherboard cover.

  11. HGsIQwZyf6gcjreS
    HGsIQwZyf6gcjreS
    dBZgbZW51iuOEXN3
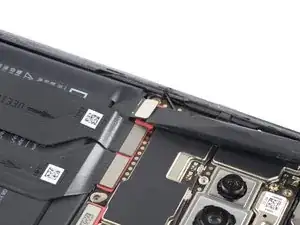
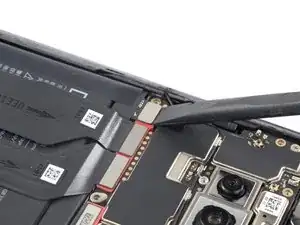
    • Use a spudger to disconnect the battery by prying the connector straight up from its socket.

Conclusion

To reassemble your device, follow these instructions in reverse order.

Manuel Haeussermann

Member since: 13/07/22

15147 Reputation

0 comments