Introduction

Prereq for disconnecting the battery of your Samsung Galaxy A10.

  1. DMFJWgCWY6EHY1RX
    DMFJWgCWY6EHY1RX
    DJTAsYKkHSjA2Arl
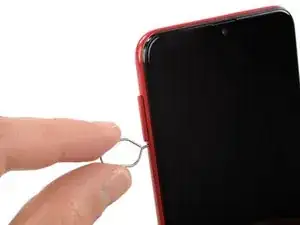
    • Insert a SIM card eject tool, a SIM eject bit or a straightened paper clip into the hole on the SIM tray located at the left side of the phone.

    • Press firmly to eject the tray.

    Habe nur das Frontglas mit Werkzeug gekauft. Kann ich nur dieses von vorn ersetzen, ohne das Gerät komplett zerlegen zu müssen? Sprich defektes Glas erhitzen und nach vorn abheben etc

    Hans Weschta -

    Hallo Hans, leider musst du dein A10 zerlegen um den Screen zu wechseln. Hier ist der Guide für deine Reparatur: Samsung Galaxy A10 Screen Replacement. Viel Erfolg beim Reparieren!

    Adriana Zwink -

  2. bJElOchHNPHPhoeE
    bJElOchHNPHPhoeE
    gEfr5ZF3AsBqlACm
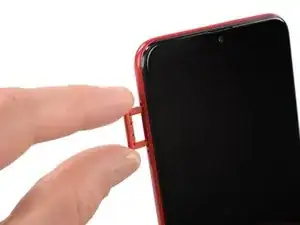
    • Remove the SIM card tray.

    • When reinserting the cards, make sure to properly orient them in the tray.

  3. m3WqmcClWjmDXxLI
    m3WqmcClWjmDXxLI
    xHAHdBfwWeDldcrE
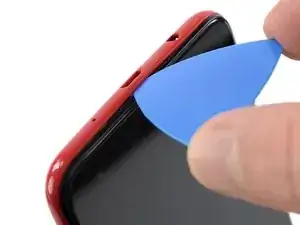
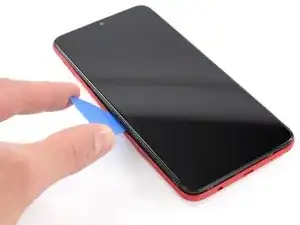
    • The back cover is held in place by plastic clips.

    • Insert an opening pick between the screen and the back cover on the bottom of the phone where the charging port is located.

    High located in charging pot only?

    AK FRIENDS -

  4. xud2yTYr4pLcDnSs
    xud2yTYr4pLcDnSs
    Cb5XNFcwDgQwUO2Z
    pIwbKEpiSpmogFsi
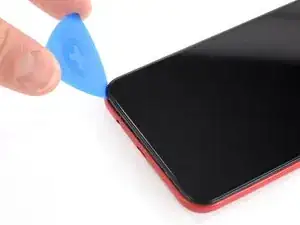
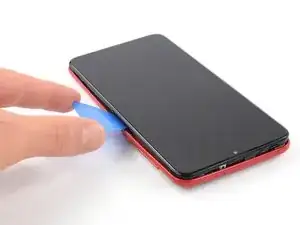
    • Slide the opening pick to the bottom left corner to release the clips.

  5. l2HDftUtCpsDFaYr
    l2HDftUtCpsDFaYr
    ZX1U1KMWmykNMJUp
    Yw5YfV3F5AtgPgRS
    • Slide the opening pick along the left edge to the top left corner of the phone, to release the clips.

  6. 1GSKt6KwTS1n6YhG
    1GSKt6KwTS1n6YhG
    YCqtI3LyccLEkuwF
    21ZhKbM6yTW1gRAC
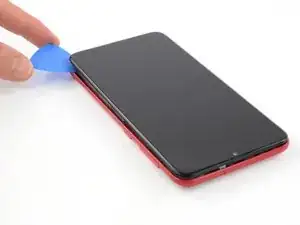
    • Slide the opening pick from the top left corner to the top right corner to release the plastic clips.

  7. gjHWFQwrIZiUqVF6
    gjHWFQwrIZiUqVF6
    NRJvqIBy3i4QhuXb
    JsTBw1XcSGyPywqQ
    • Slide the opening pick from the top left corner to the bottom right corner to release the remaining clips.

  8. yZYwMYobXe2aIQRI
    yZYwMYobXe2aIQRI
    XMTkKMd1cS2XvJjC
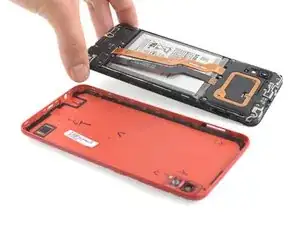
    • Remove the back cover.

  9. IocSILPudUDHGOKb
    • Remove the three Phillips #00 screws (3 mm length).

    On my A10E the second screw from the right on the top line of 4 screws had to be removed also

    Dora-Lynn Greene -

    It’s easier if you remove all 4 screws across the small top panel.

    Chris Halliwell -

  10. eC2agbvikKo6KnKy
    eC2agbvikKo6KnKy
    Hf1SZdiwWVPOLcMV
    ep13rD1eRboaboye
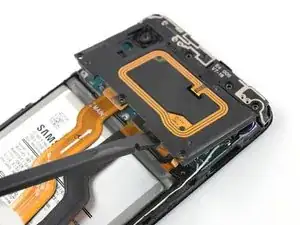
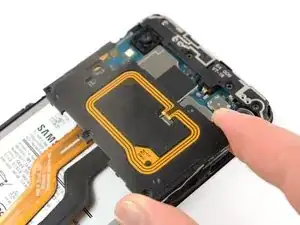
    • Use the flat end of a spudger to pry up the motherboard cover to release the plastic clips which hold the cover in its place.

    • The clips can be a bit resistive. If you're having trouble prying up the motherboard cover, twist the spudger to make the process easier.

    • Remove the motherboard cover.

    • The remaining plastic clips should release during this process or can be unhinged easily by hand.

  11. yMoqBSEN4f5VrrZI
    yMoqBSEN4f5VrrZI
    CLEc11N6Fodxb6Cx
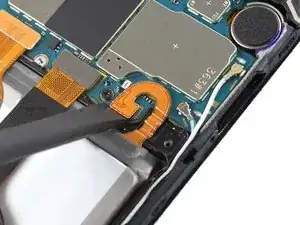
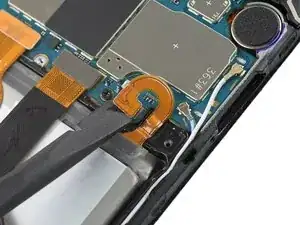
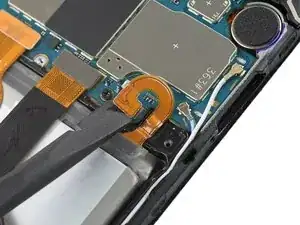
    • Use a spudger to disconnect the battery by prying the connector straight up from its socket.

Conclusion

To reassemble your device, follow these instructions in reverse order.
Adriana Zwink

Member since: 18/12/19

47683 Reputation

0 comments