Introduction

This guide will shows a step-by-step direction on how to repair a damaged SD card reader for Asus Eee PC 1005HA. If you are looking for more storage on your Asus Eee PC, then you are in the right place. Replacing the SD card will give you high-capacity memory in a small size. Before you think you can take on this project, make sure that you are skilled with wires because you will need to be careful when you are dealing with them in this guide.

  1. lQGQVRHQrnPkNfKS
    lQGQVRHQrnPkNfKS
    PNpgNfET461HoBVD
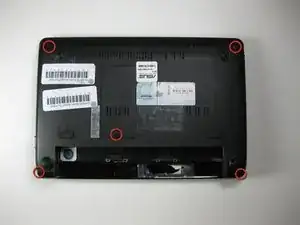
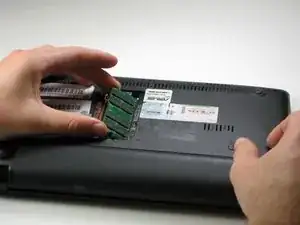
    • Flip the laptop over.

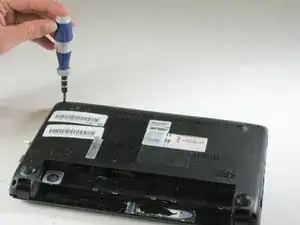
    • Using a Phillips #1 screwdriver, remove the five 5.65 mm screws.

    • The screw that holds the RAM compartment cover may be permanently connected. This screw is the center most screw of the five.

    • Be sure to have a designated place to hold the different sized screws removed in this guide.

  2. CgC2RwsdLZADG5Nq
    CgC2RwsdLZADG5Nq
    5QHEWPTjWYYH3WOA
    DXqabgRoTmBvtmmx
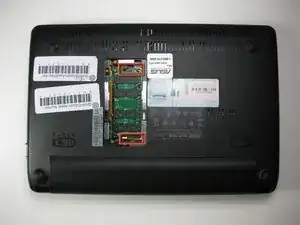
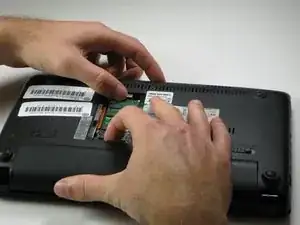
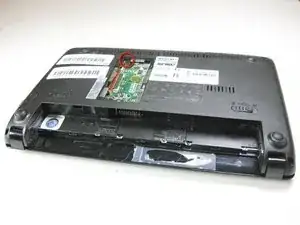
    • Remove the lid to the RAM compartment, if possible.

    • To remove the RAM, depress the tabs that are holding it in. These tabs are bound in red in the picture.

    • Use a spudger to unclip the edges of the cover if necessary.

    • The battery is shown still attached in the picture, but it should be removed prior to beginning this guide.

  3. IbKrNUhPt1rShckT
    • Use a Phillips #1 screwdriver to remove one 6.5 mm screw located next to the RAM.

  4. LfdbXUF5UiqtoWfO
    LfdbXUF5UiqtoWfO
    IVGJsFWfFBRWEPOr
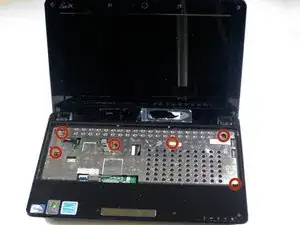
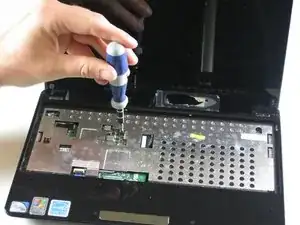
    • Flip the laptop back over, and open the display.

    • Use a Phillips #1 screwdriver to remove the six 5.5 mm screws on the inside covering.

  5. YTTUtcT24eAkP2wi
    YTTUtcT24eAkP2wi
    xbbRAHmWsiP1ZwV4
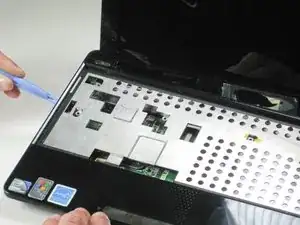
    • Detach the five plastic clips holding the upper and lower halves of the laptop together. These can be undone by carefully running a plastic opening tool between the top and bottom casing. There will be an audible audible "click" as the clips come undone.

    • The top plastic is fragile. There are also two miniature LEDs exposed along the top edge of the bottom casing at the bottom right that are easily damaged.

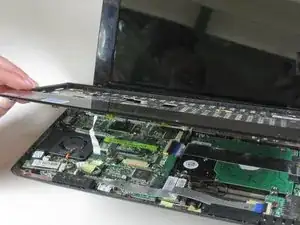
    • Once the five clips have been undone, carefully remove the upper half of the laptop.

  6. mrjnHsBFUQFrIC5k
    • Detach the track pad ribbon by using a plastic opening tool to raise up the black pad.

  7. OOMadiNQOffxDmNm
    OOMadiNQOffxDmNm
    IaT6LZEHFC4GgkBH
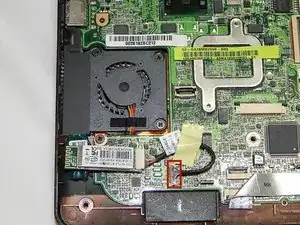
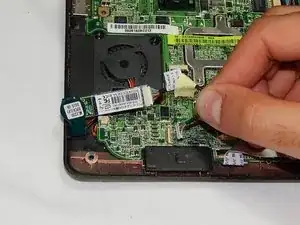
    • Detach the Bluetooth wire located below the fan by gently pulling it upward.

  8. FZUIYQuwBurZNAca
    FZUIYQuwBurZNAca
    JWmIHBf5rPQWEtyI
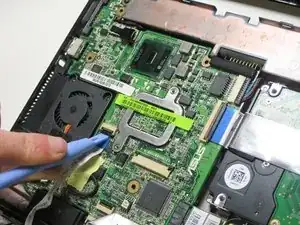
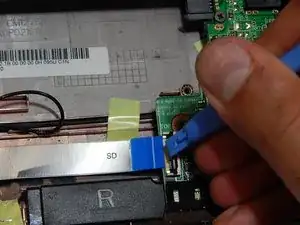
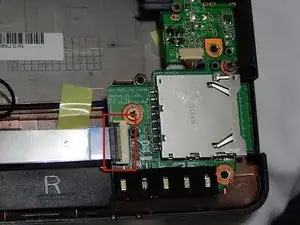
    • Detach the ribbon cable that connects the SD card module and the motherboard by lifting the black clips using the plastic opening tool.

  9. PN3XYP4rSdxoKx3Q
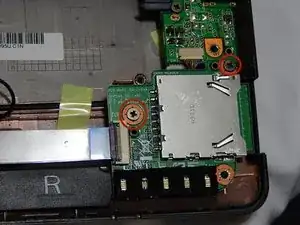
    • Remove the two screws holding the SD card panel in place.

  10. AFQP3Ypsy5oaw4P1
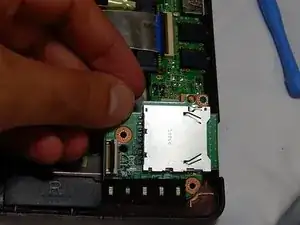
    • Gently lift up the SD card reader from its housing.

Conclusion

To reassemble your device, follow these instructions in reverse order.
Maged Hanna

Member since: 13/03/14

666 Reputation

0 comments