Introduction

This guide will show you how to replace the fan in an Asus Eee PC 1005HA laptop. There are some fragile pieces exposed during this process: the touch pad ribbon, the LEDs at the top of the casing under the keyboard, the WiFi antenna, and the motherboard. With some base level of care these components should be fine, they're meant to be moved around. Take it slow, it's easier than it looks!

This guide goes through the process of removing both the fan and the WiFi antenna, so if you're looking to replace either this will help. It also accesses the hard drive and SD card module, so it may help if you're looking to replace your hard drive or ensure your SD card module is working.

  1. TfEu6XmsKNXj3DYo
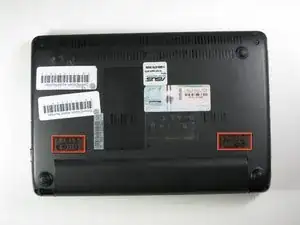
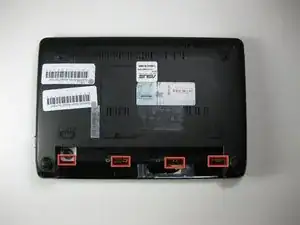
    • Lay the laptop upside down.

    • Locate the two battery lock tabs.

  2. LSdBmMNgYeDdcOdW
    LSdBmMNgYeDdcOdW
    aDlaTcZOOsOuAjQF
    4sPfDtLOJLJiJ1Uq
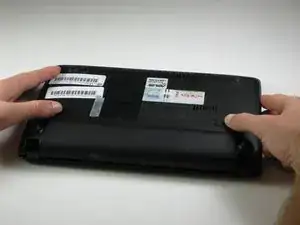
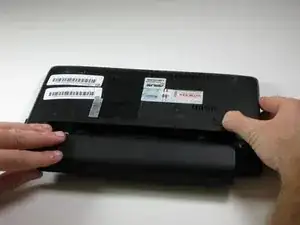
    • Slide the tabs outward to unlock the battery.

    • The left tab will remain unlocked, while the right tab must be held.

    • Holding the right tab open, slide the battery out of the laptop.

  3. kTCYldyvpDOYK15M
    kTCYldyvpDOYK15M
    eIXO1lhSHbOSAmtN
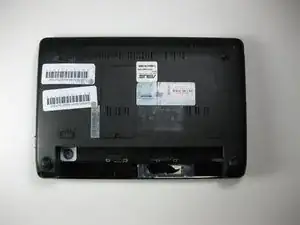
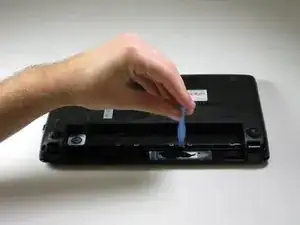
    • Use a plastic opening tool to pull up the four metal latches in the battery cavity that is located on the bottom of the laptop.

    • Do not apply too much pressure. The latches can not be removed and will bend if forced.

  4. vth1xHClrRt4La2d
    vth1xHClrRt4La2d
    wF4sHgYXJrYGIWNj
    e2KAJhdBWTXuUJiR
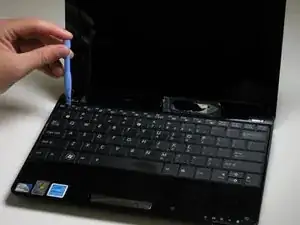
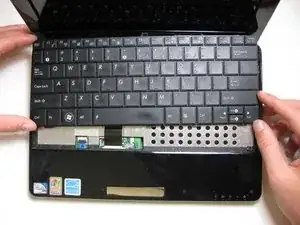
    • Flip the laptop over, and open the display.

    • Use a plastic opening tool to lift the edge of the keyboard that is nearest to the screen.

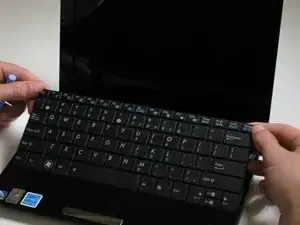
    • Gently lift the keyboard and slide it toward the screen.

    • Do not remove the keyboard completely. This can damage the ribbon cable connecting the underside of the keyboard to the laptop.

    It must be mentioned that you need to put the plastic opening tool above the F1, F6, between F10 and F11 and the Insert (Num Lock) Keys . It has 4 clips in total.

    Jakab Szilárd -

  5. pIJOdNQRPYUUJ2D1
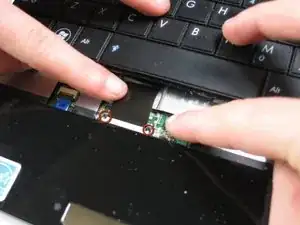
    • Use a spudger tool to release the tabs on the ribbon cable ZIF connector that is attached to the underside of the keyboard.

    • Depending on the model, the tabs on this ZIF connector will either flip up toward the display or push out toward the display.

    • Once the ZIF connector tabs have been released, remove the keyboard.

    Step is missing. you also suppose to remove back screws, then rf shield screws, disconnect touchpad cable and then unclip and lift sides.

    Smoke Fumus -

  6. D4XVwGFDYqyQTmDQ
    D4XVwGFDYqyQTmDQ
    QhOULuDIRvr5oCOP
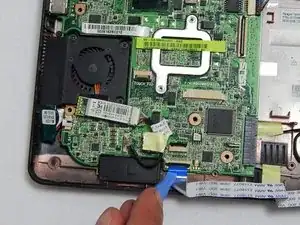
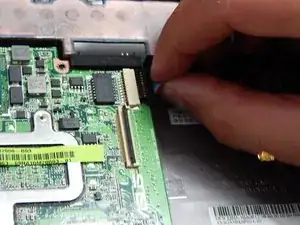
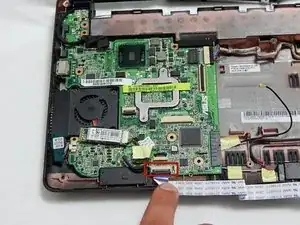
    • Detach the ribbon cable that connects the SD card module and the motherboard by lifting the black clips using the plastic opening tool.

  7. iyHNumW4I4jNJSBU
    iyHNumW4I4jNJSBU
    DLwGMTJEOKiDxuiF
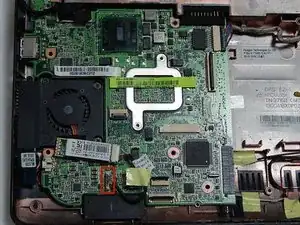
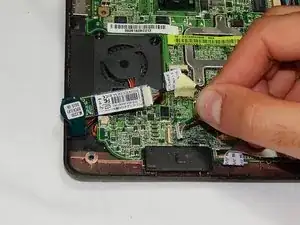
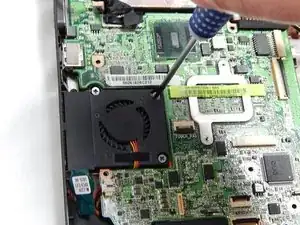
    • Detach the Bluetooth wire located below the fan by gently pulling it upward.

  8. wJqoFfCeLRUdI1Kh
    wJqoFfCeLRUdI1Kh
    21JUCvVeURWyFpJu
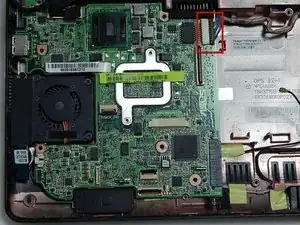
    • Detach the black structure connected to the input cables in the top right center of the motherboard by pulling them to the right, away from the fan.

  9. Gf6JSbmYW2HsWOYX
    Gf6JSbmYW2HsWOYX
    yEbUyaJKMT1M5w5K
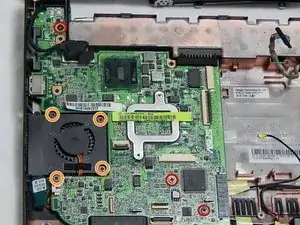
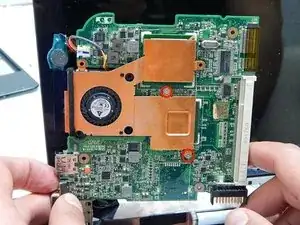
    • Remove the three 5.5 mm screws holding the motherboard to the motherboard plastic frame.

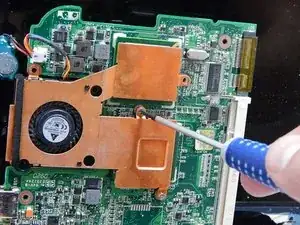
    • Remove the four 5.5 mm screws surrounding the fan.

  10. NAEqlCFwdFuSD5tY
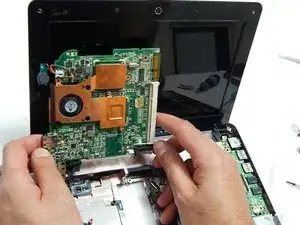
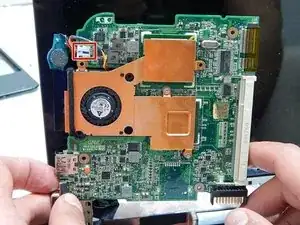
    • Gently lift the motherboard and hold it so that the bottom of the board is exposed.

  11. aqJYeH5X6kHKfTJb
    aqJYeH5X6kHKfTJb
    KkjBVUdfxhMrLFpE
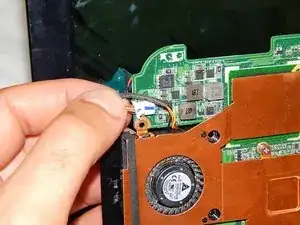
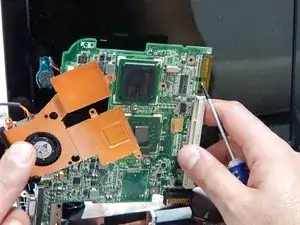
    • Disconnect the cable attaching the motherboard to the fan.

  12. PFvDUVYYkZlCjInS
    PFvDUVYYkZlCjInS
    gBGSHMRZlxu3STjp
    3ntGXtMkUyE3SykG
    • Remove two 5.5 mm screws holding the fan and the brass frame to the motherboard.

Conclusion

To reassemble your device, follow these instructions in reverse order.
Maged Hanna

Member since: 13/03/14

666 Reputation

0 comments