Introduction

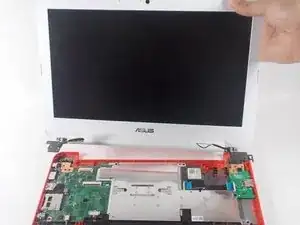
This guide will walk you through the step by step process of removing the display assembly from the laptop. To replace just the LED screen component within rather than the entire assembly, refer to Asus Chromebook C300SA-DS02 Screen Replacement.

  1. BgtMRkAL4PFdmvVU
    BgtMRkAL4PFdmvVU
    WHoPBbP2VjbJPqdQ
    • Power the laptop off and make sure the charger is unplugged before starting.

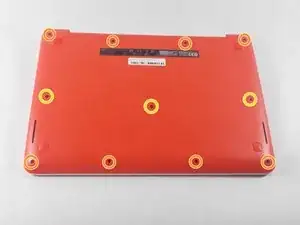
    • Remove the eight 8.0mm Phillips #0 screws on the bottom of the laptop.

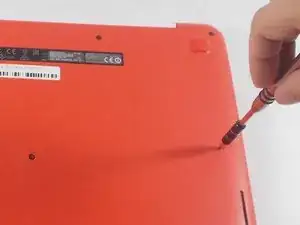
    • Remove the three 6.0mm Phillips #0 screws.

    I appear to have FIVE of the smaller screws. The four securing the near edge and the one in the center are smaller than the four securing the far edge and the left and right sides. Either your diagram is wrong, or someone screwed mine together incorrectly.

    brucegreer -

    Mine is the same way — six long screws, five short ones. The screw paths seem to correspond accordingly.

    Paul Wagenseil -

  2. CYIkLNwVP5DNIFcl
    CYIkLNwVP5DNIFcl
    VpQZtDe13hyoHDUe
    YWrtIxSkdBuvXUWO
    • Open the laptop.

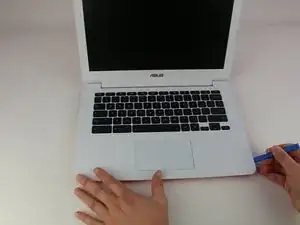
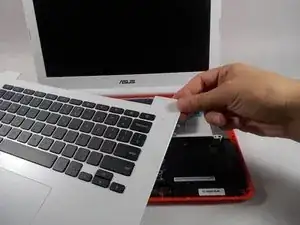
    • Using an iFixit opening tool, pry along the edges of the keyboard.

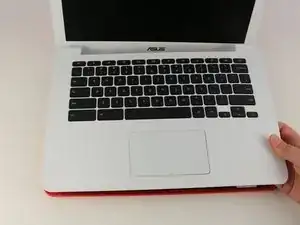
    • Lift the keyboard and slide it gently towards you.

    • Do not completely remove the keyboard. It is still connected to the back panel by a pair of ribbon cables.

  3. yNbTIYYWEh3rRHtT
    yNbTIYYWEh3rRHtT
    xYcpBWpcKx3HK3yN
    NHPVgBFCNdXUDMYw
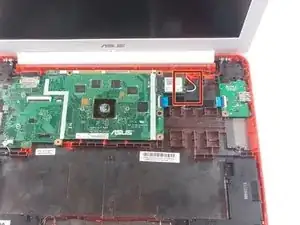
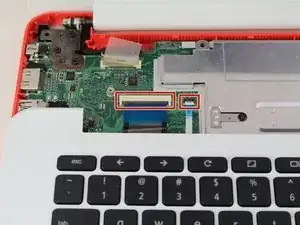
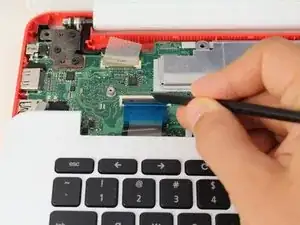
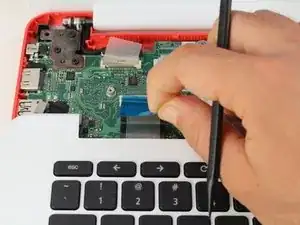
    • Disconnect the two ZIF connectors by prying up the locking bar with a spudger and removing the ribbon cable.

    Peut-on trouver le verrouillage zif en détail sur internet ou autres ?

    Jeremy Audy -

  4. 3PsJhHGwBIyGKVNV
    • Remove the keyboard from the laptop.

  5. T6lPsJcmiYIHFNRv
    T6lPsJcmiYIHFNRv
    vJCeGdREB6qA5qCj
    • Remove the six 5.6mm Phillips #0 screws around the battery.

  6. FoOIQpGTNrZouAQJ
    FoOIQpGTNrZouAQJ
    rCQkAjxuOMK11L25
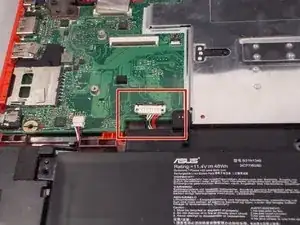
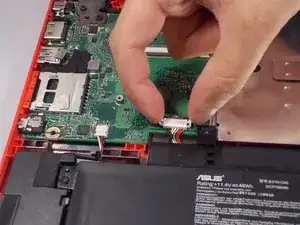
    • Using your thumb and index finger, pinch the multi-color cable and disconnect it from the motherboard.

    A serious omission is that there is a metal clamp holding the battery connector in place that MUST be slid back in order for the connector to be lifted up and off.

    Rob -

  7. hYitUhqPXixSaHla
    • Lift the battery out of the laptop.

  8. VNK55CmEn3aW3lrY
    VNK55CmEn3aW3lrY
    AHoDEa6Kyv4kE2GL
    • Unplug the black and white cable from the motherboard.

    • These two wires connect to the antenna within the display assembly. The white cable is longer and connects to the bottom import.

  9. Sh5wjx1p1QZ36CAr
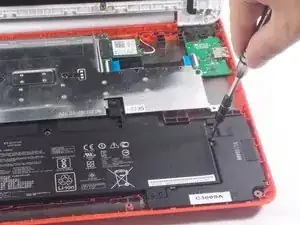
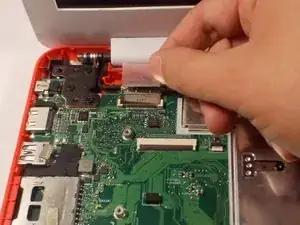
    • Peel back the tape covering the display cable.

    • Ease the cable towards the screen and out from the connector.

  10. YLrpALJRCAhDVEvk
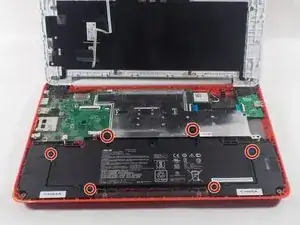
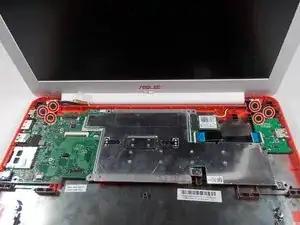
    • Use a Phillips #0 driver to remove the six 5mm screws on the top right and left display hinges.

  11. 4JeDIPRQ1MRiwvZA
    • Gently lift the display assembly up and away from the laptop.

Conclusion

To reassemble your device, follow these instructions in reverse order.

Celina Monteiro

Member since: 17/10/17

224 Reputation

0 comments