Introduction

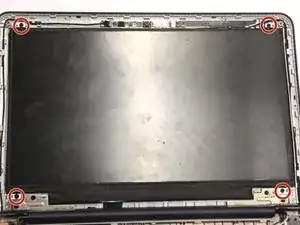
This guide will show how to replace the LCD screen for the device. Note that the screen is only one piece of the total display, for which there is another guide.

  1. G5StVMguwBuaTbF2
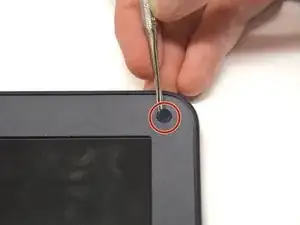
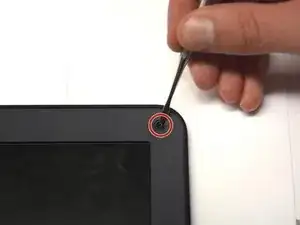
    • Using a flat blade, remove the two screw covers on the front of the bezel. They are attached by adhesive, so you may have to dig at it a little bit.

    this is poo it dont work dont buy it waste of money bad asus or should i say anus?

    jodete a tu madre.

    im mexican this didnt help me getting over trumps wall so f you

    Kevin Stolpe -

  2. vRSy3PpWx1idIvIH
    • Unscrew and remove the two Phillips #1 4.5 mm screws that are now visible.

  3. JyoX56TjW2kyKkRe
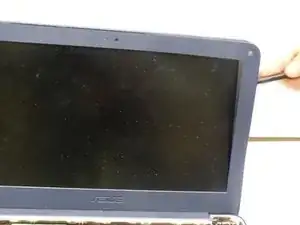
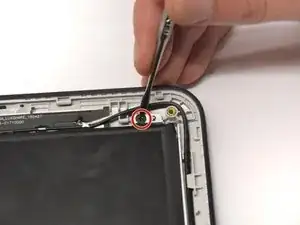
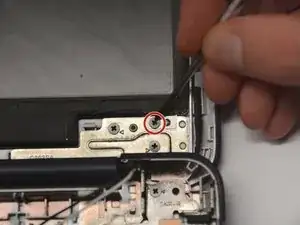
    • Using the plastic opening tool, carefully pry off the bezel. It will come off entirely, so be careful not to break it.

  4. 3jcyHTQ6JrqVdCUJ
    3jcyHTQ6JrqVdCUJ
    UUA3IlIJWZbgOVvJ
    AdWAsXaDDLgKIOqQ
    • Unscrew and remove the four screws holding the screen in place.

  5. oEdgZKHdsvqj6Xo1
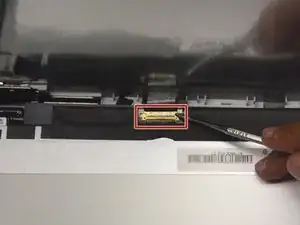
    • Fold down screen and remove the screen connector band. You may have to use a small flat blade or a spudger, since the latch is very small.

    Any tips for getting that tape off? There's some clear plastic tape on the connector with some wickedly strong adhesive. From the black plastic tape that's peeled back a bit on the image, I'm guessing that you also had to peel that off as it goes over top of this, the connector and the nylon or whatever fabric below the connector. I realize that black stuff is just more tape, but still want to avoid making more of a mess than necessary.

    Brett Gersekowski -

    I found that working from the side carefully across the tape until it was clear of the black tape underneath worked out ok. Once you're past the edge of the black tape all the way across, it gets easier. Just work carefully until the connector is exposed. I left it from there and didn't try to remove it from the nylon sheath on the display cable, then just smoothed it back down as best as possible once reconnected.

    Brett Gersekowski -

Conclusion

To reassemble your device, follow these instructions in reverse order.

Beau Hansen

Member since: 28/09/17

836 Reputation

0 comments