Introduction
You will be removing the keyboard of the Asus Chromebook C201 from the rest of the laptop, then removing the trackpad from the keyboard, replacing it, and then putting the laptop back together.
-
-
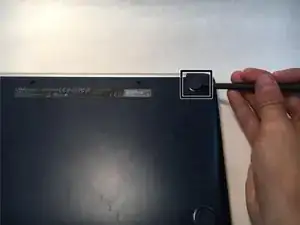
Then, pull off the plastic sliders on either side of the bottom of the computer using the spludger.
-
-
-
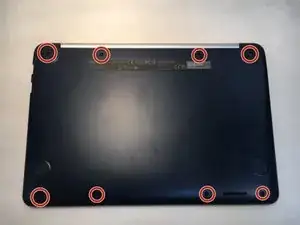
Unscrew all of the screws in the back of the computer. Use a Phillips 1 screwdriver to remove the 8 1/2cm screws.
-
-
-
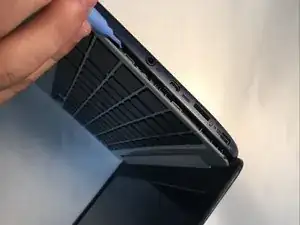
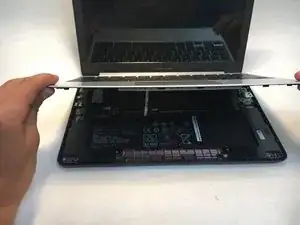
Turn the computer onto its side. Then, use a plastic opening tool to open the gap between the keyboard and the rest of the computer by slipping it between the two panels making up the body of the computer.
-
-
-
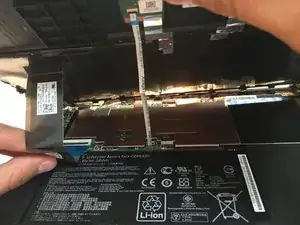
Slide the plastic opening tool around the length of the keyboard to free it from the laptop. Once the keyboard is free of the computer, lift the keyboard up gently until you can see and reach the two wires attaching it to the computer.
-
-
-
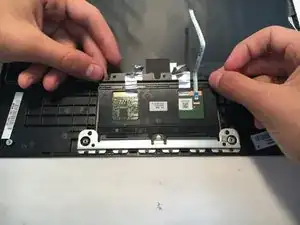
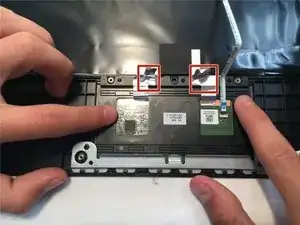
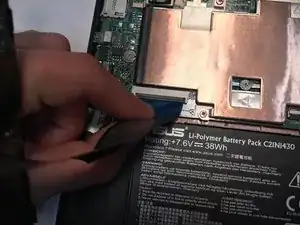
Lift up the retaining flaps on the keyboard and trackpad ZIF connectors.
-
Gently pull the trackpad and keyboard ribbon cables out of their sockets on the motherboard.
-
-
-
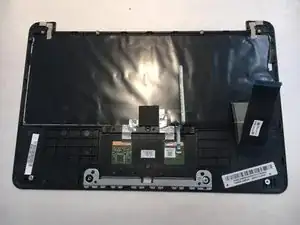
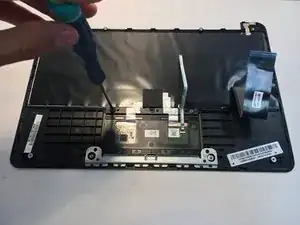
Unscrew the 2/10 cm screws holding the trackpad onto the keyboard using a Phillips head #000 screwdriver.
-
-
-
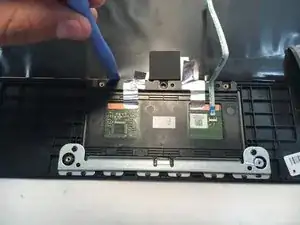
Gently pry up the trackpad with a plastic opening tool. gently tilt the trackpad out of its slot and pull the trackpad out of the keyboard at an angle away from the slot.
-
-
-
Place new trackpad into slot at an angle. Gently push new trackpad into the slot and press down on it very gently to make sure that it is completely in the slot.
-
-
-
Screw in 2/10 cm screws to hold the trackpad onto the keyboard using a Phillips head #000 screwdriver.
-
-
-
Screw all 1/2 cm screws back into place using the Phillips head #1, and push the plastic sliders back into their slots.
-


Your replacement is now complete and your trackpad is as good as new... because it is new!

One comment
where can i get the replacement track pad