Introduction
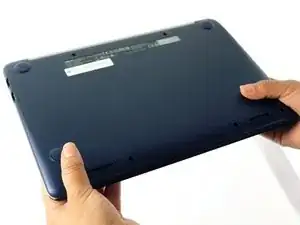
If your Chromebook is not getting any power, then this guide is going to help you get your power back. When working on replacing your battery, be sure to ground yourself. Static can short circuit your Chromebook, so be sure to either wear an anti-static wrist strap or work on a surface that doesn't generate static electricity, like wood, tile, or other hard floors.
-
-
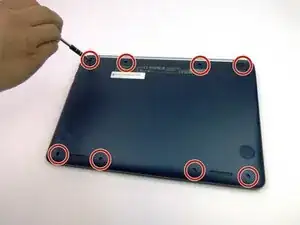
Use the J0 screwdriver to remove the eight 5mm black screws on the bottom of the laptop, which includes the two that were hidden under the rear rubber feet.
-
-
-
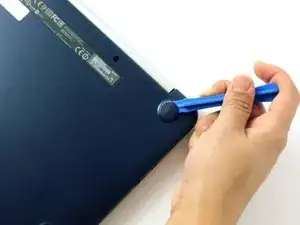
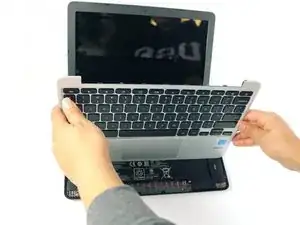
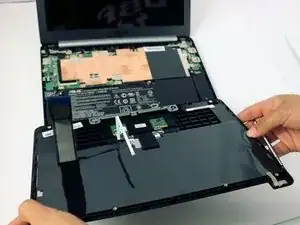
Turn the laptop on its side. Use a small, blue opening tool to pry the keyboard cover and laptop apart. Begin from the top right, next to the power button, and slowly work your way around to the opposite side until the keyboard cover is detached.
-
-
-
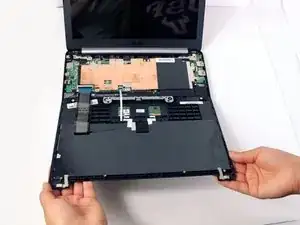
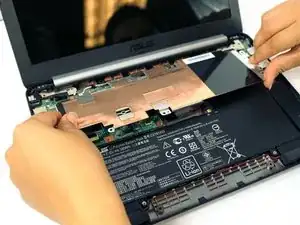
Gently flip the keyboard cover away from the laptop. Rest it safely upside down so the cables are not strained and are easily accessible.
-
-
-
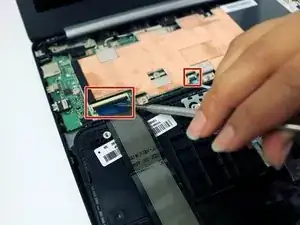
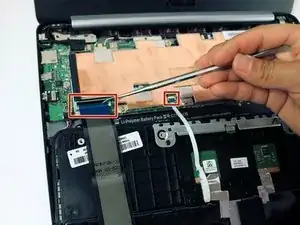
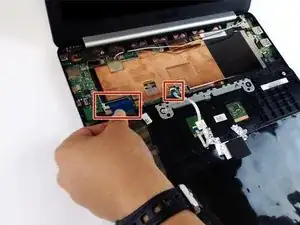
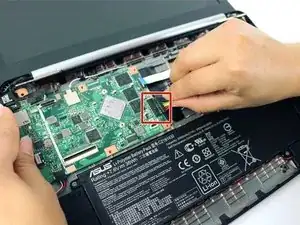
Use the metal spudger to gently pry up the small tabs that are clamping down on the keyboard cables.
-
-
-
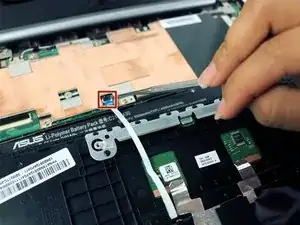
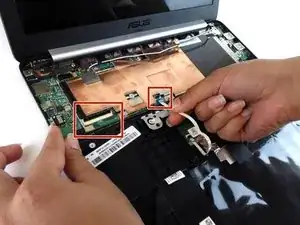
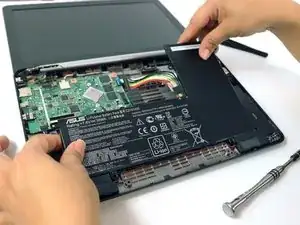
Carefully pull the keyboard cables out of the connecting ports that are attached to the motherboard.
-
-
-
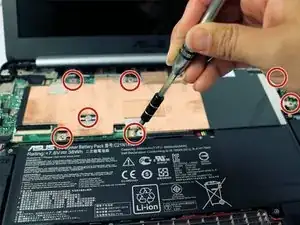
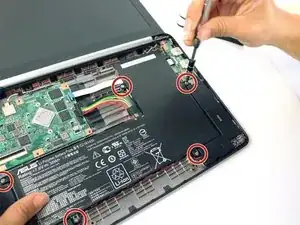
Use a J0 screwdriver to remove the seven 4mm silver heat shield screws and remove the heat shield.
-
To reassemble your device, follow these instructions in reverse order.
2 comments
This was a great guide to replacing the battery in the ASUS chromebook C201 PA. I left the instructions displayed on my regular lap top as I went thru the steps. There was a trick when it came to disconnecting the keyboard plugs. The tabs that were supposed to be bent up to enable the unplugging weren’t there and rather than fiddle around trying to unplug them in some other way I just left them connected and manipulated the key board very carefully when needed. A second set of steady hands can help.
I first looked for a YouTube video for info, silly me. They showed removing the lid and disconnecting all the accompanying cables! It didn’t look necessary to me, and as this guide shows, it isn’t.
I do find it curious as it looks to me like the lid is lying flat, I wonder if the author loosened or removed the lid hinge screws to allow that. That might simplify things.
The battery failed in mine, I’m debating whether or not it’s worthwhile to replace in a five year old device that cost $200ish to originally purchase.