
Introduction
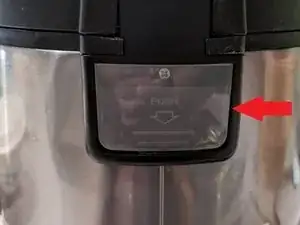
How to fix F3 Error on your ARC-1030SB.
Cause:
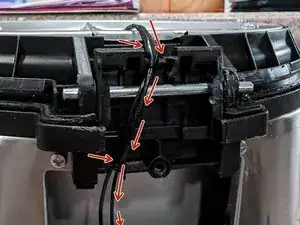
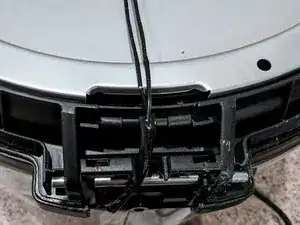
I think almost all Aroma Thermo sensor errors are caused by this simple defect were the lid pinches the Wires every time you open and close the lid. Over time, the wires will wear away and become completely severed.
Fix:
Open/Remove Rice Cooker lid and splice/reattach severed wire(s).
Backstory:
Hi All,
When I originally had this error, I couldn't find any guides online or on YouTube about the F3 Error on a Aroma ARC-1030SB. The only threads I found was about people calling into Aroma Support and all support had them do was power off to cool down the Thermo sensor and then try using the cooker again, which never seemed to fix the issue. Thus, I went ahead and opened mine up to investigate.
I've had 2 different Aroma rice cooker models and both has had this same problem (different error codes). I believe my previous model had an E5 error. After having experienced both rice cookers, and opening both up. I can only conclude that this is a common occurrence and could of easily been avoided had they just engineered the thing a little better for how they routed the Thermo sensor wires or added some sort of padding/more space for the wires to avoid this problem.
Thanks and I hope this guide fixes your problem.
-
-
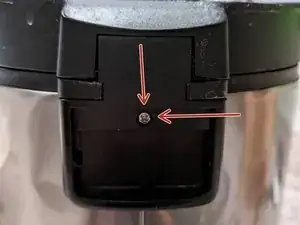
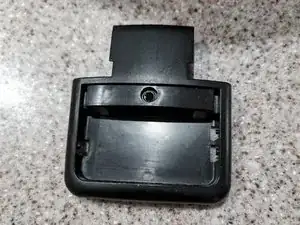
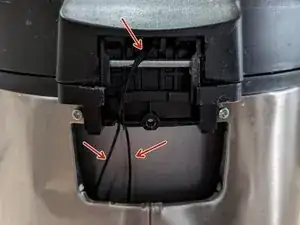
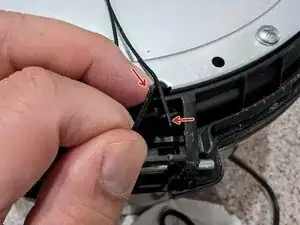
Now that the screw is out, remove the piece that the screw was holding onto from Rice Cooker.
-
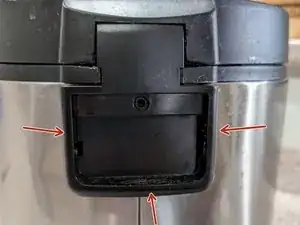
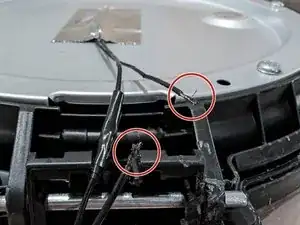
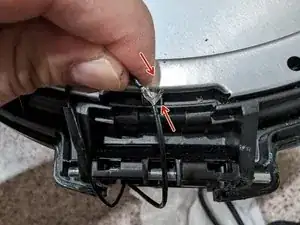
Now that this piece has been removed, you may notice that there are two wires going up into the lid (these wires connect to the Top Thermo sensor) and that one of them may be partially or completely severed. This is the likely cause of the F3 Error.
-
-
-
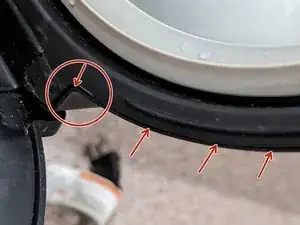
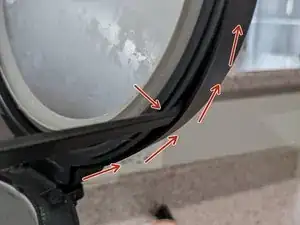
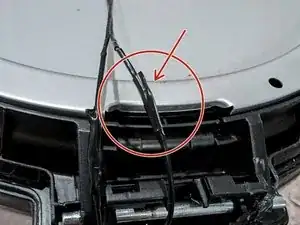
Using the Prying tool or a Flat tool/object, pry open the Rice Cooker Lid by running the tool along the seams.
-
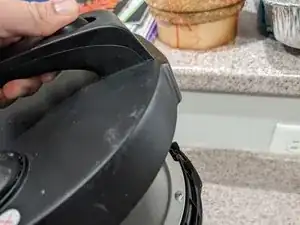
Once loosened, press the lid release/open button and lift the lid. It should easily pop right off.
-
-
-
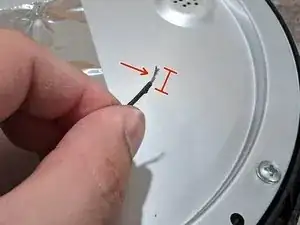
Assess the damage and cut off any bad/burnt ends of the severed wire(s). Best practice would be to snip away any exposed wire so that you have fresh new wire to work with.
-
-
-
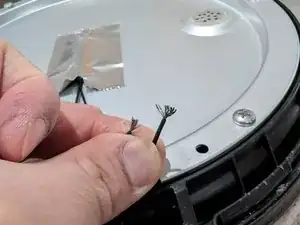
Strip both ends of the wire(s), I tend to just eyeball it and strip roughly 3-5 cm of the plastic off the wire.
-
-
-
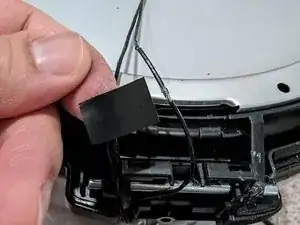
Once stripped, I like to spread the thin wires out and splice the wire(s) (push both ends of the wire into one another before twisting them together).
-
-
-
All done! I would recommend plugging the rice cooker in now and running it to confirm that the error code is gone for good before putting it back together in reverse order. This way you wont have to tear it apart again if you need to re-splice the wire(s).
-

To reassemble your device, follow these instructions in reverse order.
