Introduction

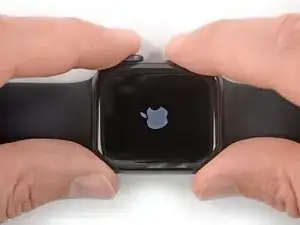
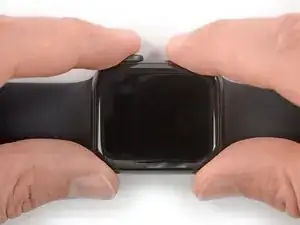
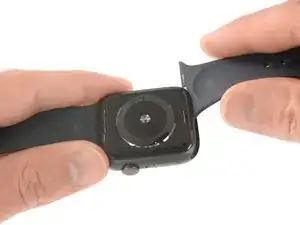
Use this guide to replace a worn-out or dead battery in your Apple Watch Series 4.

This guide shows the procedure on the standard, GPS-only version of the watch, but the cellular/LTE version is similar.

For your safety, discharge your battery below 25% before disassembling your Apple Watch. This reduces the risk of a dangerous thermal event if the battery is accidentally damaged during the repair.

Note: If your battery is swollen, take appropriate precautions.

During the display opening procedure of the Apple Watch it is likely to damage the force touch gasket. If you separate the gasket layers or cut the cable, you'll also need to replace the Force Touch gasket itself.

You’ll need replacement adhesive to reattach components when reassembling the device.

  1. TDmmj111IrE2meG4
    TDmmj111IrE2meG4
    Cpp6tfMVL2vSSYE5

    Hi. I changed the screen on an apple watch series 4, now the screen works, whcih is great, but when I charge it, the green snake comes on but never charges. It heats up the bottom, gets very warm. Could it be the battery itself? Maybe needs a new one? Is rthere anything else that woudl be causing the battery to not charge and or heat up on the bottom when chaging the screen?

    Derrick Brewer -

  2. dHFOZE3GFSGxBhhH
    dHFOZE3GFSGxBhhH
    NvPAbIu3kDqSQsda
    Ot2VBZWEmrXNxt3H
    • Because the gap between the screen and watch body is so thin, a sharp blade is needed to separate the two. Read the following warnings carefully before proceeding.

    • Protect your fingers by keeping them completely clear of the knife. If in doubt, protect your free hand with a heavy glove, such as a leather shop glove or gardening glove.

    • Be careful not to apply too much pressure, as this might cause the knife to slip and cut you, or damage the watch.

    • Wear eye protection. The knife or glass may break, sending pieces flying.

    • Feel free to attach or remove the watch band as needed to provide more control as you make repairs.

  3. NwJjsTnJXVlpRVDB
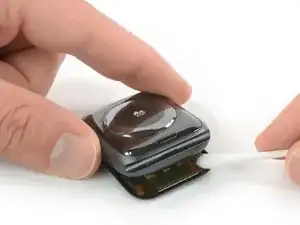
    • Prepare an iOpener (or use a hair dryer or heat gun) and heat the face of the watch to loosen the display adhesive.

    • Leave the iOpener on the watch for at least two minutes to fully heat the screen and soften the adhesive holding it to the case.

    • You may need to reheat the iOpener and repeat this procedure several times until the display adhesive gets loose enough.

  4. k3IDd4hsbkDqtrmd
    k3IDd4hsbkDqtrmd
    S4R1wEIwOJQ4UviI
    YqAXTDrCDtvIkckK
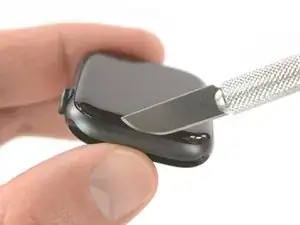
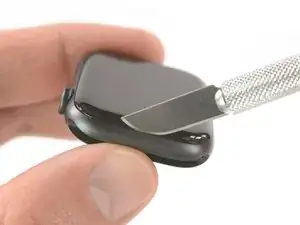
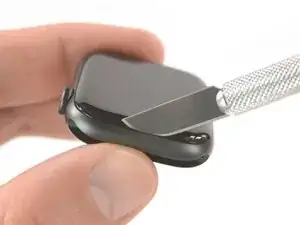
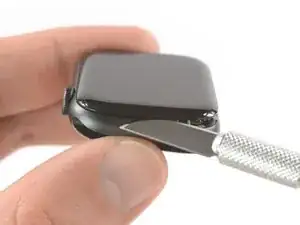
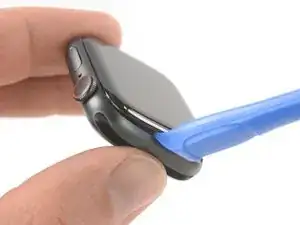
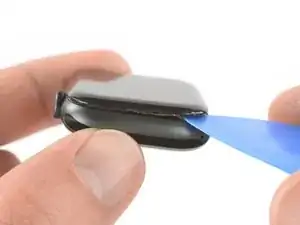
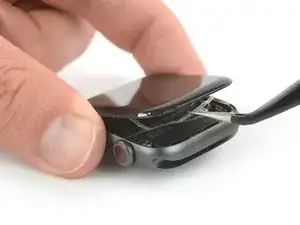
    • Place the edge of a curved blade into the thin gap between the display and the outer case. Start at the short side of the display, closest to the digital crown.

    • Press firmly straight down into the gap.

    • Once inserted, tilt the blade to pry the display open slightly.

    • Do not insert the knife more than 1/16th of an inch (~2 mm) to avoid damaging the Force Touch sensor.

  5. KuNPi1Z2VHKphUto
    KuNPi1Z2VHKphUto
    5PKygwrOcmTYAmap
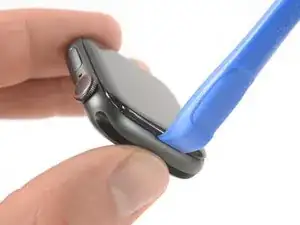
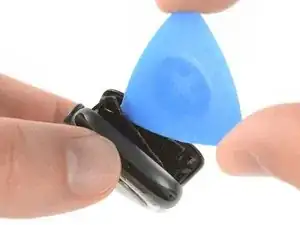
    • Once you've opened a small gap with the curved blade, remove the blade and insert the thinner edge of an opening tool into the gap.

    • Push the opening tool into the gap, using your thumb as a pivot to lift the display open a bit farther.

    • Don't try to fully open or detach the display yet.

  6. jK3rFdOpwMSaI2xw
    jK3rFdOpwMSaI2xw
    IPWpgQVoSf3uuXPC
    L1HVgo24JpO2pwUi
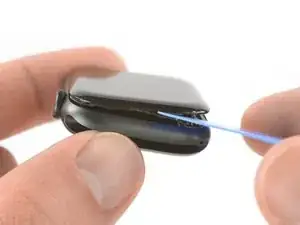
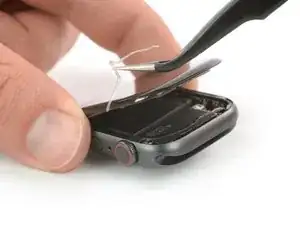
    • It's likely that the Force Touch sensor will stick to the display frame instead to the watch's body. In this case, insert an opening pick under the display and carefully separate the Force Touch gasket from the display.

    • To preserve the Force Touch gasket, pry carefully under the edge of the display. If the Force Touch gasket splits when lifting the display, or if you separate the gasket layers, you'll also need to replace the Force Touch gasket itself.

    • Slide the pick around the display to separate the adhesive between the Force Touch gasket and the display.

    • Don't insert the opening pick deeper than 1/16th of an inch (~2 mm) to avoid damaging other components.

  7. bbxyCNV5BNVXKwXf
    bbxyCNV5BNVXKwXf
    ACKAUAw2LSxO66kG
    oIvY2Pr1WE5ZKKG6
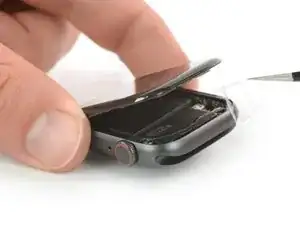
    • To avoid straining the display cables, don't open the display all the way yet.

    • Open the display at max. to an 45° angle, and use tweezers to peel off the adhesive between the display and the Force Touch gasket.

    • Thread the adhesive around and behind the display cables to get it off completely. Since the adhesive needs to be replaced anyway, you can cut it if that makes removal easier for you.

    • Make sure to return to this point during the reassembly of your watch and then continue with the Resealing Procedure.

  8. T5IFtANCaFRiUVYI
    T5IFtANCaFRiUVYI
    BK2wAaN2YsSvQ3Gd
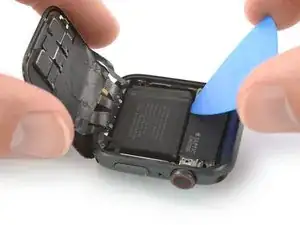
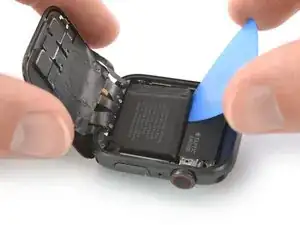
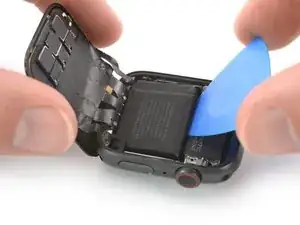
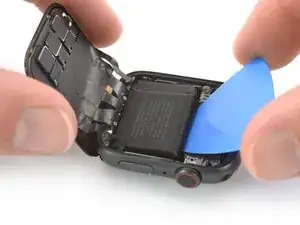
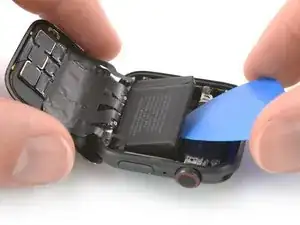
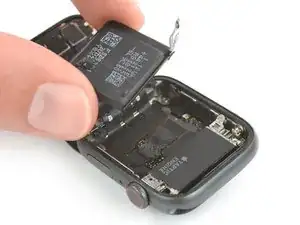
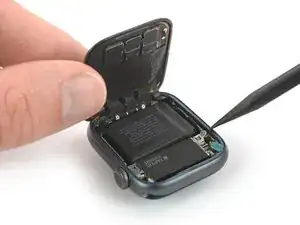
    • Carefully fold the screen to the back until you get enough space to pry out the battery.

    • Avoid tensioning the display cables when folding the screen to the back.

    • Insert an opening pick between the battery and the Taptic Engine.

    • A regular opening pick works fine with the 44mm version of the Apple Watch Series 4. However if you own the 40mm version and don't have enough space you can customize your opening pick with scissors.

    If you are just replacing the screen then there is no need to remove battery.

    anonymous 1930 -

    When removing the screen I tore the two outer cables attached to the lcd screen. What are their purpose? I read somewhere they are just some sort of shield. Will my watch function normally without them?

    thanks

    Mike Bahlman -

  9. llONwk1nUgKFZnnM
    llONwk1nUgKFZnnM
    axbIaUl6OxxySNYE
    ZAn2JGQiaGGy5JBm
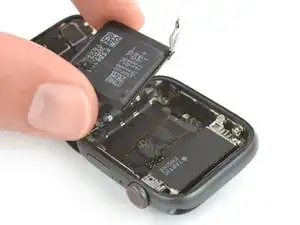
    • Slide the opening pick along the edge of the battery to loosen the adhesive.

    • The adhesive which holds the battery in place is soft. However, if you're struggling to pry out the battery you can place a heated iOpener on the rear side of the watch to loosen the adhesive. Apply the iOpener for at least two minutes.

    • Use constant, steady pressure to slowly pry the battery up, separating it from the adhesive securing it to the system board.

    • Mind the display cables and especially the Force Touch cable which covers the battery in one corner so you don't damage them when levering the battery out.

    • Make sure you don't puncture or deform the battery, as it can catch fire and/or explode if damaged.

    • Don't try to remove the battery all the way yet. It is still connected to the watch assembly.

  10. ALceSRAHdGngFTyL
    ALceSRAHdGngFTyL
    nAqFMHnFgCmFH5nS
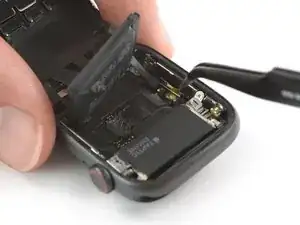
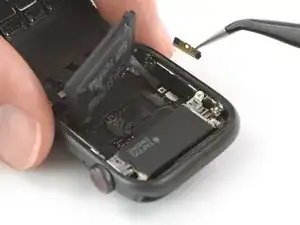
    • Carefully lift the battery and bring it in a 75° angle.

    • Use a pair of tweezers to peel the black sticker off the metal plate which covers the battery connector.

  11. LKGMeHb4RbqTwZsm
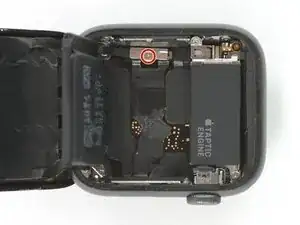
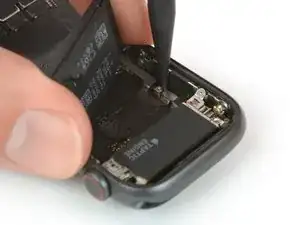
    • Remove the Y000 screw (1.2 mm length).

  12. 6wAKJpuVmXmYqPWg
    6wAKJpuVmXmYqPWg
    MDQaLHLfD6B2TM4F
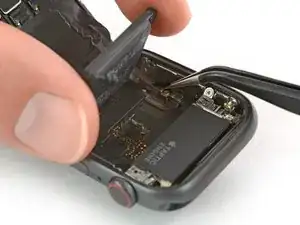
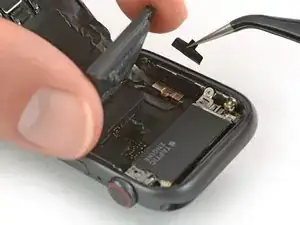
    • Use a pair of tweezers to remove the metal plate which covers the battery connector.

  13. 4GFQSOoiaEAYvpwO
    4GFQSOoiaEAYvpwO
    RYFJORynT6iX2hUQ
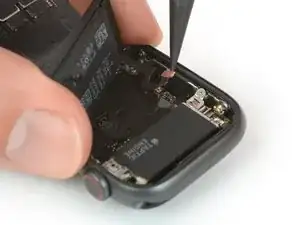
    • Use the pointed end of a spudger to pry up and disconnect the battery flex cable.

  14. rKtPysGpWHjSVRDm
    rKtPysGpWHjSVRDm
    bhPYhpOIvBFhOKsK
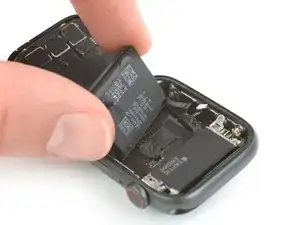
    • Remove the battery.

    • Be sure to remove the protective liner to expose the adhesive on your new battery before you set it in place.

    • Do not reinstall a damaged or deformed battery, as doing so is a potential safety hazard.

    • If you are reusing your old battery during reassembly, you can reuse the existing adhesive to secure the battery during reassembly. Alternatively, remove the old adhesive with high isopropyl alcohol and a lint free cloth and use a small piece of double-sided tape such as Tesa 61395, or a dab of liquid adhesive such as E6000.

  15. 3CbiytE4yBtNAXEO
    3CbiytE4yBtNAXEO
    r1vyLxfc1EvsfgvD
    • The following steps describe how to apply replacement adhesive in preparation for the resealing procedure.

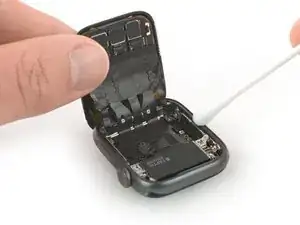
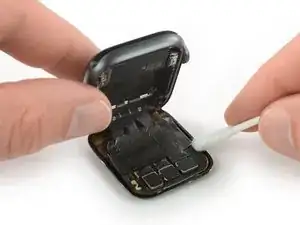
    • Apply a little bit of high isopropyl alcohol (>99%) to a Q-tip or use a cleaning pad to gently remove the leftover adhesive on top of the Force Touch gasket.

    • To remove the adhesive on the edge where the display cables are running, fold down the display and carefully pull it away from the frame so there's enough space for cleaning.

  16. w3KDml4BFTmJtHaW
    w3KDml4BFTmJtHaW
    GEQIZAjcOIQNevFK
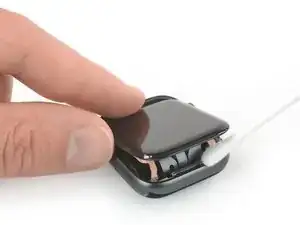
    • Flip the Apple Watch upside down so the display lays flat while lifting up the case.

    • Remove the leftover adhesive from the back of the display.

    Und warum soll ich dann bei Amazon 70% Tigern kaufen?

    Martin Kirschner -

    Was genau meinst du?

    Fabian Neidhardt -

  17. rUTbV2JIDvZrO2RR
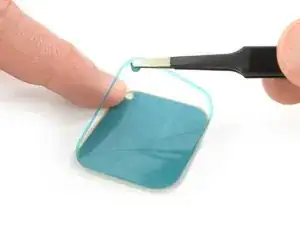
    • Use a pair of tweezers to carefully remove the replacement adhesive with the blue protective film from the backing paper.

    The step showing the new battery being installed is missing.

    Brett Hollifield -

    As stated 3 layers. Trick is to separate them correctly and at the right time. The greatest adhesion is to the blue top layer. If done as shown the most difficult task of separating the blue film will be done at the worst time, on the watch. It is better to do the hard part first, separate the blue from the adhesive. So leave the adhesive on the paper backing in the picture above. Then remove the inner part as 3 layers together leaving you with the paper backed adhesive.

    the bicycleguy -

  18. ItRVaDUUFmVvAOON
    ItRVaDUUFmVvAOON
    kV1oNM6TA2JPMyat
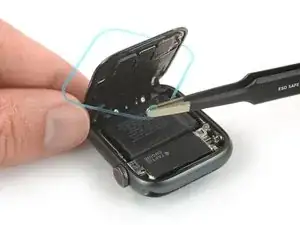
    • Hold the replacement adhesive diagonally to thread it over the display.

    • Slightly tilt the display forward so you can align the adhesive with the frame.

    • Position the replacement adhesive on top of the Force Touch gasket.

    You're missing the step that says "INSERT THE NEW BATTERY."

    M Gessner -

    See my comments previous step. Instead of blue it should look like the brown paper side with the adhesive down. Now press into the cavity in the watch frame. The paper and cavity will make location easy. You shouldn't have to adjust much. Press the face down on top to squish the adhesive into place. It won't stick because the paper is still on. Open and check placement. Now remove the paper

    the bicycleguy -

  19. JfAViiEfd2ieaiut
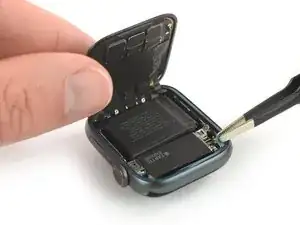
    • Use the pointed end of a spudger to make final position adjustments and press the adhesive into place.

    • Follow the resealing guide to reseal your watch after reassembly.

Conclusion

To reassemble your Apple Watch Series 4 follow these instructions in reverse order to reattach the battery.

For optimal performance, calibrate your newly installed battery: Charge it to 100% and keep charging it for at least 2 more hours. Then use your device until it shuts off due to low battery. Finally, charge it uninterrupted to 100%.

Take your e-waste to an R2 or e-Stewards certified recycler.

Repair didn’t go as planned? Check out our Answers community for troubleshooting help.

Dominik Schnabelrauch

Member since: 23/11/16

201132 Reputation

4 comments

Is the adhesive waterproof?

laws -

Hi laws,

iFixit makes no claims to the continued splash-resistance of the Apple Watch after applying this adhesive strip. It's probably going to be just fine, but we can't confirm that the Apple Watch will maintain its IPX7 waterproof rating after being repaired.

Dominik Schnabelrauch -

Ich habe jetzt 2 Uhren durch - besten Dank für die Hilfestellung. Ich habe mir die “Dichtungs-Klebestreifen” besorgt, waren für mich aber nicht praktikabel. Bei beiden Uhren hat sich die Force-Touch-Dichtung teilweise gelöst und der Klebestreifen hat zwar auf der FT-Dichtung gehalten, aber das Display kam wieder hoch, da der die FT-Dichtung eben nicht mehr am Gehäuse geklebt hat.

Ich habe mir eine Tube Smartphone-Dichtmasse besorgt, damit konnte ich die FT-Dichtung wieder befestigen und habe damit auch das Glas wieder optimal einkleben können. Da sich sich die Masse (wie die Klebestreifen auch) bei Hitze wieder entfernen lässt: für mich die praktikablere Lösung. Auch nicht ganz so frickelig…

carver -

Wie heißt der Kleber? T-7000?
joachimschreiter -