Introduction

This Guide Picks up after the Battery and Screen Removal guides posted, all of the same tools are used.

  1. K2bcNVR5edGkk26f
    K2bcNVR5edGkk26f
    2ZiApdZBbqJY4mei
    • Unscrew Tri-screw and remove small plate cover.

    • Then, remove these two Tri-screws.

  2. fTPPmh6JUEqA3mhA
    fTPPmh6JUEqA3mhA
    VPmZ3lYIAMIINUcW
    2tKc6UPfKabJ6LCS
    • Undo both connectors highlighted.

    • Then the Taptic engine should be able to be lifted out.

    • The Taptic engine has some adhesive on the cable outlined in blue that sticks it to the speaker.

    attention! don't undo the connector on the top of taptic engine remove the entire flex glued on taptic. Just broke this connector my self once

    Wesleyfraga -

  3. oeGXLTPMwKruxhmt
    oeGXLTPMwKruxhmt
    yLfYX1k3eEkUYSNC
    rWt2C5kLlmUJwkFg
    • Disconnect this connector.

    • Then remove these 3 tri-screws.

  4. nFsyQABrqILhCcRb
    nFsyQABrqILhCcRb
    ZiH6kKlembQEOwIY
    • Remove the speaker slowly.

    • Where my tweezers are located seems to be the best place to remove the speaker.

  5. qKb5oxYlHs1RUNbA
    qKb5oxYlHs1RUNbA
    xHR5cGMFCjIkJx2i
    3tsQcZGPk4KuQRVw
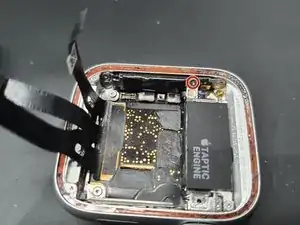
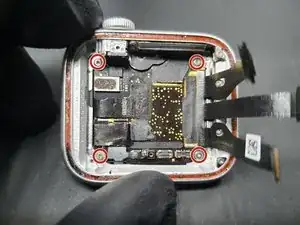
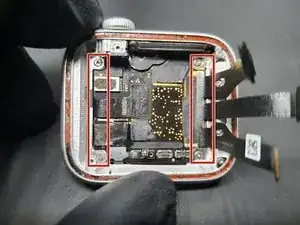
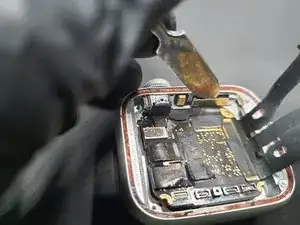
    • 4 more Tri-screws are removed here.

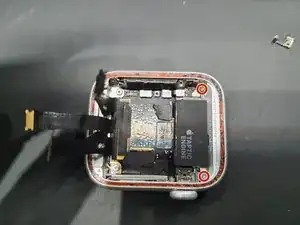
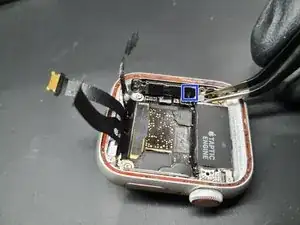
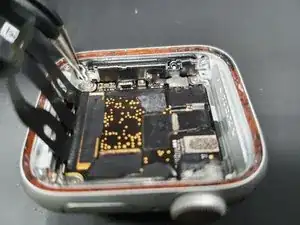
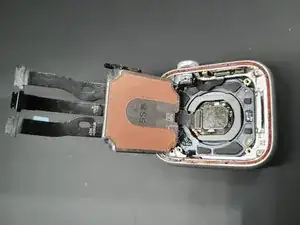
    • Gently pulling back the screen flex cables reveals 2 more Tri-screws that should be removed.

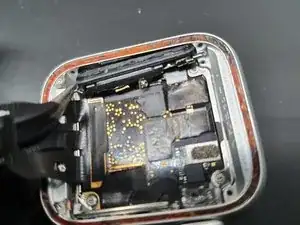
    • Then the brackets can be removed with tweezers.

  6. XwsbS21LgAdZG2bj
    XwsbS21LgAdZG2bj
    xeAjXWBVFfoq1Ulk
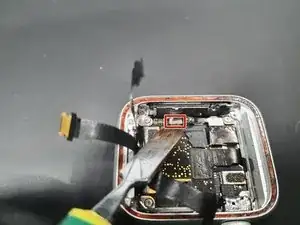
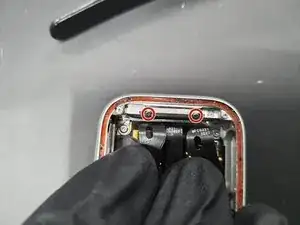
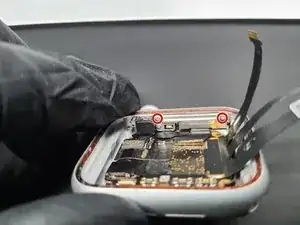
    • Remove these 2 Tri-screws.

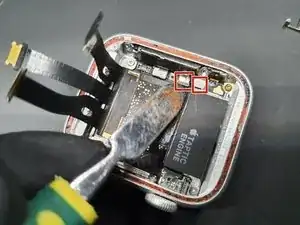
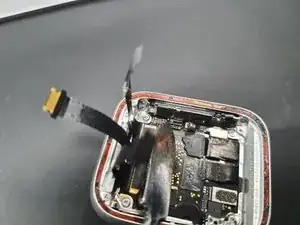
    • After taking off the first bracket, take of the next Tri-screw and remove the second bracket.

  7. JXOYuaLZZ4BvUIwG
    JXOYuaLZZ4BvUIwG
    B2anPHcJQfSkFcYf
    • Disconnect the Power button FPC.

    • The FPC here has 2 connections. DO NOT pry in the middle as it may bend.

  8. 3IFlWXDxJUADbNbj
    3IFlWXDxJUADbNbj
    U4JRREG1WPkM5TbO
    bhKmseNp3IpGZLpe
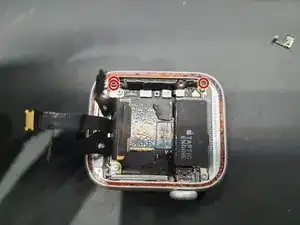
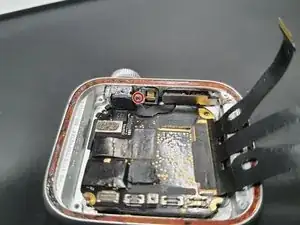
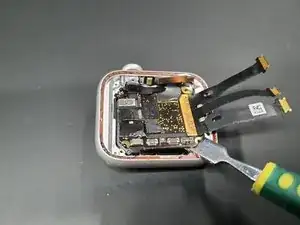
    • Starting in the bottom right corner as show here. Gently wedge in a spudger and pry up on the board.

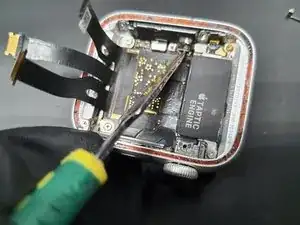
    • Once you are able to get a good hold on the board move try pulling down and to the right in a clockwork motion.

    • Do this motion slowly as there is a final connector under the board.

  9. HQBWKkWnkUkW2Fmi
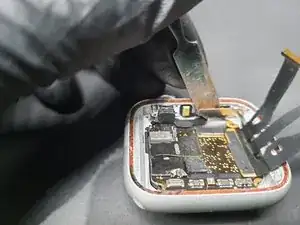
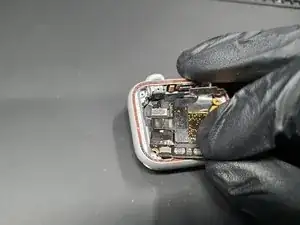
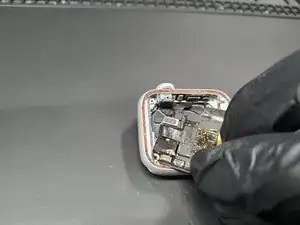
    • Once the board is lifted out, the final connector is highlighted.

    • Disconnect and you are all done!

    • Repeat steps backwards to put everything back together.

jessepugsley

Member since: 21/01/20

169 Reputation

One comment

thank you so much

Wesleyfraga -