
Introduction
Since opening the TimeCapsule, f.e. for HardDisk Upgrade, it has been (for me at least) a pain in the A….
So I tried a different approach. I cut the rubber plastic thing on the appropriate places and take the screws out. …
-
-
all measures are with the rubber still on. and it stays on.
-
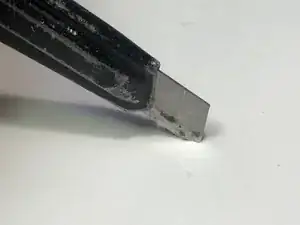
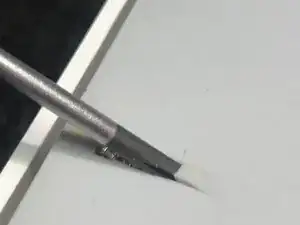
first you take a cutter and cut little squared or circles or what you prefer into the rubber. and then, f.e with the screwdriver tear of the rubber on the incicion you just did.
-
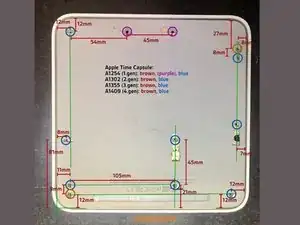
there are exact measures in millimetres. I recommend to turn the TimeCapsule with connections facing you and then start from the lower left corner.
-
fyi: 1 inch = 25,4 mm, 1 feet = 304,8 mm
-
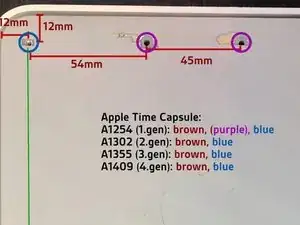
Note: the green lines indicate that the screws are in alignment with each other.
-
Note: the different color circles indicate screws. I found only the 1. gen TimeCapsule sometimes be having the purple screws. with the 2.,3.,4. Generation I never found the purple ones.
-
-
-
the first generation is sometimes different. I had ones where in the purple markers are screws . sometimes they are reveted from the other side, and must not be removed.
-
the 2,3,4 generation have almost the same screws. sometimes the brown ones dont exist.
-
-
-
turn the TimeCapsile 90D clockwise.
-
then get something where you can lean on the opened but still connected part. (in my case I used another time capsule for it)
-
then carefully open the lid to the left. and carefully put it aside like shown on the picture
-
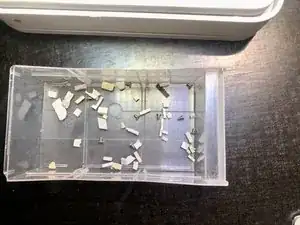
after that you can do inside whatever you desire. in my case I took out the hard drive
-
-
-
if you are nerdy or have too much time on your hand, you can keep the cut-out rubber pieces and after replacement you can glue the right parts back in.
-
note: nobody sees the bottom of the TimeCapsule in general.
-
so I did not.
-
ENJOY
-

To reassemble your device, follow these instructions in reverse order.
Do not cut the rubber to join the screws..... it's just glued, You can pell it off gently...
Ne coupez pas la base en silicone, vous pouvez simplement la décoller pour atteindre les vis
Laurent Vieillefault -
to be honest I found cutting the rubber the better more (time) efficient way, because:
since it’s a thick rubber the glue can’t be heated or made to go off more easily.
due to the age of the device the rubber is not that strong to withstand the pealoff process in most of the cases.
I found it more acceptable to have small holes in the rubber that aren’t visible if the device sits on the shelf or similar.
it’s super frustrating if you (and yes it happend to me more than once) that I ripped the rubber apart and then the damage was always visible after repair.
and for me the most important reason was: what if I have to reopen it again?!“ if i cut the rubber there is not much to do beside the screws. if I re-glue the bottom back, I have to peal it off again in whole.
Martin David -