Introduction

Replacing the keyboard is an easy repair that is unfortunately necessary in certain cases. This guide will take you through the process of removing your keyboard step by step.

  1. jMPpumGVtEeYUdii
    jMPpumGVtEeYUdii
    fbhG6bYPrCVoABPD
    • Remove the six 19 mm long screws with a #2 Phillips head screwdriver.

  2. ojUoJKcfdTIjppMN
    ojUoJKcfdTIjppMN
    kqUDuZNkwHOKxdsW
    • Release the catch by pushing it in using a plastic opening tool.

    • The catch is off-center, but in line with the middle of the speaker underneath.

  3. REWjmRkgwdjbbAPk
    REWjmRkgwdjbbAPk
    SBPPd6rMkOyvmdTv
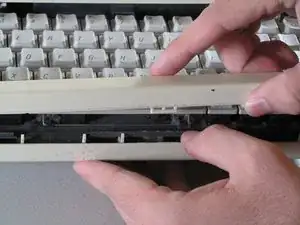
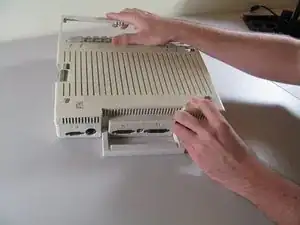
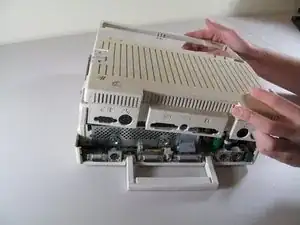
    • Slide the case toward the ports on the back, then grip under the catch and pull up while moving toward the ports to remove.

    This step is wrong. The ports cover should be removed with a plastic disassembly tool first. Failure to do this will lead to a set of broken plastic hooks.

    cybernesto -

  4. CZqfLpwObewXSGpX
    CZqfLpwObewXSGpX
    LYtjTVZ5YN46GQdj
    • Lift the handle straight up to remove.

  5. M3nuBTDswCYPyAJB
    M3nuBTDswCYPyAJB
    QYjZUy5qUtZBBn2R
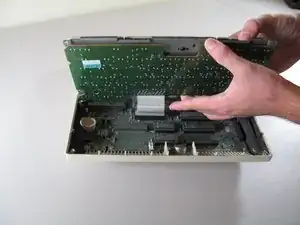
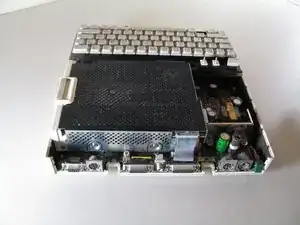
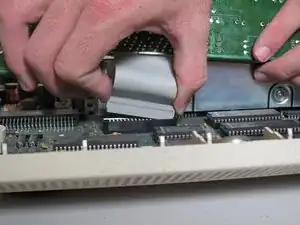
    • Tilt the keyboard up while detaching the ribbon connection by pulling it straight up. You may have to wiggle the connector sideways to loosen it.

    • Be careful not to force the ribbon while pulling it out to avoid tearing. Do not try to pull the ribbon out by pulling the keyboard as it may cause tearing.

Conclusion

To reassemble your device, follow these instructions in reverse order.

Alexandria Weinberg

Member since: 06/10/11

601 Reputation

0 comments