Introduction

Use this guide to remove or replace the interlock assembly in a Clarke Floor Sander 07163A 2012.

  1. aFhxKotnHWEBZUaF
    • Before you begin, make sure the sander is turned off and unplugged.

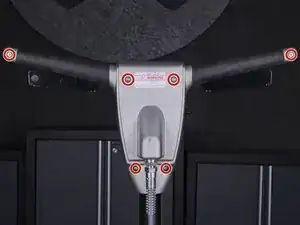
    • Use a 3/16" hex key or driver bit to remove the six 23.4 mm-long screws holding the two halves of the handle enclosure together.

  2. m6YbyadPYEOkZLHj
    m6YbyadPYEOkZLHj
    x3tSTiMdASFwQZGU
    ANTFssZHCCslnPpL
    • The rear half of the enclosure is bolted to the handle support, so the front half will be removed first.

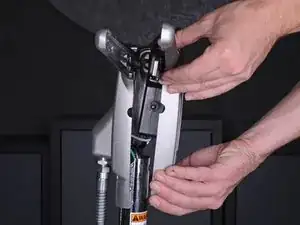
    • Pull the front half of the enclosure straight away from the rear half to separate the enclosure.

    • If the interlock assembly comes out with the front half of the enclosure, detach it and place it back into the rear half.

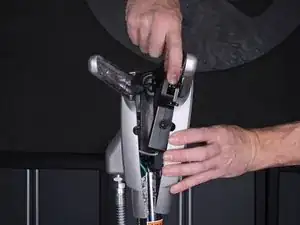
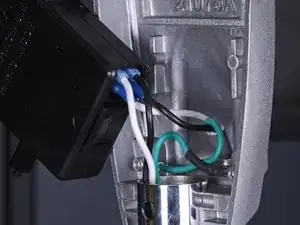
    • Remove the front half of the handle enclosure.

  3. NqaEgosyISvXxgBf
    NqaEgosyISvXxgBf
    mHUOcgIc4eaYaDun
    4lwclVHGCCAwCmOt
    • Pull the wires connected to the interlock assembly straight out of their connectors.

    • Keep track of where each wire connects on the interlock assembly.

  4. aSnx6F5BJeCjRBhG
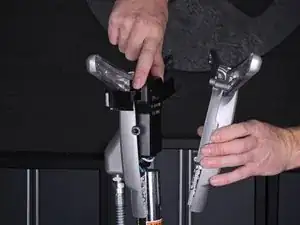
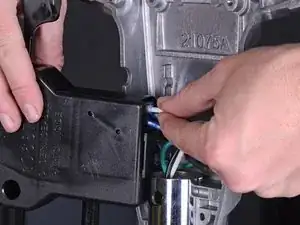
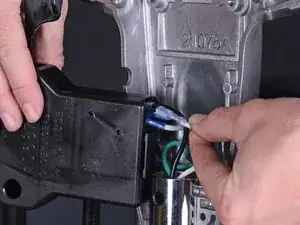
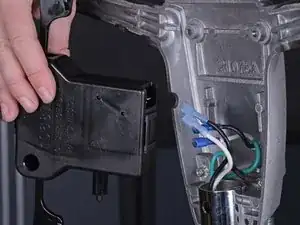
    • After all wires are disconnected from the interlock assembly, remove the interlock assembly from the handle.

Conclusion

To reassemble your device, follow these instructions in reverse order.

Miles Robinson

Member since: 04/03/19

860 Reputation

0 comments