Introduction

Use this guide to remove or replace the dust fan in an American Sanders EZSand Orbital Sander 07163A 2012.

  1. K1NixocPg1pbUaid
    • Before you begin, be sure that the sander is unplugged and powered off.

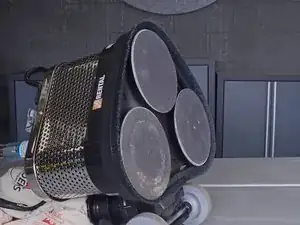
    • Carefully tilt the sander back and lay it down on its side, exposing the three sanding pads on the bottom.

  2. WRxewIeJBi4PYQnD
    • Peel the hook-and-loop sandpaper disc off of the driver assembly.

    This picture doesn’t refer to the white pads between the sanding disk and the base plate.

    GREGORY -

    what is part number for the white pads?

    REYNA -

    MP481400 Disc, Hook, 6-7/8 O.D is the thin white pad

    MP482000 is the sanding disc and pad all in one

    SAM -

  3. TejJnMAKYgMPlpoe
    TejJnMAKYgMPlpoe
    eEqT4ZBSAKQWLS5H
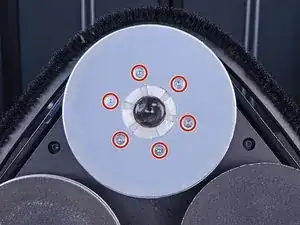
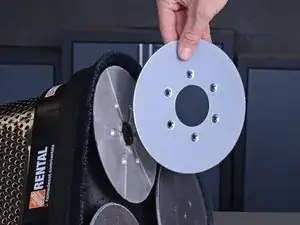
    • Use a 3 mm hex key or driver bit to remove the six 11.9 mm-long screws securing the driver pad.

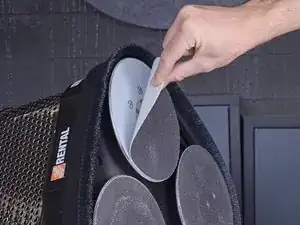
    • Remove the driver pad from the sanding disc.

    Would be nice if you gave the correct part numbers. The disk in the picture is NOT 11139A.

    MARK -

    Not even listed as the Driver Pad it’s called the Sanding Disc part # MP482000

    WAYNE -

  4. UMcBPbIoQBRXqBSm
    UMcBPbIoQBRXqBSm
    1YbXluClXNSG5Crl
    f2S3sMNT1dG2BqKf
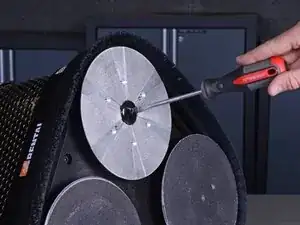
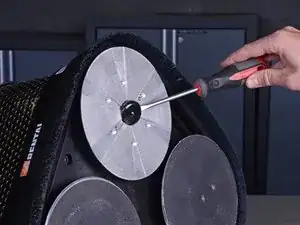
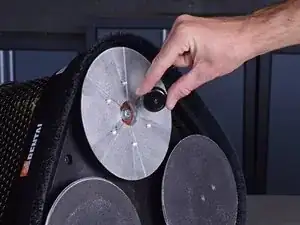
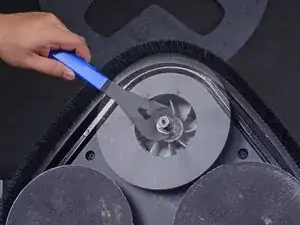
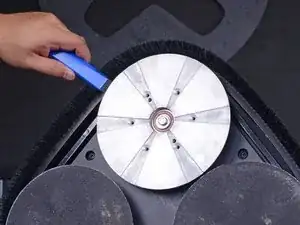
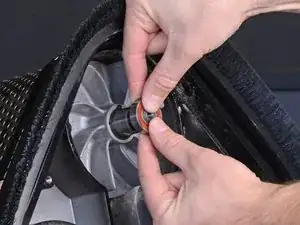
    • Use a flathead screwdriver to pry off and remove the rubber plug in the center of the sanding disc.

  5. GQnsMChSL3QUQI3p
    GQnsMChSL3QUQI3p
    6B5Orj4EPiEE1ukX
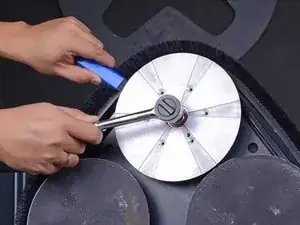
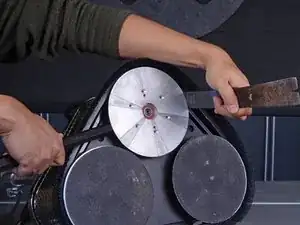
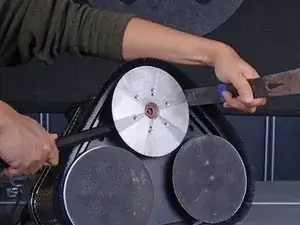
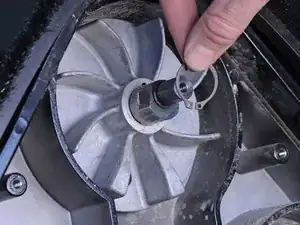
    • Slide a thin 22 mm wrench underneath the sanding disc and clasp it onto the flat part of the motor driveshaft to keep the driveshaft from turning.

    2623 tech where i can get that type of wrench?…i need one

    MANUEL -

  6. BPy3HHtY2uqIyTOX
    BPy3HHtY2uqIyTOX
    eRSbpFEwnL6yQNqI
    • Use an 11 mm socket and socket wrench to remove the 16.5 mm-long bolt securing the sanding disc to the motor driveshaft.

    • Apply counter torque to the driveshaft wrench as you loosen the bolt to keep the sanding disc from spinning.

  7. AjoP6RAil1ZJQ6gZ
    AjoP6RAil1ZJQ6gZ
    iasgH226QBes5uyW
    A5WsbEmkRNOoIdOD
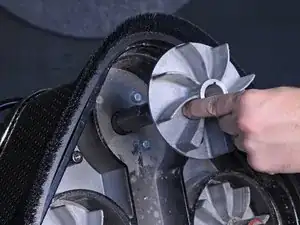
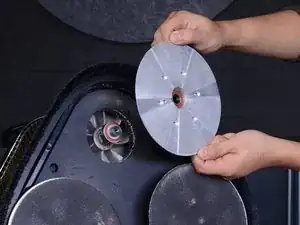
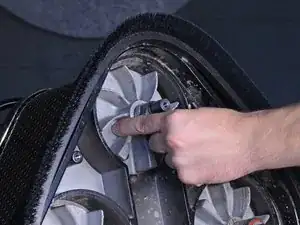
    • Take two pry bars and insert them underneath the sanding disc as close to the driveshaft as possible.

    • Apply pressure to the pry bars in opposite directions to carefully pry the sanding disc off of the driveshaft.

    • Remove the sanding disc from the floor sander.

    With this step do yourselves a favor, use a set of jaw pullers. So much faster.

    AUSTIN -

    with this step I use 2: 1/4 in-20 x 1 in. flange bolt; insert in the 2 screw holes opposite of each other that you didn’t use to remove the 6 hex screws. do not screw them in all the way, and with the flange head attach a two claw puller.

    LUIS -

    actually just use a rachet to inch down the bolts that way you dont bend the bolts in the holes.

    JEFF -

  8. 3HKvxORmfFGPtt3h
    • Repeat the previous seven steps to remove the other two sanding discs before continuing.

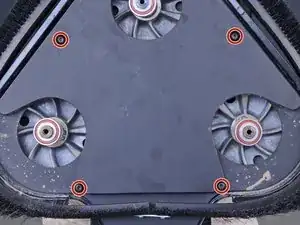
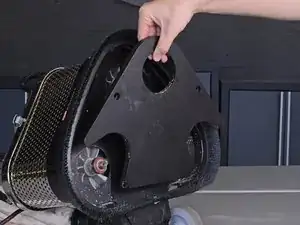
    • With all three sanding discs removed, use a 4 mm hex key to remove four 25.4 mm-long screws securing the bottom cover and bottom weight.

    i had to tap my 4mm allen bit into the screw hole in order to not round off the allen hole

    JEFF -

  9. G1CINktDNSYFrVAG
    • Lift the bottom weight away from the sander.

  10. G21iPYFHyAFEypa3
    G21iPYFHyAFEypa3
    etvEYsHHN1qkiKEr
    xmNuyFoiJYS3rbvT
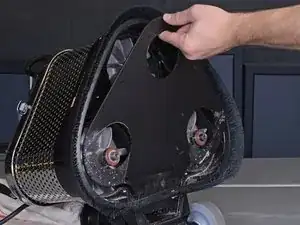
    • Pull the top edge of the bottom cover away from the sander until you have enough space to slide the cover out.

    • Slide the cover across the bottom of the sander, away from the wheels, and remove it.

  11. ELXIYmRWiLGvKcDC
    • Remove the washer from the motor shaft.

  12. SnpMYWtVcVWUXVfA
    SnpMYWtVcVWUXVfA
    kiWUWBF54pCAwADZ
    vM24BCkcDbQjvCvD
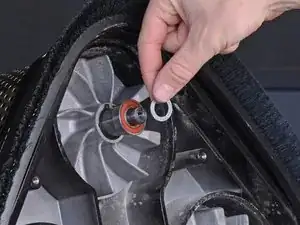
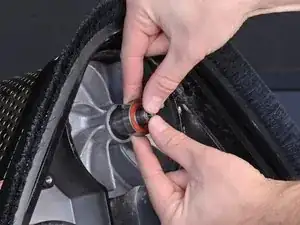
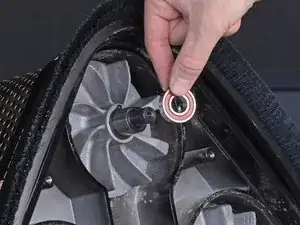
    • Pull the drive pad bearing straight off of the motor shaft.

    • You may not be able to remove the bearing with your hands. If this is the case, use a bearing puller to remove the bearing.

  13. bvPQ5hTg6oymeXkI
    bvPQ5hTg6oymeXkI
    pocg1g4uEYO5KADy
    wUkSAdLMJJlmgjPO
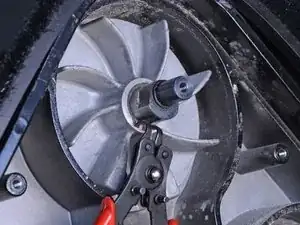
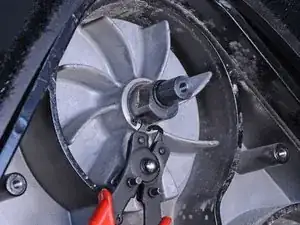
    • Using snap ring pliers, pry the snap ring open and slide it off of the motor shaft.

    • Remove the snap ring.

  14. OE56pyWwSF5NkYcK
    OE56pyWwSF5NkYcK
    Jfe5dQCYAju5GZPV
    • Slide the dust fan straight off of the motor shaft.

Conclusion

To reassemble your device, follow these instructions in reverse order.

Miles Robinson

Member since: 04/03/19

860 Reputation

0 comments