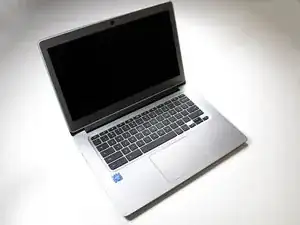
Introduction

This is a guide designed to instruct you on how to replace the power port on your Chromebook. Make sure that your computer is powered off before you begin to work on it. All you need for this replacement is a Phillips #0 screwdriver, a plastic spudger, and tweezers. Remember to be careful when handling the internal components of your computer as they are fragile.

  1. GMBtwmLkFBFURZtk
    • Working on your device while it is turned on may result in electric shock. Make sure to shut down and unplug your device before you begin.

    • Turn device over so the bottom panel is facing you.

  2. PN3egt2PE1knitR5
    • Remove the eight 4mm Phillips #0 screws.

    • Remove the two 6mm Phillips #0 screws.

    There are two tabs on the battery opposite the connector side that need to be inserted into the retention slots or the battery won’t sit flat. Need to do this before reinserting the battery screws.

    Also, I found that #00 Phillips works best on the 4mm screws.

    John Burleson -

  3. xpK5hFjVxVobQgUZ
    xpK5hFjVxVobQgUZ
    KvtmAfscIIcQeXSV
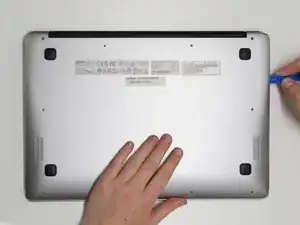
    • Insert a plastic opening tool into the crack between the bottom panel and the side of the computer.

    • Gently pry the panel off the computer by continuously pulling up and on the panel and moving the plastic opening tool around the crack until the panel comes off.

    • There are several clips holding the cover in place.

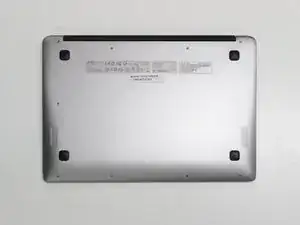
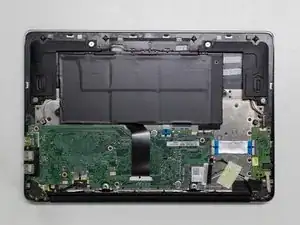
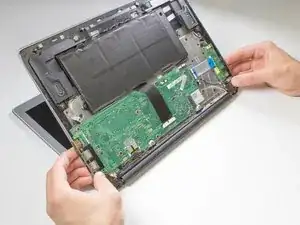
    • Remove the bottom panel and set it aside.

  4. HsF2Lt1UYB23mId5
    HsF2Lt1UYB23mId5
    OGpvpJwXHJ2es6GC
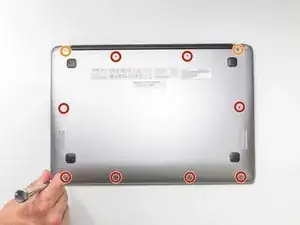
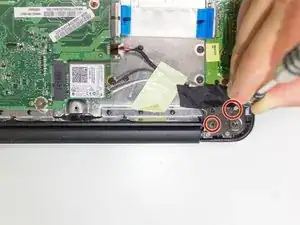
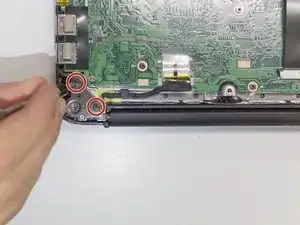
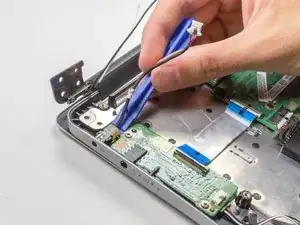
    • Remove the four 4mm Phillips #0 screws from the hinge plates on the two corners of the laptop.

    • Remove any manufacturers tape holding in the wires.

  5. ahPm32naeTiShF4U
    ahPm32naeTiShF4U
    PnWkVpBYoAPELYWA
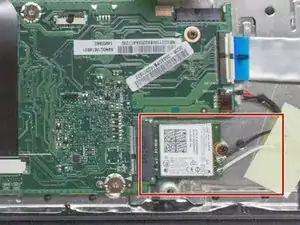
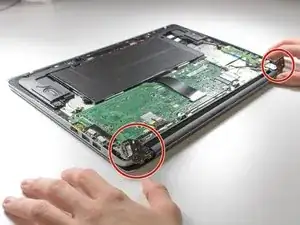
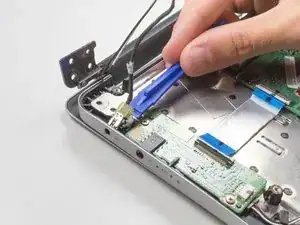
    • Disconnect black and white wires from the wireless adapter by gently pulling up on the metal connectors with your fingernail.

  6. jfR5K2sNdqQemGeD
    jfR5K2sNdqQemGeD
    RsTHkia5eRSZJRia
    • Open hinges to the screen. and then slide base of the computer off of the hinges.

    • It is easiest to do this by holding the hinges in place and opening the entire laptop. Then close the laptop while letting the hinges remain open.

    • This will detach the base of the computer from the screen in order to allow better access to the power port.

  7. BOdepCOFD1tss2Pe
    BOdepCOFD1tss2Pe
    fMKSDYM1Trsy6KEH
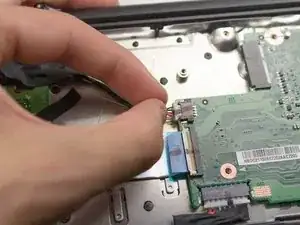
    • Detach the power port plug from the main circuit board by grabbing it by the sides of the plastic with the tweezers and gently pulling it out.

  8. Wpd34HaaR2hveSi2
    Wpd34HaaR2hveSi2
    urQ5hbtHFWsxT6nM
    • Remove the power port entirely from the computer by pulling up on the plastic portion of the port with a plastic opening tool.

Conclusion

To reassemble your device, follow these instructions in reverse order.

Cayley Ho

Member since: 19/04/17

545 Reputation

6 comments

I need a link to the replacement part for a new power port!

Tom Adams -

Require a link for a new power port

Kieran Davies -

Do a search for 50.GC2N5.003

Scott Hardin -

The guide is excellent and easy to follow.

However, a word of advice. If you do want to disconnect the wires be warned that their terminals are extremely small and difficult to get back if damaged. It appears to be a soft metal and if you do not line them up exactly the holes on the wireless chip will distort and you will find it impossible to put them back on. I speak from experience and the only solution is to either buy a new wireless adaptor or to solder the wires on.

That itself is fiddly and I have yet to find out if it has worked on mine. (I need to buy a soldering iron). As the wire is an antenna only, I am assured that it should still work even without a connection, provided that you are near the router.

My recommended procedure is not to disconnect the wires but instead to take the small screw out of the adaptor itself and then press down and slide it out. That will free the two halves of the computer without separating the wires.

Ron Seymour -

Thanks for giving my Chromebook a new lease on life! I followed all of the steps except (1) disconnecting the wireless adapter and (2) separating the base from the screen. Those two steps seemed unnecessary, and since I don't repair my own devices regularly, I was worried I might cause more trouble for myself than the convenience was worth. The rest was very helpful and clearly written/highlighted in the photos. Thank you again!

K.E.H. Ellis -

Thank you so much for posting this! I had to replace both the charge cord and the power port when my computer fell to the ground with the charger plugged in. I used the part number that was posted (50.GC2N5.003 - thanks Scott!) to find the charge port and then followed these steps exactly as K.E.H. Ellis did (all of the steps except Steps 5 and 6) and everything worked perfectly. Thank you!

Jesse Carlson -