Introduction

This is a guide to replace a faulty motherboard in an Acer Chromebook CB3-431-C5EX laptop. You will need a Phillips #0 screwdriver, iFixit opening tool, Tweezers, and a Heat gun. Be cautious when removing the motherboard because of having to handle wires.

  1. GMBtwmLkFBFURZtk
    • Working on your device while it is turned on may result in electric shock. Make sure to shut down and unplug your device before you begin.

    • Turn device over so the bottom panel is facing you.

  2. PN3egt2PE1knitR5
    • Remove the eight 4mm Phillips #0 screws.

    • Remove the two 6mm Phillips #0 screws.

    There are two tabs on the battery opposite the connector side that need to be inserted into the retention slots or the battery won’t sit flat. Need to do this before reinserting the battery screws.

    Also, I found that #00 Phillips works best on the 4mm screws.

    John Burleson -

  3. xpK5hFjVxVobQgUZ
    xpK5hFjVxVobQgUZ
    KvtmAfscIIcQeXSV
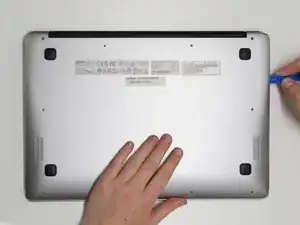
    • Insert a plastic opening tool into the crack between the bottom panel and the side of the computer.

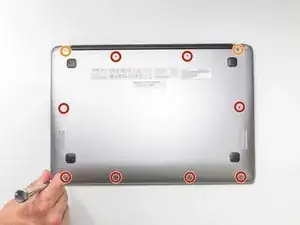
    • Gently pry the panel off the computer by continuously pulling up and on the panel and moving the plastic opening tool around the crack until the panel comes off.

    • There are several clips holding the cover in place.

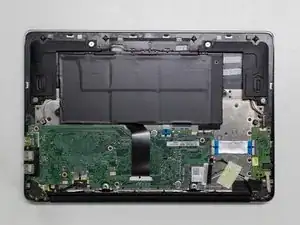
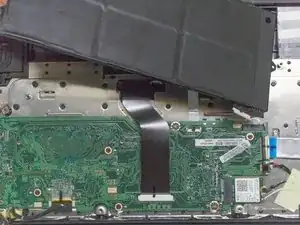
    • Remove the bottom panel and set it aside.

  4. R4iBZAJfGZCxyPlc
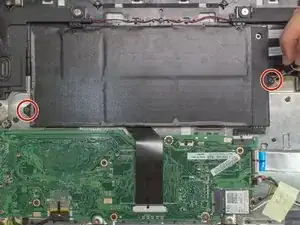
    • Remove the two 4mm Phillips #0 screws on either side of the battery pack that are securing it in place.

  5. HyPiaYidMqCPdboX
    HyPiaYidMqCPdboX
    Gv45liXitlUUcACe
    • Disconnect the taped white 8-pin cable on the bottom right of the battery pack.

    • Use thumbnail to pull on the small protruding tabs on either side of the connector.

  6. UcGpbOshMtosSUR3
    • Carefully lift the entire battery pack out of the laptop.

  7. 2kHJSFmVNp4MWHh4
    2kHJSFmVNp4MWHh4
    vvBXEBCemOq3rsAr
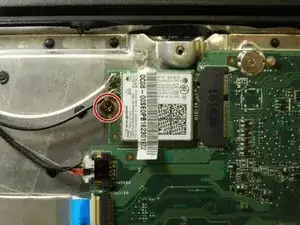
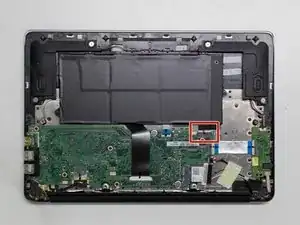
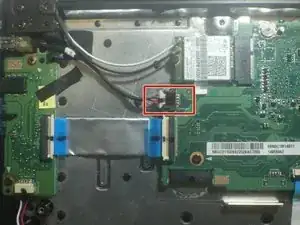
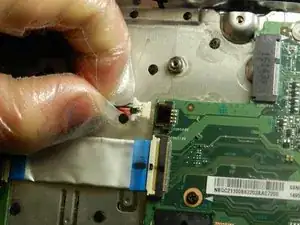
    • Remove the 4.7 mm screw from the Wi-Fi card using a Phillips #0 screwdriver.

    • Remove the Wi-Fi card from the laptop.

  8. lfRTpfaQevDOZ3lQ
    lfRTpfaQevDOZ3lQ
    JlaBwRSXPOBXOYYL
    • Unplug the black wire connecting the small circuit board to the motherboard.

  9. wfJoPs1lAfWM5nBu
    wfJoPs1lAfWM5nBu
    6d2OAmlxmFhWeIMr
    u1xTDeK3LekPjxwX
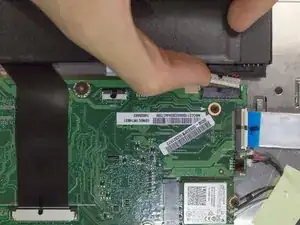
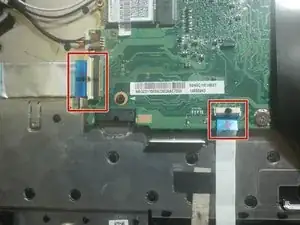
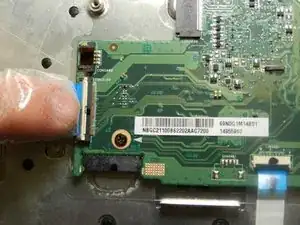
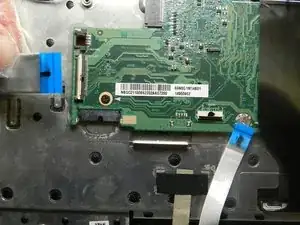
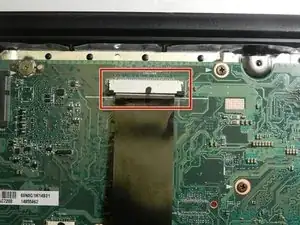
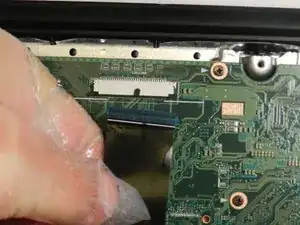
    • Lift the respective white and black tabs and slide the ribbon cables out of their connectors.

  10. hFyOrJpVC3JNbkih
    hFyOrJpVC3JNbkih
    fmDNWWwp2VtdYAMn
    • Carefully remove the display adapter from the motherboard.

  11. 5vAWC1ksSkXoJ6dS
    5vAWC1ksSkXoJ6dS
    Cefdys4FsOLBja6n
    • Remove the black tab connecting the motherboard to the keyboard.

  12. 2XUIXsQUeVTaUtEp
    2XUIXsQUeVTaUtEp
    FhsicJHyDaZK6Pnr
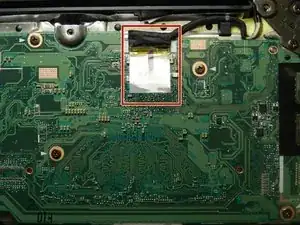
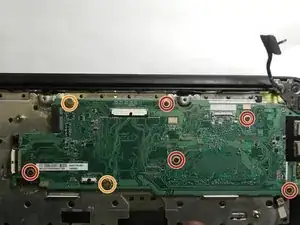
    • Remove the five 4.7 mm screws from the motherboard using a Phillips #0 screwdriver.

    • Remove the two 4.5 mm screws from the motherboard using a Phillips #0 screwdriver.

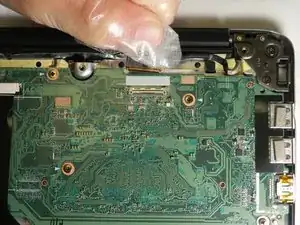
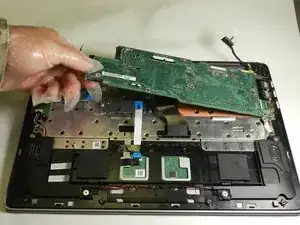
    • Gently remove motherboard from the laptop.

Conclusion

To reassemble your device, follow these instructions in reverse order.

Graham Caldwell Blondes

Member since: 20/09/21

133 Reputation

0 comments