Introduction

This is a fairly easy repair and only requires a Phillips #0 screwdriver and a plastic spudger. Before beginning this repair, make sure to completely power down your computer as it is dangerous to work on the internals of the computer while it is running. Also, remember to handle all of the internal components of your Chromebook with care as they are fragile.

  1. GMBtwmLkFBFURZtk
    • Working on your device while it is turned on may result in electric shock. Make sure to shut down and unplug your device before you begin.

    • Turn device over so the bottom panel is facing you.

  2. PN3egt2PE1knitR5
    • Remove the eight 4mm Phillips #0 screws.

    • Remove the two 6mm Phillips #0 screws.

    There are two tabs on the battery opposite the connector side that need to be inserted into the retention slots or the battery won’t sit flat. Need to do this before reinserting the battery screws.

    Also, I found that #00 Phillips works best on the 4mm screws.

    John Burleson -

  3. xpK5hFjVxVobQgUZ
    xpK5hFjVxVobQgUZ
    KvtmAfscIIcQeXSV
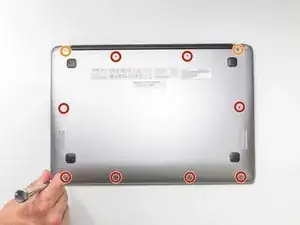
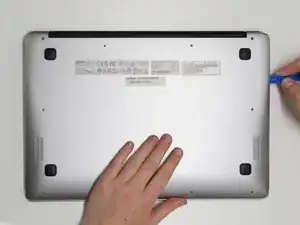
    • Insert a plastic opening tool into the crack between the bottom panel and the side of the computer.

    • Gently pry the panel off the computer by continuously pulling up and on the panel and moving the plastic opening tool around the crack until the panel comes off.

    • There are several clips holding the cover in place.

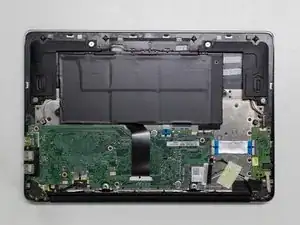
    • Remove the bottom panel and set it aside.

Conclusion

To reassemble your device, follow these instructions in reverse order.

Cayley Ho

Member since: 19/04/17

545 Reputation

0 comments