Introduction

Use this guide to replace the motherboard for your device.

  1. jX1XpZmrpgCZ2KY5
    jX1XpZmrpgCZ2KY5
    WkfuGOYsPuFpggix
    • Make sure you turn off the laptop before starting.

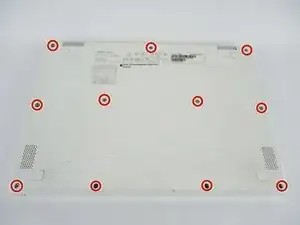
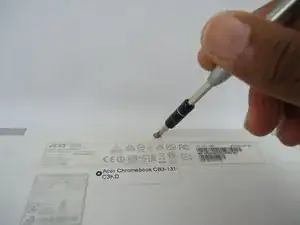
    • Unscrew and remove the (11) eleven 4mm J0 head screws on the underside of the laptop using the JIS #0 screwdriver.

  2. qEEJ3xtssXTIhd1v
    qEEJ3xtssXTIhd1v
    V6yeGLKyJM3ImunC
    uE3CMKNB1qbLC3xc
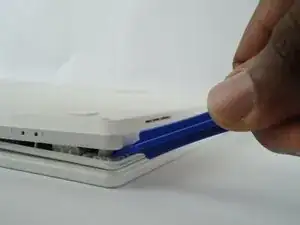
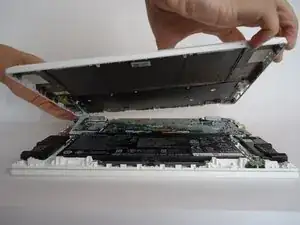
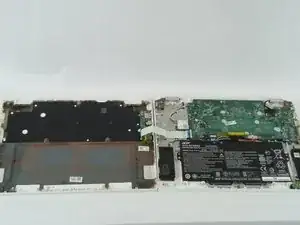
    • Use the plastic opening tool to remove the back cover.

    • Be careful not to damage the ribbon cable connecting the back cover to the laptop.

  3. OYu35xO5OSVu1xJt
    OYu35xO5OSVu1xJt
    omsG1FDUyVOtPk4m
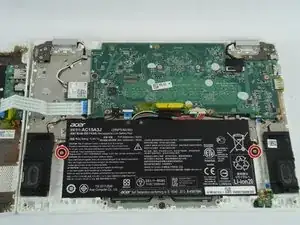
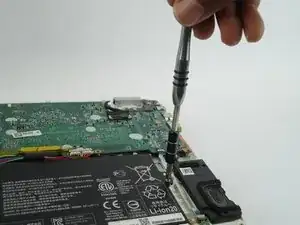
    • Unscrew the (2) two 3mm J0 Phillips head screws that hold the battery in place.

  4. 5k52pCrBKaZcIkNH
    5k52pCrBKaZcIkNH
    DRoaHLnxHGEdo4ku
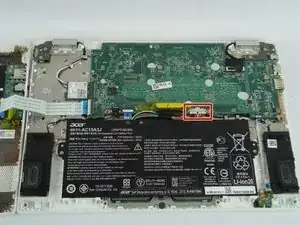
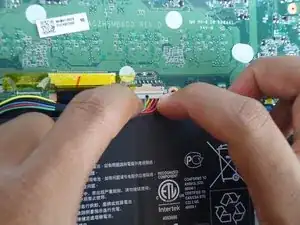
    • Disconnect the battery from the motherboard.

    • Carefully disconnect the cable parallel to the board, not at an angle. Otherwise, you could damage the port.

  5. ISeC1XDPyggFhjD5
    ISeC1XDPyggFhjD5
    OnomyJBUmC2sFLJZ
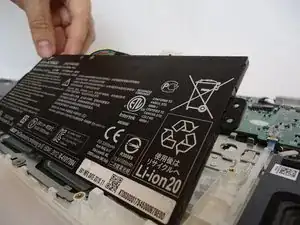
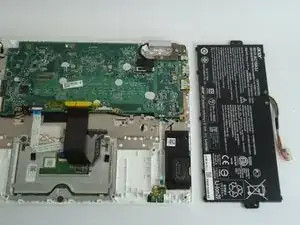
    • Carefully lift the battery from one side, and then lift it out of the laptop.

  6. LoGAL1NukJXIdrgK
    LoGAL1NukJXIdrgK
    QiuKnjDPJEnylYge
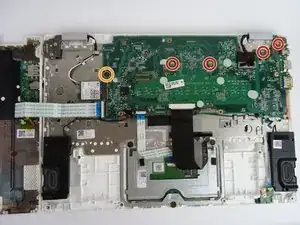
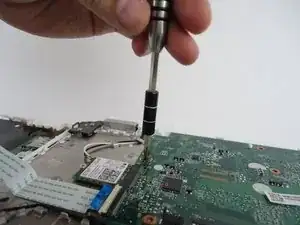
    • Unscrew the (4) four J0 head 3.0 mm screws from the motherboard.

    • Unscrew the (1) one 7.0 mm screw from the center of the motherboard.

  7. lMc1RKpDKQjUATWT
    lMc1RKpDKQjUATWT
    qBsZgteSsFrdNlqE
    PwkEEi2WpwTldqxK
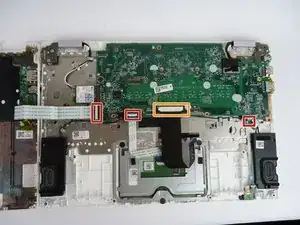
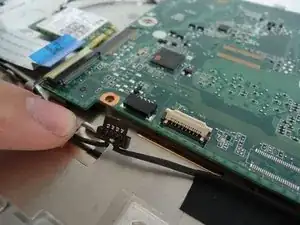
    • Unlock the latches on the three white ribbon cables, then pull to detach them from the motherboard.

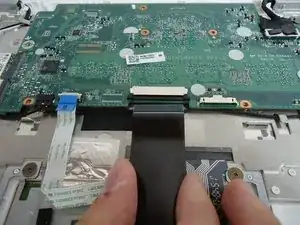
    • Slide the hook forward and pull the black ribbon cable out.

    "Unlock the cables":

    These are ribbon cables that slot directly into the connectors on the motherboard. For the cables to the lower case and the trackpad, the connectors are black and white. The color part that's the outside half of the connector - that is a little tab that flips up. You don't need much force with a fingernail. Just flick it up, then you can gently pull the ribbon cable by its blue tab, parallel to the motherboard.

    The larger black ribbon is the keyboard cable. That connector may have its black latch held in place by Kaptan tape. Gently peel up the tape, then release the cable by easing the black latch out, parallel to the motherboard, just about a millimeter. There are small edges on each side of the latch, two fingers you can pull that out. Again, not much force at all.

    The last tiny cable is the indicator lights. Again, the white tab just flips up, then you can pull out the ribbon by the blue tab.

    Boyd Waters -

  8. 2QPxvaJ1CBRxiSRQ
    2QPxvaJ1CBRxiSRQ
    KJ2AMUeYTYUEFfYw
    CvFitcxuy3gPHt16
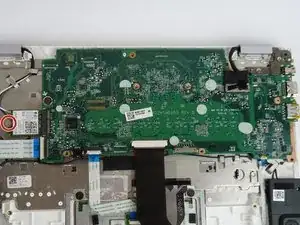
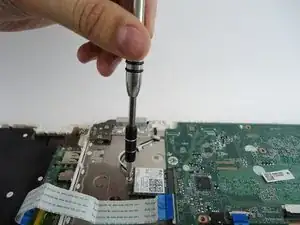
    • Unscrew the 4.0 mm screw from the Wi-fi card using the JIS #0 screwdriver.

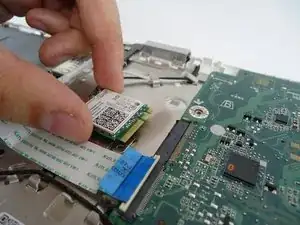
    • Pull the Wi-fi card parallel to the Chromebook to remove.

  9. OUgIjVYnWUtIUwmm
    OUgIjVYnWUtIUwmm
    4U3mUBlgvI12HlWy
    DKtKddEkBBYIJPsp
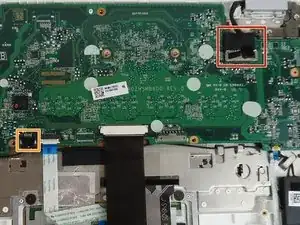
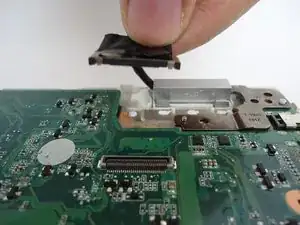
    • To remove the regular cable near the hinge, pry from one side.

    • To remove the regular cable at the top of the motherboard, pull it parallel to the board.

  10. 6nXhfMLDwWxSMwXw
    6nXhfMLDwWxSMwXw
    PyLtb4nZXANfGpOA
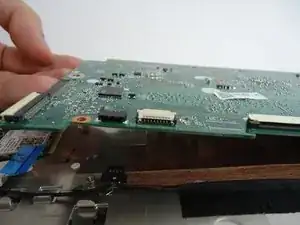
    • Open the hinge by prying it backwards.

    • Be careful not to damage the ribbon cable connecting the back cover to the laptop.

    • Remove the motherboard by lifting from the top.

    The two 4mm screws on the metal hinge need to be removed before prying up the hinge.

    The easy way to lift back the hinge is to carefully "open" the laptop as usual, gently lifting from the front of the case. Then set the case back down, the unscrewed hinge remains elevated.

    Boyd Waters -

Conclusion

To reassemble your device, follow these instructions in reverse order.
Ashley Oxner

Member since: 26/09/17

704 Reputation

0 comments