Introduction
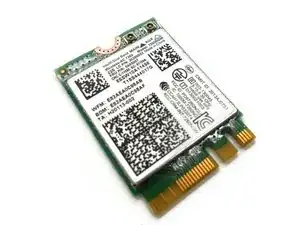
If your Acer Chromebook is not able to connect to Wi-Fi even after you try troubleshooting through the operating system, a WLAN chip replacement may help resolve your problem. The following steps will show you how to replace the WLAN Board in your Acer Chromebook CB3-111-C670. This model of the Acer Chromebook uses an Intel WLAN Wireless Board 7260NGW that allows the Chromebook to access wireless internet.
-
-
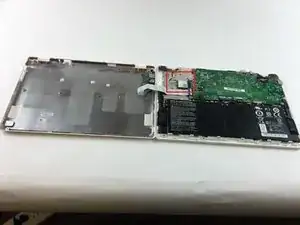
Turn the Chromebook over so that the back panel with the Chromebook's serial number is facing upward.
-
Use the Phillips #000 screwdriver to remove the twelve screws from the back panel.
-
Use an opening tool to detach the back panel. Start at one of the four corners of the Chromebook and gently work around the edges. Insert it in the crease where the back panel and the main board meet. You should hear a slight click; this is the sound of the back panel detaching from the board.
-
-
-
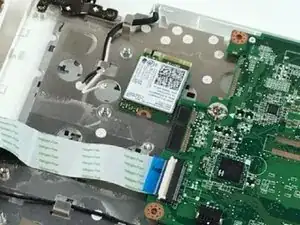
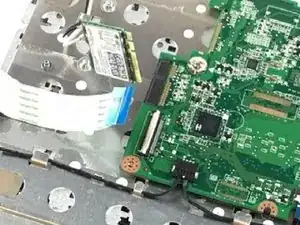
Disconnect the coaxial cables from the WLAN board located near the top left corner of the motherboard.
-
Grasp the top and bottom edge of the WLAN board using your fingers and gently disconnect it from the motherboard.
-

To reassemble your device, follow these instructions in reverse order.