Introduction

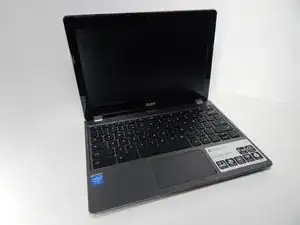
The trackpad replacement for the Acer Chromebook C740 requires removing the back panel, removing the battery, unplugging a ribbon cable, and removing several screws.

  1. 1DURKfRbgZOYdcMN
    • Power down the Chromebook and disconnect the power adapter.

  2. UtocpFGyJPwmFE6x
    UtocpFGyJPwmFE6x
    jU3lPobIiaMW4Fny
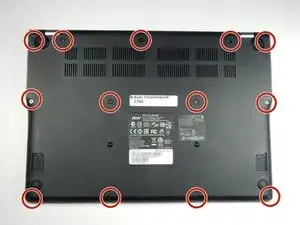
    • Place the chromebook bottom side up on a flat surface.

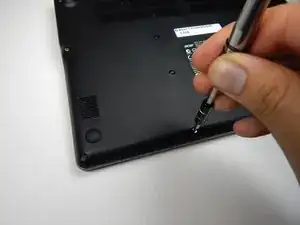
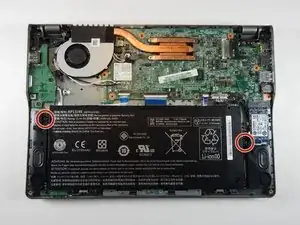
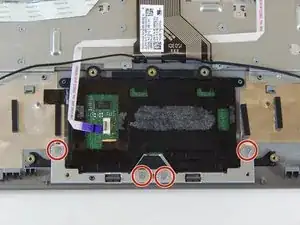
    • Remove the thirteen 7 mm screws with a Phillips #0 screwdriver.

  3. l4Gbq5OJdArkdJYL
    l4Gbq5OJdArkdJYL
    QD4KyPW3qBtt1VlZ
    JZE2sE2YQXbxWjfE
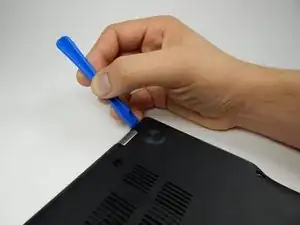
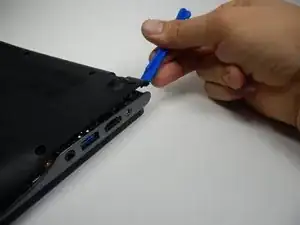
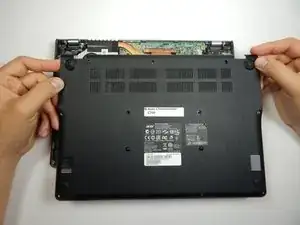
    • Insert the plastic opening tool into the slit near the hinges and pry upwards to lift the back panel.

    • Applying pressure may be necessary. A click indicates the panel is ready to come off.

    This was SO helpful! Thank you!

    littlewhitecloudy -

  4. U5pXPTpAeENRHcXB
    U5pXPTpAeENRHcXB
    OBtTTSdMERHHSyDT
    FJUDsKQkfNDfKYot
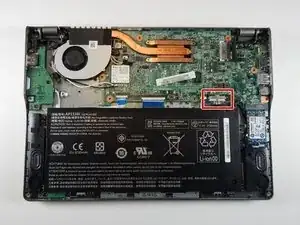
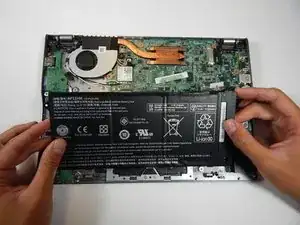
    • Unplug the white 8-wire battery connector from the motherboard by using a spudger to push the two L-shaped indentations towards the battery.

    • The connector is a tight fit. This process requires going back-and-forth between the two indentations and plenty of patience.

  5. SjrRFXRTk2VOSNYh
    SjrRFXRTk2VOSNYh
    S1jXHV1gwP3QnmEL
    • Remove the the two 3.7 mm screws with a Phillips #0 screwdriver.

  6. eUI4RhAjxKWcXdvN
    • Lift the battery from the frame.

  7. 5NkiW6IfrwFTjZYo
    5NkiW6IfrwFTjZYo
    ZEjiOyncHxOiE6Ot
    uQklASy3gj4QpDdn
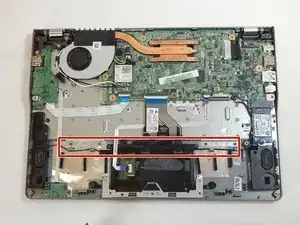
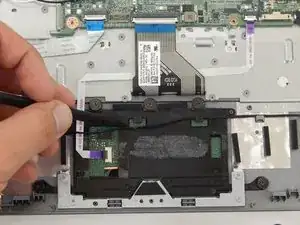
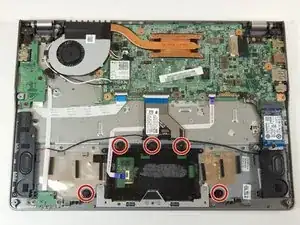
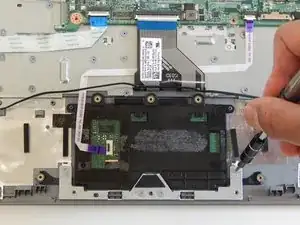
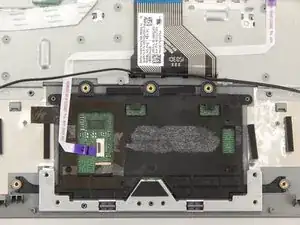
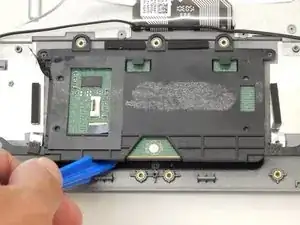
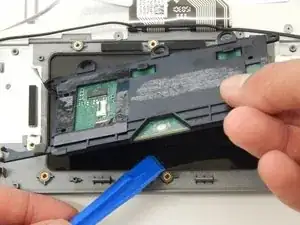
    • Pull the black wire out from under the the black center clips and up from the gray outer clips with a spudger.

    Should specify how to find wire.

    William Yu -

  8. iCCbBoFWPbLCyCW5
    iCCbBoFWPbLCyCW5
    DegWypCxqlfNDy2w
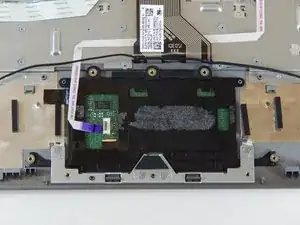
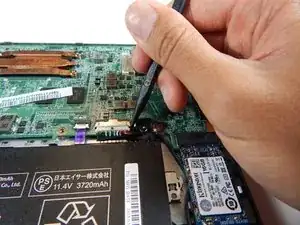
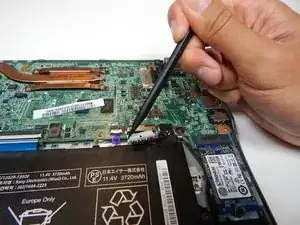
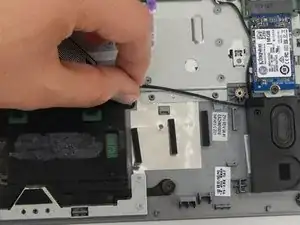
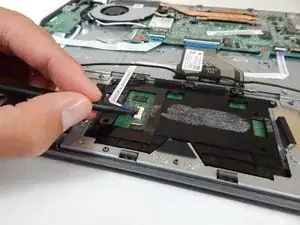
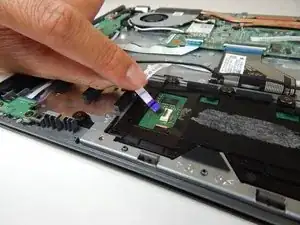
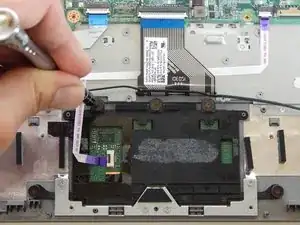
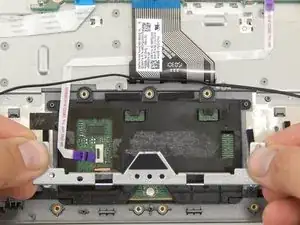
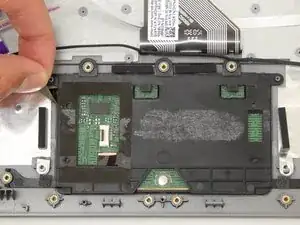
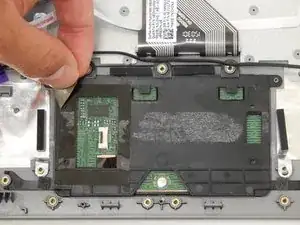
    • Use a spudger to lift the black clip on the small purple ribbon cable connector to the left of the touchpad.

    • Pull the ribbon cable out from the connector.

  9. GDZopoBGfMHPWQxX
    GDZopoBGfMHPWQxX
    EALhax33wiBKCbBg
    • Remove the five 2.5 mm screws with a Phillips #0 screwdriver.

  10. K1baXsLSwrLJcEnP
    K1baXsLSwrLJcEnP
    DlooWqpZmZrpaaGt
    • Remove the four 2.8 mm screws with a Phillips #00 screwdriver.

  11. j6gaC1ZuHksTAOXo
    j6gaC1ZuHksTAOXo
    ogriWq6nYHWoR3NP
    • Wiggle off the silver bracket with your fingers.

  12. KkJ5nJLTXkaYpEx5
    KkJ5nJLTXkaYpEx5
    JDMAA5TVgQ3WU3nK
    • Remove the black tape on the left side of the touchpad.

  13. 6lAL4yRDPfPpt3lR
    6lAL4yRDPfPpt3lR
    M54qExEXdk5X5Z2E
    • Lift off the black plastic cover with the plastic opening tool.

Conclusion

To reassemble your device, follow these instructions in reverse order.

Flor De La Rosa

Member since: 25/04/17

875 Reputation

0 comments