
Introduction
This guide explains how to properly remove the fan of the Acer Chromebook C720-2103. It can be referenced for temporary removal, while replacing another component, or for the fans replacement. This is a moderately hard replacement, requiring the removal of the battery first.
A fan replacement may be necessary if the device is experiencing unexpected shutdowns due to overheating.
- Be extremely gentle while handling internal components of the device, most are very fragile.
- Make sure the device is powered off during this replacement. There is a possibility of electrocution.
-
-
Shut the device off.
-
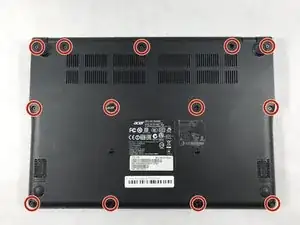
Turn the device over so the bottom is facing up.
-
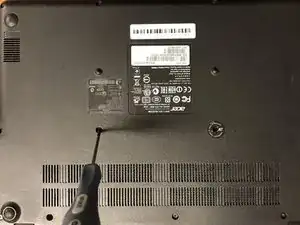
Remove all thirteen 6mm screws using a Phillips #0 screwdriver.
-
-
-
Wedge a plastic opening tool between the back casing and the rest of the device.
-
Apply pressure up and down carefully, until backing pops up. Repeat this process in multiple spots if needed.
-
-
-
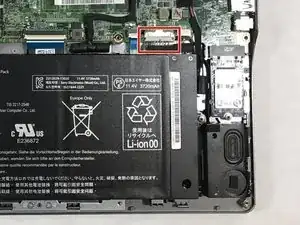
Pull the rainbow cable connector out of the white terminal by wiggling it gently from side to side with your fingers.
-
-
-
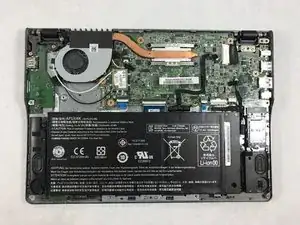
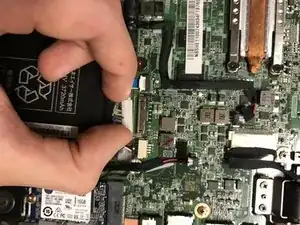
Lift the battery straight up and out of the device with your hands. Take care not to knock the battery against another component.
-
-
-
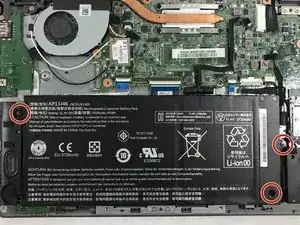
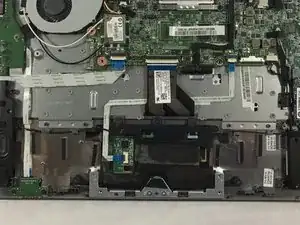
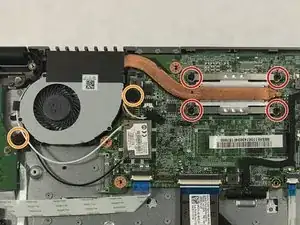
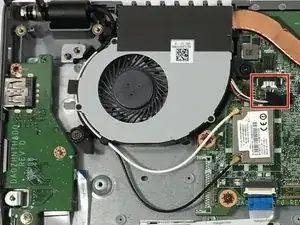
Remove all four 6mm screws attaching the fan to the motherboard with a Phillips #0 screwdriver.
-
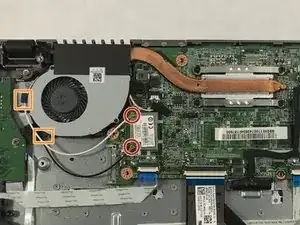
Remove the two 6mm screws attaching the fan to the device base with the Phillips #0 screwdriver.
-
-
-
Unsnap the two coaxial connectors from the motherboard.
-
Unhook the coaxial wires from the side of the fan by gently pulling them downward and away from the hooks.
-
-
-
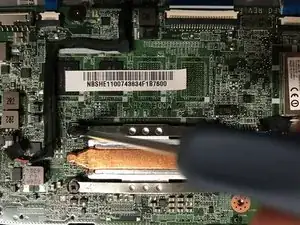
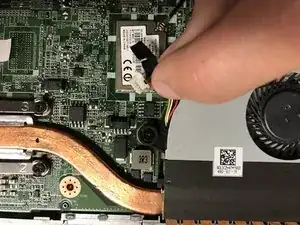
Peel up the tape attaching the rainbow connector wire to the motherboard, but leave the tape attached to the wire itself.
-
Pull the rainbow cable connector out of the black terminal by wiggling it gently from side to side with your fingers.
-
-
-
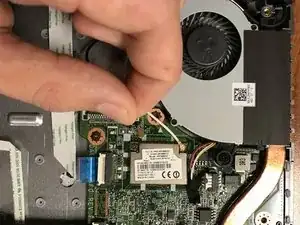
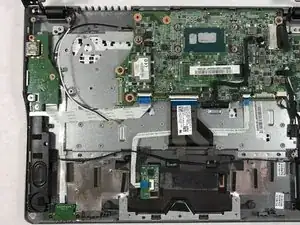
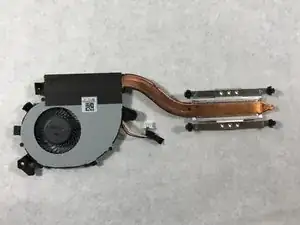
Lift the fan component up and out of device with your hands. Take care not to knock the fan against the motherboard.
-
To reassemble your device, follow these instructions in reverse order.