Introduction

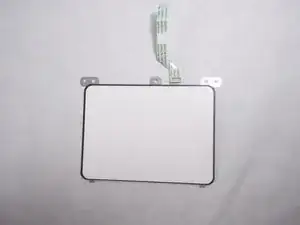
This guide will walk you through replacing the track pad in your Acer Chromebook 15 CB5-571-C09S.

  1. JMxJHm4x5MUqOri1
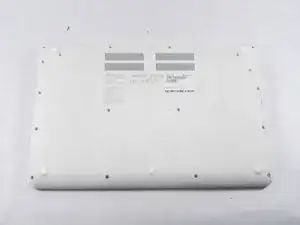
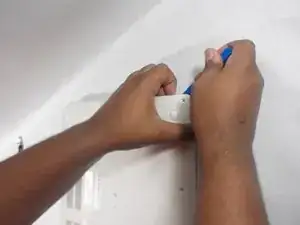
    • Place the device on a flat surface faced down so that the fan vents are at the top of the device.

  2. WmCaEvKYGE614Q6U
    WmCaEvKYGE614Q6U
    xOBoISsDVwOP1Q2m
    • Unscrew the eighteen 6 mm PH0 Phillips head screws from the back of the device.

  3. aGmPTYtPMOPsNqL3
    aGmPTYtPMOPsNqL3
    ghceCUUBQBMqCaJK
    • Use a plastic opening tool to pry open the back cover around the edges of the device.

    • Be careful not to crack or break the back cover of the device.

    • You will have to adjust the position of the device to pry it open along all the edges.

  4. Wme2LGVeqD2p5DYq
    Wme2LGVeqD2p5DYq
    JRtNXknG1eBVHK4D
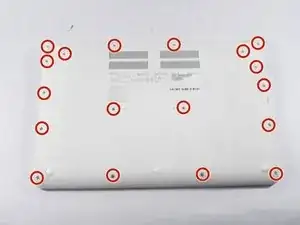
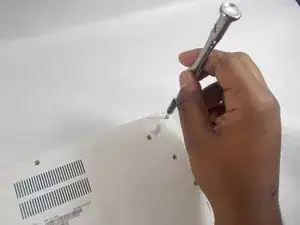
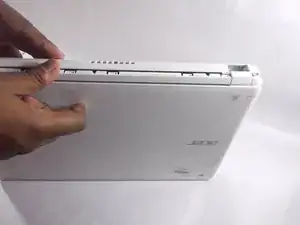
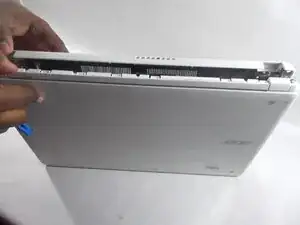
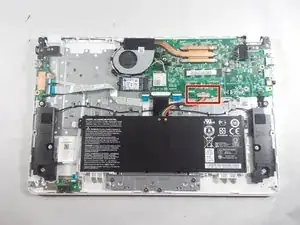
    • Stand the device up with the hinges on top and carefully pull apart the back cover from the device.

  5. Z3NgfdmL2UxbkKFZ
    Z3NgfdmL2UxbkKFZ
    YeVhMUWkcClIcsWl
    2Av1jE2CsXGuQNNP
    • The battery is the large black rectangle located in the bottom center of the device.

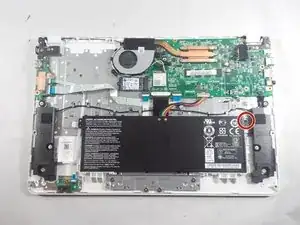
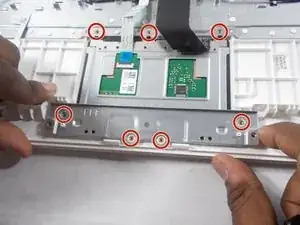
    • Unscrew the single black 5 mm PH00 Phillips head screw holding the battery in place located at the top right corner of the battery.

  6. RdY2RNuuYJjOEos1
    RdY2RNuuYJjOEos1
    QMXbNBLEjEllu2mt
    1PAmgvIPKBYLa6qc
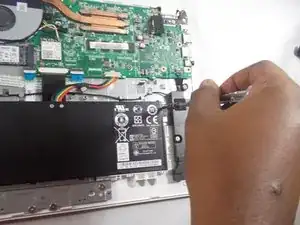
    • Disconnect the battery connector from the motherboard using two plastic opening tools.

    • The battery connector is the white "plug" that connects the battery to the motherboard with rainbow colored wires attached to it.

    • Use two of the plastic opening tools on either edge of the battery connector and carefully pull out the battery connector out from the motherboard.

  7. L3FmIJKmQFP1vW1x
    L3FmIJKmQFP1vW1x
    IweZMisYJoWVpqvA
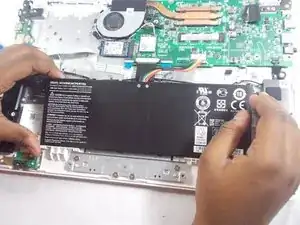
    • Once the battery has been disconnected from the motherboard it can easily be removed from the device.

    • Grab the top edge of the battery and carefully pull it up and out of the device towards you.

  8. bGSm2TtF1ZVvbI4D
    bGSm2TtF1ZVvbI4D
    CgMxYS6LiHWZIRT1
    • The track pad is located in the bottom center of the device where the battery used to be.

    • Unscrew the seven 2 mm PH00 Phillips head screws.

  9. xOYjJPeiLlhFNpBB
    xOYjJPeiLlhFNpBB
    gXvN4rpfFS1vgbVI
    anpEXPpFLD4OCRKa
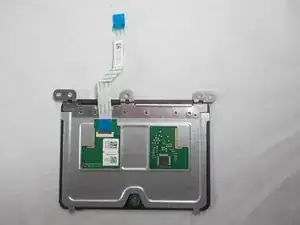
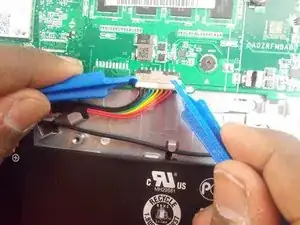
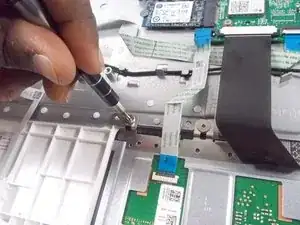
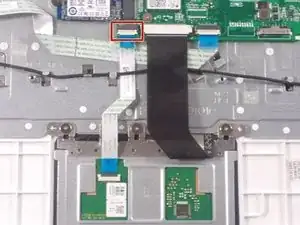
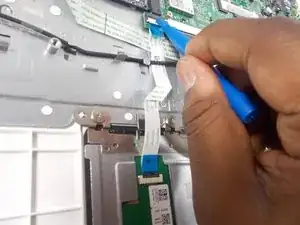
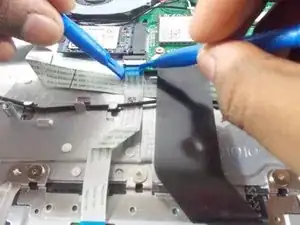
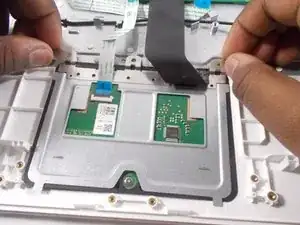
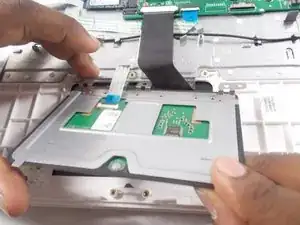
    • Remove the track pad connector from the motherboard.

    • The track pad connector is the white "plug" located at the bottom right corner of the motherboard with a blue and silver ribbon attached to it.

    • Use two of the plastic opening tools to grab either side of the track pad connector and carefully pull it out from the motherboard.

  10. 2VZAZBrcxwIOABXD
    2VZAZBrcxwIOABXD
    OV25DnNkdBcPLFoq
    ZNMo6FUNxoTdtJcw
    • Grab the track pad from its corners and carefully pull it up and out of the device.

Conclusion

To reassemble your device, follow these instructions in reverse order.

Sakiynah Howard

Member since: 17/10/17

1000 Reputation

0 comments