Introduction
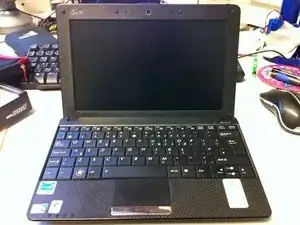
It is fairly easy to replace the hard drive and requires very little technical expertise.
There are no security bits inside the case so a standard cross head screwdriver is all that is required.
Additionally it would be useful to have a small flat head screwdriver, and a plastic card about the size of a credit card to separate the case.
Some care must be taken when unclipping cables to ensure that the circuit boards are not damaged.
Tools
Parts
-
-
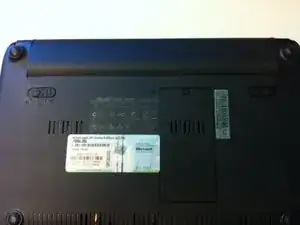
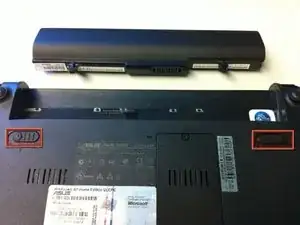
First turn the netbook upside down and slide the battery catches to release and remove the battery from the netbook
-
-
-
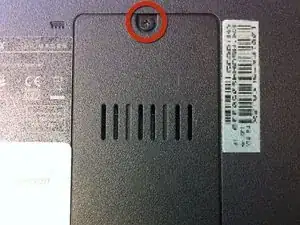
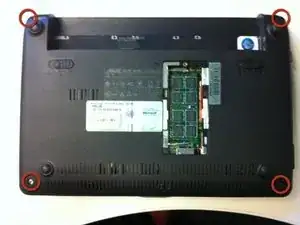
Locate the memory compartment and undo the screw. Note: It cannot be removed from the compartment door.
-
Prise the door away from the netbook from the screw end. There are clips along the side that hold it in place. Once loose, put the door to one side.
-
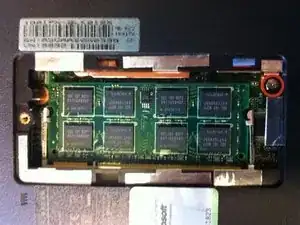
(Image rotated) Undo the screw and remove from the bottom right of the memory compartment. Note: It is not necessary to remove the memory when replacing the Hard Drive.
-
-
-
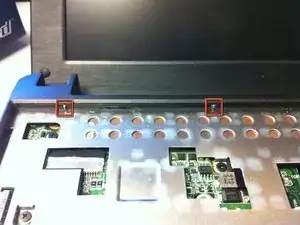
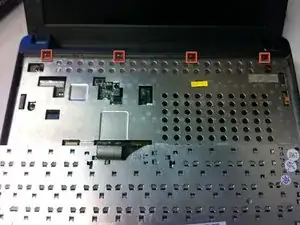
Turn the netbook back over. To remove the keyboard there are four metal tabs that need to be pushed back. I found a small flat head screwdriver useful for this. Be careful not to scratch the keyboard or case. You can also manipulate these clips from the underside of the netbook, at the back where the battery is.
-
I found it useful to begin with the two central clips. The natural spring of the metal prevented the clips from returning back.
-
The keyboard should pivot from the front of the case. It is attached with a ribbon cable to the main board. The next step covers releasing the keyboard.
-
-
-
There are two clips that hold the ribbon cable in place. To release them push them forwards towards the keyboard. The ribbon should then slide out without resistance.
-
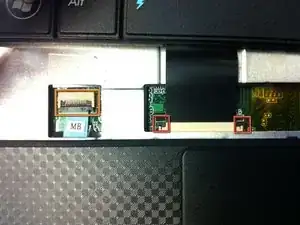
At this point you should disconnect the touchpad. The cable is on the left (highlighted orange).
-
To disconnect the touchpad raise the black bar. There is a clear tab with the label MB stuck on it. Use this to pull the cable from the board. Once again there should be no resistance.
-
-
-
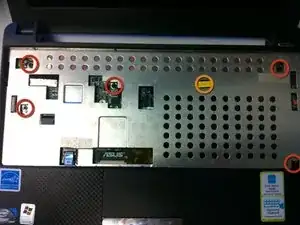
Six screws must now be removed in order to separate the case. The one highlighted in orange is under a warranty label. This is where your warranty will be voided.
-
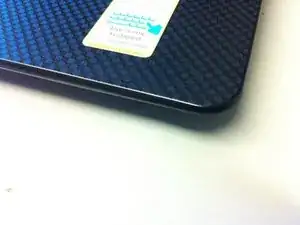
Once the screws are removed pry the case apart. I found it useful to begin at the rear and work my way around using a plastic card so as not to damage the case. The clips underneath the touchpad are the hardest to unclip.
-
-
-
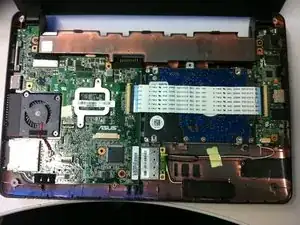
Lift away the case to reveal the main board(s). The hard drive is clearly visible to the right.
-
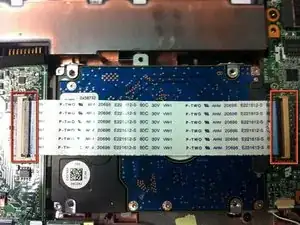
There is a cable running over the hard drive that connects the two main boards together. Like the touchpad this is removed by lifting the two black retainers and sliding the cable out.
-
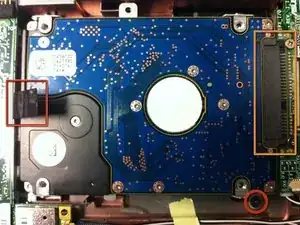
Remove the remaining screw from the bottom right of the hard drive caddy.
-
Raise the hard drive gently using the black tab to the left and slide left to release it from the connector to the right. The hard drive can then be removed.
-
-
-
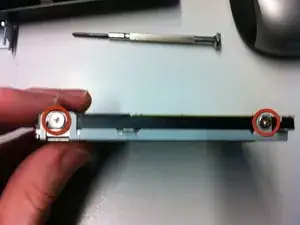
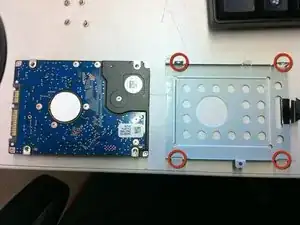
Before removing the screws from the drive caddy make a note as to which way the drive fits into the caddy. This way when you fit the replacement drive you'll know which way around the drive goes.
-
There are four screws, one at each corner. Remove these screws and separate the drive from the caddy.
-
The drive can now be replaced. To re-assemble, follow the instructions in reverse. The case and keyboard should clip in quite easily.
-
Finally, remember to reattach the touchpad and keyboard when re-assembling!
-
To reassemble your device, follow these instructions in reverse order.
12 comments
Great chance to use your store loyalty cards so you don't mung up a credit card or your case while pulling the keyboard.
**
Lifting the pivoting latch for the touchpad cable was sort of unintuitive since I'd never seen one before. If this is your first time with one of these connectors, read it twice or thrice to be sure you've got it. Keep yourself from trying to refit the little bugger. . . Like me.
**
One more stupid mistake I made was leaving a kink in the touchpad cable. Had to pull the KB again to tuck it down. Didn't hurt anything, just left an unsightly bulge in the keyboard.
**
Excellent guide, THANKS!
mrhootie -
Upon completion, The unit will not display. WHAT could I have done wrong?
Great !!! You saved my life.. well, actually the life of my best friend whose PC's HDD died yesterday...
The most difficult part was with removing the cables fixed with two black retainers... I have been pulling on those like crazy... Fortunately nothing broken and the PC is now booting (Useful also: find a good paper on how to install windows from a usb key! )
vletroye -
Remove the screw close to the silver block.
phfva -
Sorry, was descibed in step 2 ;-(
phfva -
I broke the connector on the ribon that goes over the HDD. Please, do not try to open it, the PC is now in the garbish abd I have to buy a new one. Fortunately, I resaled the SSD to one of my coleague so I didnt lost to much.
I do understand why you say it is "EASY". In fact you have 80% of chance to destroy the machine. It is not made to be upgradable.
oborgeaud -
These are called FFC connectors and you already encountered them in step 5. FFC connectors have a locking mechanism (known as a flip lock) and must be opened before removing the cable. It is unfortunate that yours broke -- the tiny flip locks can be somewhat fragile especially when not opened. If you still have access to the unit then it is worth knowing that such connectors can be repaired using glue like cyanoacrylate fairly reliably.
I don't agree that the unit is not made to be upgradeable because in all honesty it is a tinkerer's dream. Mine has ram upgrade, touch screen, keyboard upgrade, 9h battery upgrade, massive SSD and 4 operating systems installed!
Dave Driesen -