Introduction
Parts
-
-
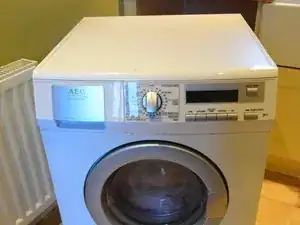
Starting point: The washing machine pulled out of its cave, unplugged and disconnected from water and electricity.
-
-
-
The washing machine may be full of water if the valve is faulty and therefore left slightly open.
-
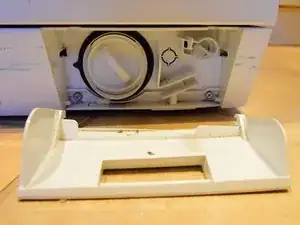
There is a panel on the bottom right of the front of the washing machine. This contains the filters and emergency outlets. Open it forwards, and remove it.
-
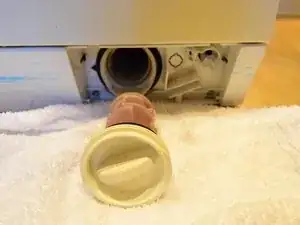
Do _not_ unscrew the large valve to the left unless you are sure the machine is empty. You may be rewarded with several gallons of water pouring out. Instead, pull out the emergency outlet hose located to the top right, put it in a bucket, and pull out the tab controlling the water flow. Empty the bucket as necessary until all the water is gone.
-
Once all the water has been emptied, you can open the large valve, and catch the rest of the water in a towel.
-
-
-
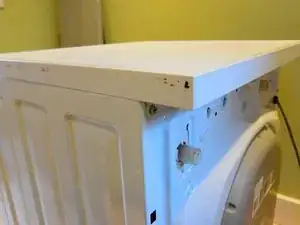
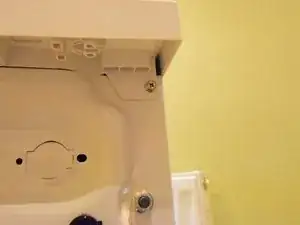
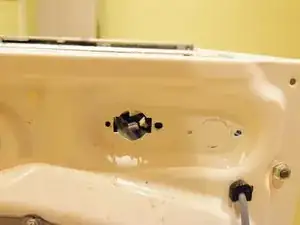
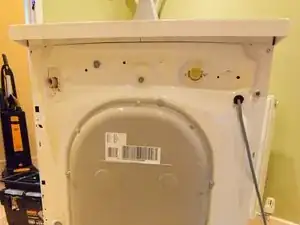
The top lid is held in place with two screws at the back as indicated. Remove these, and lift the lid off
-
-
-
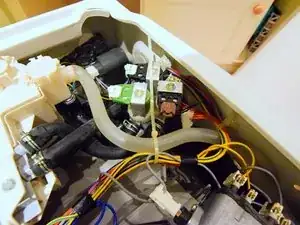
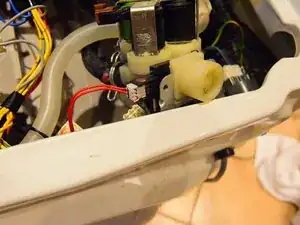
The valve is located at the rear of the washing machine, near the water inlet point to the washing machine. In fact, it is part of it.
-
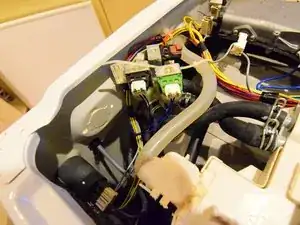
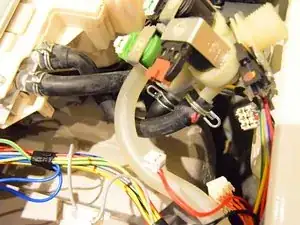
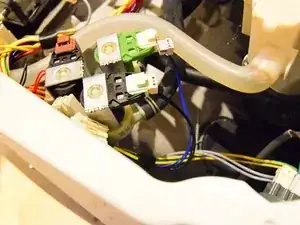
The valve has several hoses connected to it, and electrical connectors as well. Take pictures from all angles to capture which connectors and which hoses go where.
-
-
-
Disconnect all wires
-
Remove all the hoses connected to the valve
-
Remove the two screws that hold it on the rear panel
-
Lift the valve out
-
-
-
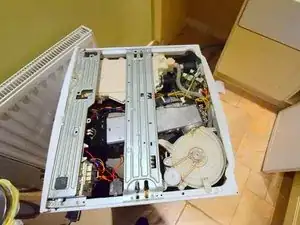
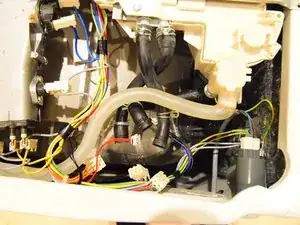
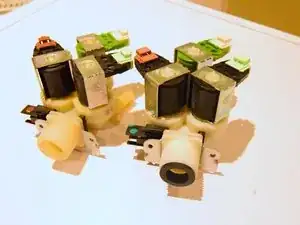
Two pictures showing the washing machine without the valve, and the valve placed alongside the replacement unit
-
-
-
Do all the earlier steps in reverse:
-
Attach hoses
-
Attach connectors (you *did* photograph them thoroughly, didn't you??)
-
Attach the valve to the rear panel
-
Reassemble the emergency valves and filters at the front
-
Attach the top lid with the two screws
-
-
-
Connect the inlet pipe
-
Connect the outlet pipe
-
Connect the electricity supply
-
Run a small program to test it works
-
-
-
Our washing machine is as good as new.
-
There is no flooding.
-
Bonus: The conditioner dispenser hadn't worked properly for ages. It now does! :-)
-

To reassemble your device, follow these instructions in reverse order.