Introduction

This guide will show you in detail how to remove the AARP RealPad. In order to remove the back cover you will need to know how to use a screwdriver and a suction cup.

  1. GTfWcY6dr6oZJvU5
    GTfWcY6dr6oZJvU5
    EQWGeSQEJOK3YPI5
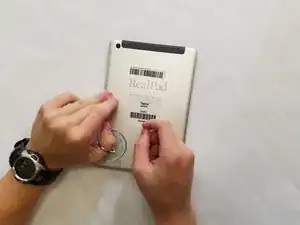
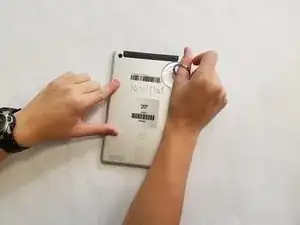
    • Loosen the back cover using the suction cup.

    • Pull up on the center of the back with the suction cup.

    • Pull up on all four corners of the back with the suction cup.

  2. nWIMdEXBxiaQNnCR
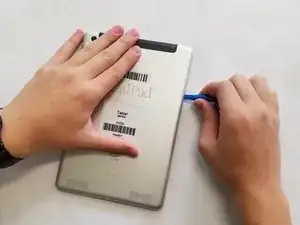
    • Remove the back cover by gently placing the small opening tool in the crevice created by loosening the back.

    • Slide the opening tool around the edges of the device.

    • Wedge it open using the opening tool.

    • Use the suction cup again if you're having trouble removing the back cover.

  3. YXMtumN5PYGOab3Y
    YXMtumN5PYGOab3Y
    dwjBYNIIsVI3FqO1
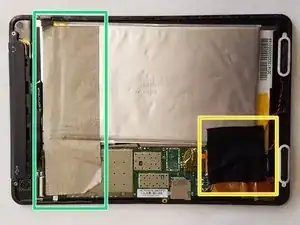
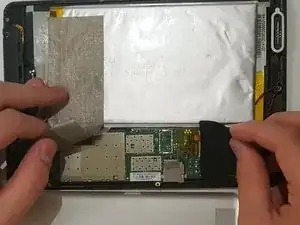
    • The black tape is stuck to delicate wires; remove with caution.

    • Peel off the silver tape.

    • Gently pull off the black tape.

  4. lIWvywqUYvMmNb5x
    lIWvywqUYvMmNb5x
    XIS3yq5OSswYS3HX
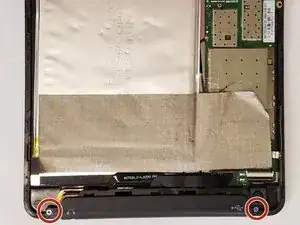
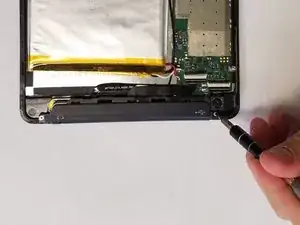
    • Using a JIS #000 screwdriver, remove the two 2.5 mm screws.

  5. dAPvko5IFGFhHCiR
    dAPvko5IFGFhHCiR
    JnSNnTQHALNk5rvS
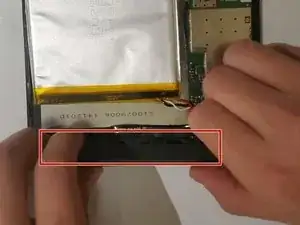
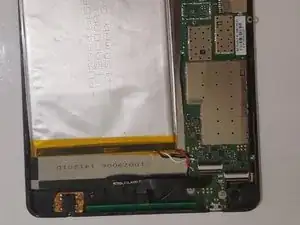
    • Lift off the black audio cover.

    I added a blue box around the audio cover and relabeled your instruction to be a blue dot instead of a black dot.

    I also recommend retaking step 5's first photo with your hands out of the picture so that the person can see the whole black audio cover.

    matthew jones -

Conclusion

To reassemble your device, follow these instructions in reverse order.
Alana Escue

Member since: 18/09/18

425 Reputation

0 comments